

Razer Synapse 2.0 will continue to operate on existing PCs but cloud-related features will no longer be supported effective October 28, 2025.
Note:
- You can still log in with your Razer ID to access local profiles.
- Existing settings, such as Profiles and Macros created before the sunset date, will remain stored locally.
- You can manually export settings to another PC using Razer Synapse 2.0.
- Cloud syncing of new settings to other PCs will no longer be supported.
To ensure a smooth transition, log in with your Razer ID and export any Profiles or Macros you want to keep.
Tips to help you get started
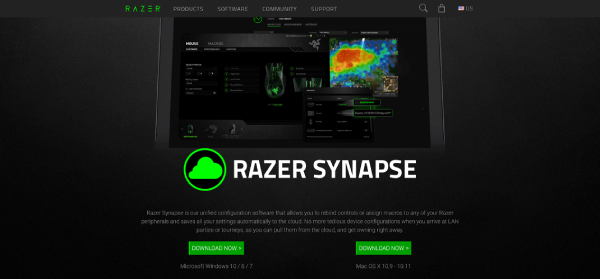
Razer Synapse is our unified configuration software that allows you to rebind controls or assign macros to any of your Razer peripherals and saves all your settings automatically to the cloud. No more tedious device configurations when you arrive at LAN parties or tourneys, as you can pull them from the cloud, and get owning right away.

Full Technical Specifications
| Category | Specification |
|---|---|
| Variation | Razer Synapse 2.0 |
| Version |
|
| Supported Operating System |
|
| Supported Languages |
*English only for Mac |
| Supported Devices |
Razer Synapse 2.0 will continue to operate on existing PCs but cloud-related features will no longer be supported effective October 28, 2025.
Note:
- You can still log in with your Razer ID to access local profiles.
- Existing settings, such as Profiles and Macros created before the sunset date, will remain stored locally.
- You can manually export settings to another PC using Razer Synapse 2.0.
- Cloud syncing of new settings to other PCs will no longer be supported.
To ensure a smooth transition, log in with your Razer ID and export any Profiles or Macros you want to keep.
Configuration
How do I install Razer Synapse 2.0?
Installing Razer Synapse 2.0 allows you to rebind controls or assign macros to any of your Razer peripherals and saves all your settings automatically to the cloud.
-
Visit the Razer Synapse 2.0 download page and download the appropriate installer (Windows OS or Mac OS).
-
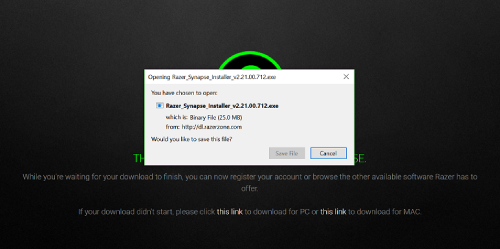
Save and download the installer.
- Once the download has completed, install the application. To do this, follow the steps below.
- Run the Razer Synapse 2.0 installer.
-
Once the InstallShield Wizard window is displayed, click "Next" to continue.

-
Review and accept the terms in license agreement then click "Next".

-
Click "Install" to initialize the installation process.

-
Wait for the installation process to complete. Once done, click "Next".

-
Click "Finish".

-
After completing the installation, log in to your Razer ID account.

-
Once logged in, Razer Synapse will automatically detect any available Razer device on the computer and update accordingly.

Congratulations! You have successfully installed Razer Synapse 2.0.
How do I create a custom profile for a specific software?
- Open Razer Synapse.
- Select your keyboard from the DASHBOARD.
- Open the “Profile” dropdown menu.
- Click the three dots icon beside APPLICATION PROFILES.
- Click the three dots (...) next to "Add Profile" and choose "add empty profile" or "add default profile".
Note: If the application is missing from the profile menu, choose “Add Application”, select application from the dropdown menu, and pick a name for the profile that will appear after pressing “ok”. - Click "Ok".
- Select an application from the drop-down menu or search from a folder.
- Create a name for your new profile.
- Add a description, if desired.
- Click ”Ok.”
How do I manually check for updates on Razer Synapse 2.0?
Razer Synapse will automatically provide a prompt when a new update is available. In the event that you missed or decided to skip the automatic prompt when it popped up, you can always check for available updates by following the steps outlined below:
-
Open Razer Synapse 2.0.
-
Click on the "cog" icon found in the upper-right corner of the screen.

-
Click on "CHECK FOR UPDATES".

-
Click "UPDATE NOW" to update to the latest version of Razer Synapse 2.0.

-
The update should start automatically.
-
Once completed, you should have the latest version of Razer Synapse.
How do I use the Surface Calibration feature in Razer Synapse 2.0?
Surface calibration is supported by Razer Synapse 2.0 on the following Razer devices:
- Razer Mamba
- Razer DeathAdder
- Razer Lancehead
- Razer Lancehead Tournament Edition
- Razer Abyssus V2
- Razer Naga Hex V2
-
Ensure your mouse features surface calibration.
-
Open Razer Synapse 2.0.
-
Select the mouse you want to calibrate.
-
Click "CALIBRATION".

- Select a mat.
-
Razer mat:
-
"RAZER MATS" > "Select A Mat".

-
Select the mouse mat.
-
Click "SAVE".
-

-
Non-Razer mat:
-
Select "OTHERS" and click "Add Mat".

-
Click on "Calibrate" then follow the on-screen instructions.

-
Click "SAVE".
-
-
How do I register my Razer product on Razer Synapse 2.0?
Aside from keeping track of the warranty status of your product, registering your product will help Razer to get in touch with you especially when there is an issue with your Razer product.
To register a new Razer Product using Razer Synapse 2.0, follow the steps below:
- Click the dropdown arrow on the right side of your e-mail address located on the top-right of the Razer Synapse window and select "Warranty Status".

- This will open your browser and redirect you to https://razerid.razer.com/ if your Razer ID is not logged in on your browser. Sign in using your Razer ID.

If you are already logged in, it will redirect you to https://razerid.razer.com/products, and you may proceed to step 4.
- Once logged in, click on the “PRODUCTS” tab.

- Click on “REGISTER A NEW PRODUCT” and follow the step-by-step process of registering your Razer product.

How do I create a Razer Synapse account?
-
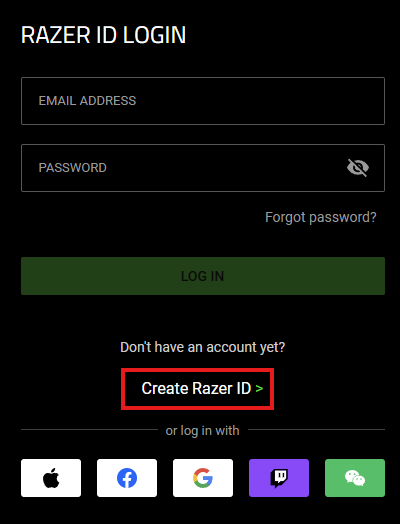
Go to the Razer ID page and click “Create Razer ID”.
-
Input your preferred Razer ID or your gamer name and other details:
- Location
- Birthday
- Email address
- Password
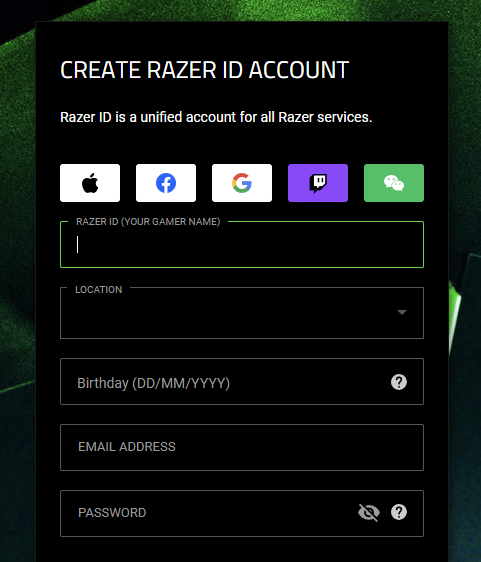
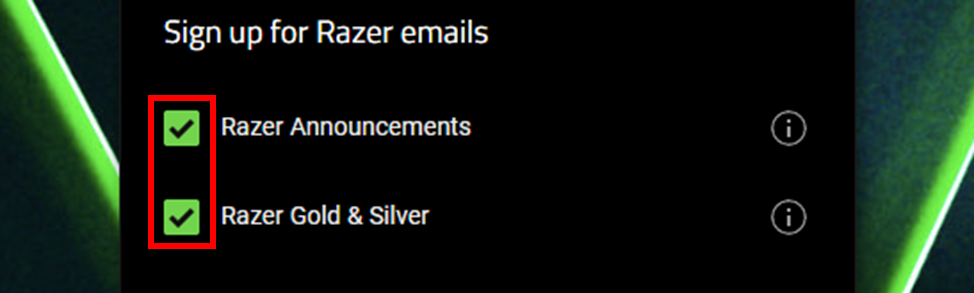
You will be given the option to sign up for Razer emails by clicking the corresponding checkboxes.
-
Click "ACCEPT AND CREATE" after reading the terms and conditions, and fulfilling the captcha.

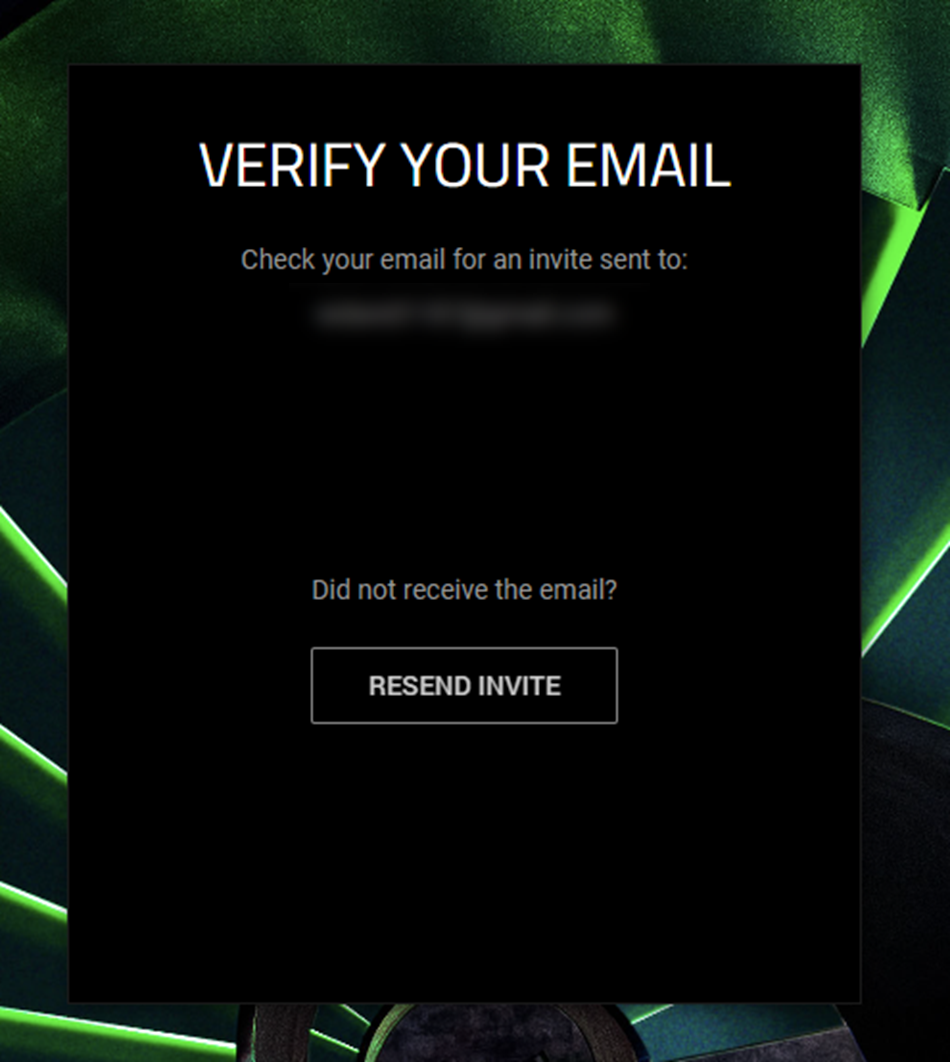
A verification email will be sent to the email address you specified.
-
Log in to your email account and verify your Razer ID by clicking “VERIFY”.
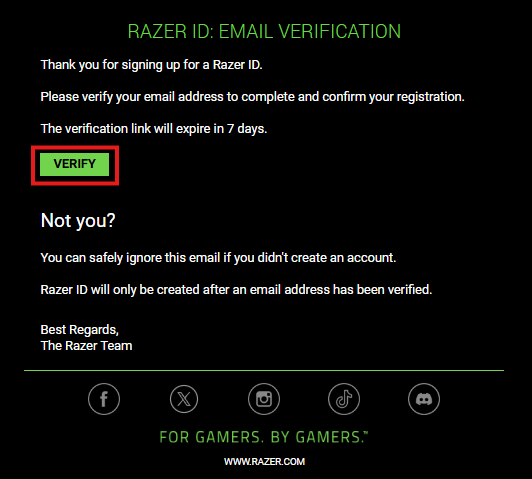
You can now use your email and password to log in to Razer Synapse.
How do I delete or de-activate a Razer Synapse account?
- Log in to your Razer ID.
- Click "Delete Account" under the "ACCOUNT" tab.
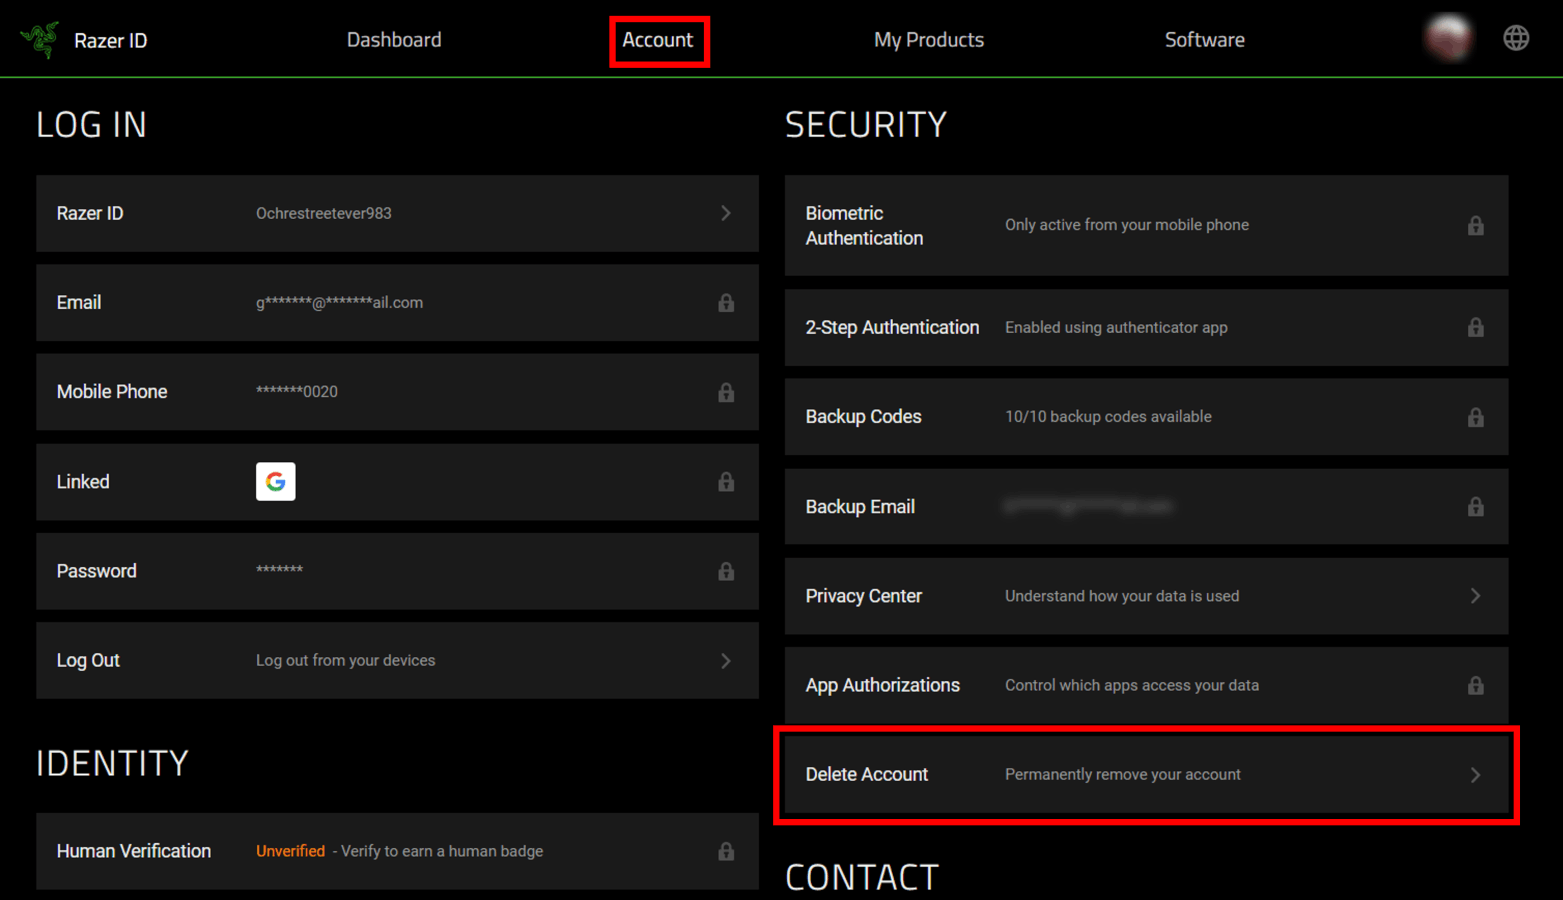
- Click the "DELETE ACCOUNT" button.
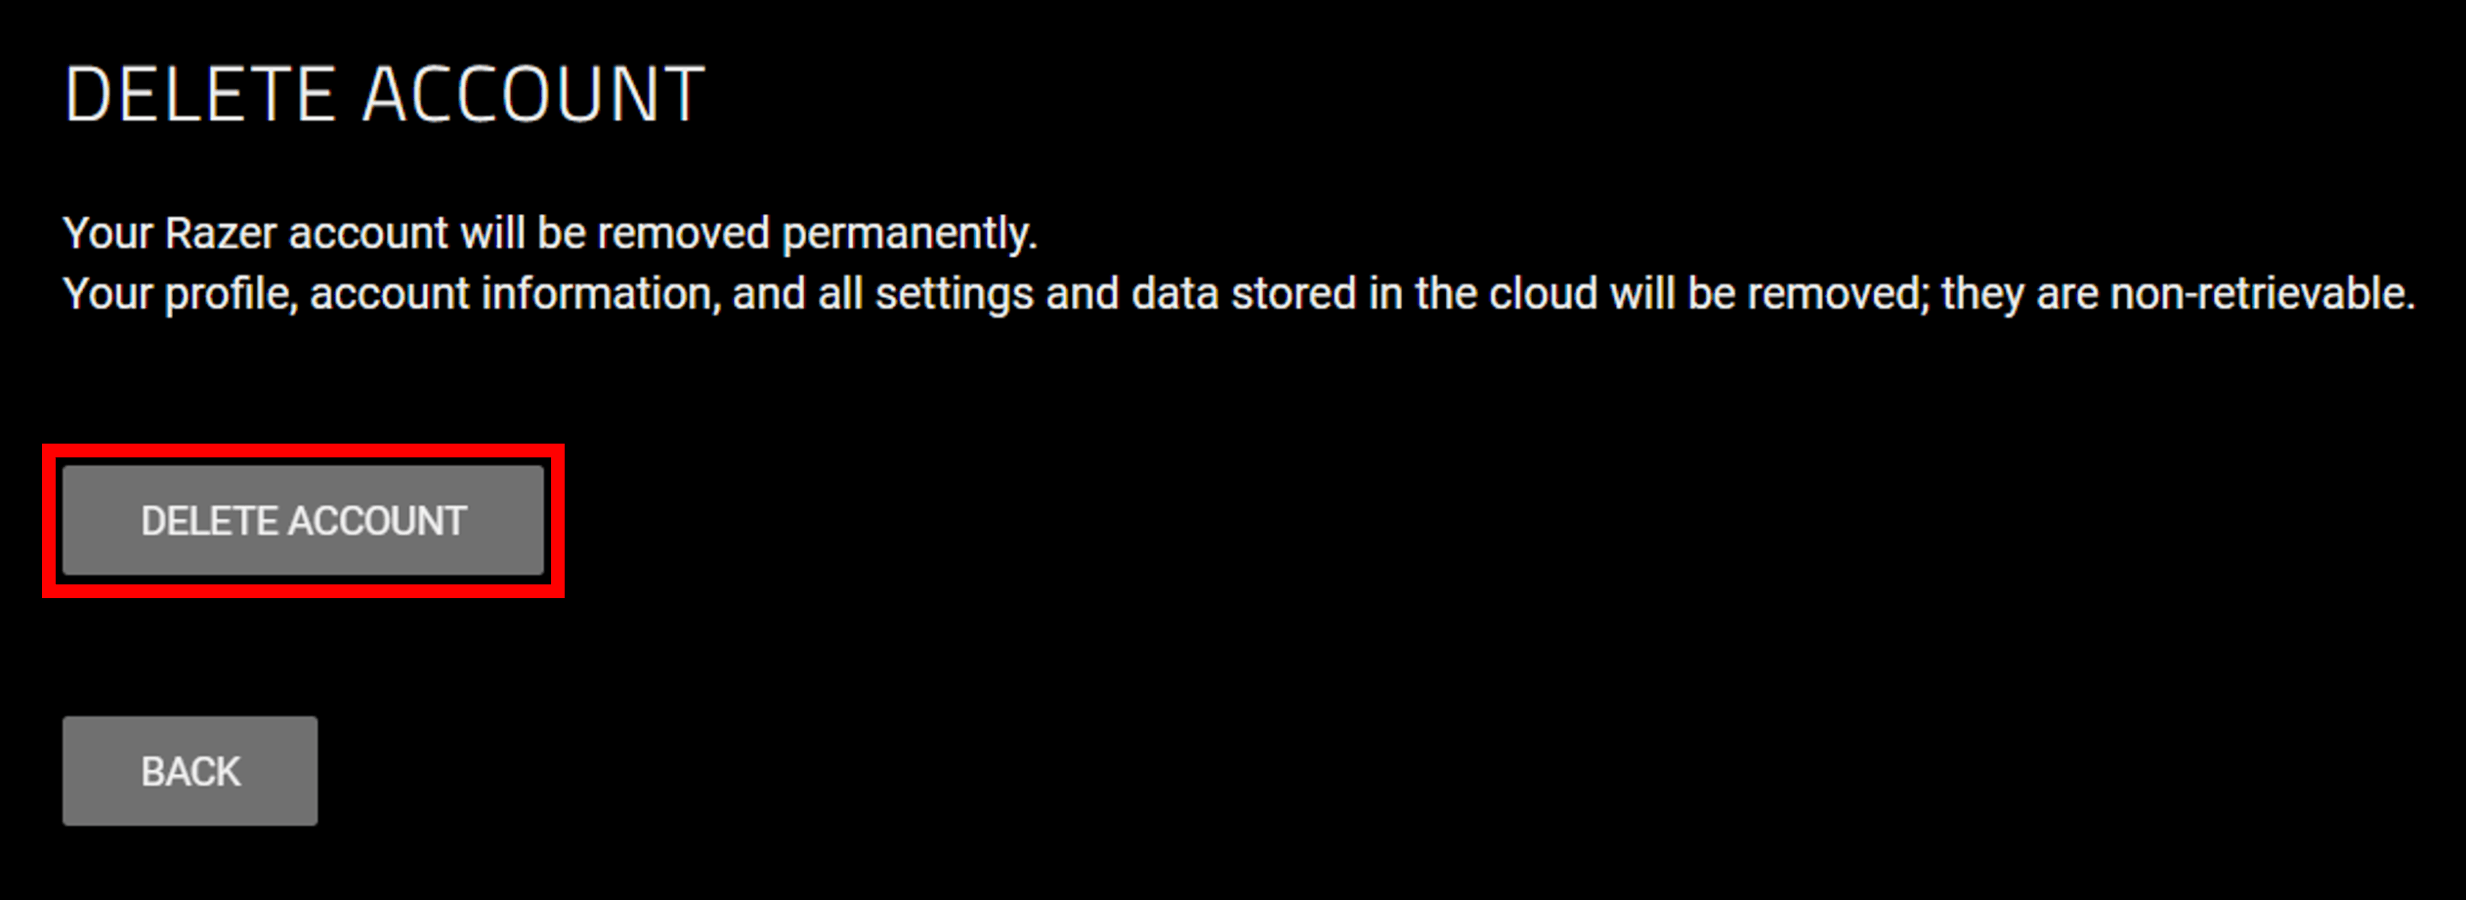
Important: Your Razer Account will be permanently deleted. All your profile, account information, and all settings and data stored in the cloud will be removed and can no longer be recovered.
-
Check the inbox of your verified email address linked to your Razer ID for the 6-digit code to confirm your deletion process for the 2-step authentication.
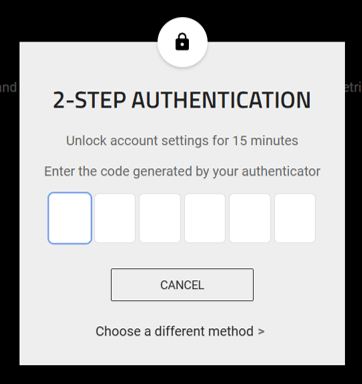
If you are unable to delete your account successfully, contact Razer Support for assistance.
How do I collect Razer Synapse 2.0 logs from a PC?
Razer Synapse logs are helpful information you need when doing troubleshooting for any issues you may experience with the software.
Note: To collect Razer Synapse 4 logs, see How to gather Razer Synapse logs.
Razer Synapse Logs
-
Simultaneously press "Windows key" and "R" to display Run box.
-
Type in "C:\ProgramData\Razer\Synapse" or copy and paste, and press enter.
- Zip the "Logs" folder. To do this, follow these steps:
-
Right-click on the "Logs" folder.
-
Select "Send to".
-
Click "Compressed (zipped) folder".
-
MSINFO
-
Simultaneously press "Windows key" and "R" to display Run box.
-
Type in "C:\Windows\System32\MSInfo32.exe" or do copy and paste, and press enter.
-
Export the information as a text file. To do this, follow these steps:
-
Select the "File" tab located at the upper-left corner of the window.
-
Click "Export" then type in the file name of your choice and choose the location where you want the file to be saved.
-
Click "Save"
-
Zip SetupAPI logs
-
Simultaneously press "Windows key" and "R" to display Run box.
-
Type in the following paths below or copy and paste, and press enter.
-
C:\Windows\inf\setupapi.app.log
-
C:\Windows\inf\setupapi.dev.log
-
Dump
-
Simultaneously press "Windows key" and "R" to display Run box.
-
Type in the following paths below or copy and paste, and press enter.
Note: The files below will become available only if crash dump is enabled.
-
%SystemRoot%\MEMORY.DMP
-
%systemroot%\Minidump\*.dmp
-
For installation issues (Optional)
MSI Logs
-
Visit this page and see how to enable MSI logging.
-
Once MSI logging is enabled, run the installation and confirm if the error is still seen.
-
Collect the following logs:
Note: The files below will become available only if MSI logging is enabled.
-
%temp%\ SynapseUninstall.log file
-
%temp%\ MSIxxx.LOG
-
How do I collect Razer Synapse 2.0 logs from a Mac?
Razer Synapse logs are helpful information you need when doing troubleshooting for any issues you may experience with the software.
See the step-by-step instructions below on How to gather Razer Synapse 2.0 logs from a Mac
How to get Mac logs for OS 10.12 and below (Lower Version)
-
Click on the Apple logo at the upper left-most side.
-
From the list, select "About This Mac".
-
Click on the "More Info" button.
-
Another window will pop-up.Click on the "System Report" button.
-
Save the file after the complete system info window appears
How to get Mac Logs for High Sierra OS 10.13 and above
-
Click on the Apple logo at the upper left-most side.
-
Click on the "System Report" button.
-
Save the file after the complete system info window appears
-
Compress the file and send the info.
How to get Console Log
-
Go to Applications/Utilities, look for the Console application and then launch it.
-
On the Console application UI, look for the FILES group, then select "system.log".
-
Save a copy of this file and compress it.
How do I prevent startup and crashing issues with Razer Synapse 2.0?
Important:
-
Check your firewall or antivirus software configuration to ensure it is not blocking the app.
-
Ensure your system specifications have met the requirements.
See the step-by-step instructions below on how to fix Razer Synapse 2.0 when it crashes or fails to start.
-
Run Razer Synapse 2.0 as administrator.

-
Revert the color profile to system default by pressing the Windows key > Color Management > Advanced.
-
Select “System default (sRGB IEC61966-2.1)” as the Device profile.

-
If the issue persists, perform a clean reinstall.
Macro
How do I create macros on Razer Synapse 2.0?
-
Plug your Razer Synapse 2.0-enabled product into your computer.
-
Open Razer Synapse 2.0.
-
Click on "MACROS".

-
Click on "+" to add a new macro profile.

Note: By default, macro profiles will be named Macro 1, Macro 2, and so on. Rename your macro for easier identification.
- Click on the macro to rename.
- Press enter.

-
Click "RECORD" to start adding input sequences.

-
Click "STOP" to end recording input sequences.

Your macro will automatically be saved. You can then assign it to any Razer Synapse 2.0-enabled Razer Product.
How do I assign macros on Razer Synapse 2.0-enabled Razer products?
A "macro" is an automated set of instructions (that is, multiple keystrokes or mouse clicks) that can be executed using a simple action such as a single keystroke. To utilize macros within Razer Synapse 2.0, you must first create the macro within Razer Synapse 2.0. Once a macro is named and created, you can then assign the macro to any of your Razer Synapse 2.0-enabled products.
To assign macros in Razer Synapse 2.0:
-
Plug your Razer Synapse 2.0-enabled product into your computer.
-
Open Razer Synapse 2.0.
-
Select the device you wish to assign a macro from the “DASHBOARD”. In this example, Razer Blade Keyboard is used.
-
Click on the key you wish to assign the macro to.

-
Select a macro from the "ASSIGN MACRO" dropdown list box.

-
Select a playback option from the "PLAYBACK OPTION" dropdown list box.


-
Once you are satisfied with your settings, click “SAVE”.

Chroma Studio
How do I add Chroma lighting effects on Razer Synapse 2.0?
There are various Chroma lighting effects that you can add on a Razer device, like Breathing, Fire, Reactive, Spectrum Cycling, Starlight, Static, Wave, and Ripple. To do so, follow the steps below.
Note: Some Razer devices do not have all the default Chroma lighting effects. Refer to the technical specs to determine which Chroma effects are supported.
-
Open Razer Synapse 2.0.
-
Select the device you want to add Chroma lighting.

-
Click the “LIGHTING” tab.
-
Under “SELECT PROFILE”, create a new profile by clicking the plus button.

-
You can also edit an existing profile by clicking the drop-down menu under “SELECT PROFILE” and selecting the profile you wish to edit.

-
Click the dropdown menu under “EFFECT” and select the Chroma effect of your choice. After selecting a Chroma effect, it will instantly reflect on the Razer Device. All changes will be automatically saved.

How do I change the Chroma lighting effect of a Razer Synapse 2.0-enabled mouse mat?
-
Open Razer Synapse 2.0.
-
Click on your mouse mat.

-
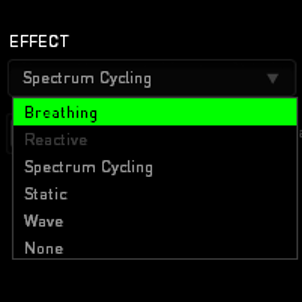
Click the EFFECT drop-down list.
-
Select your desired effect.
-
Select the colors you want to apply.


Changes apply right after the selection.
How do I change the light settings of a Razer Synapse 2.0-enabled mouse mat?
The light setting of Razer mat on Razer Synapse is different from settings in the Chroma Effects. Chroma Effects focus on the lighting effects and colors to be applied on your mat, while the lighting settings focus on brightness and trigger to switch off the lighting.
-
Open Razer Synapse 2.0.
-
Click on the mouse mat.

-
Use the “BRIGHTNESS” slider to adjust the brightness of your Chroma lighting.

-
Click on the “Switch off all lighting when display turned off” checkbox to allow your device to turn off its lighting when the computer’s display is off.

How do I enable or disable the in-game Razer Chroma Lighting for my game?
Custom Chroma lighting effects will start once you launch the game or application. See the answer below for a step-by-step guide on how to enable or disable Razer Chroma Workshop on Razer Synapse.
-
Open Razer Synapse 2.0.
-
Select any of your Chroma-enabled products.
-
Select the “CHROMA APPS” tab at the top of the bar.
-
Select “ON” or “OFF” to enable or disable the Chroma Applications.

How do I export and import profiles in Razer Synapse 2.0?
Exporting a Profile
-
Right-click the Razer Synapse 2.0 icon in the system tray.
-
Click on "Open Razer Synapse".

-
Under "System", click the ellipsis icon then click "Export".

-
Select all applicable profiles that need to be backed up and click "Export".

-
Navigate to the location where you wish to save the profile, set an appropriate file name for the backup then click on "Save".

Importing a Profile
-
Right-click the Razer Synapse 2.0 icon in the system tray.
-
Click on "Open Razer Synapse".
-
Under "System", click the ellipsis icon then click "Import".

-
Click the folder icon under "Browse".

-
Navigate to the location where the profile you want to import is saved and click "Open".

-
Click "Import".

How do I install or import one of the Razer Custom Chroma Profiles?
Razer Synapse 2.0 allows you to create your own lighting effects and profiles. You can also download pre-made lighting effects made by other users.
Note: Razer Synapse 2.0 and Razer Synapse 3 profiles are not compatible with each other.
To install or import a custom Chroma profile, follow the instructions below:
-
Go to the Chroma Workshop Profiles.
-
Download your desired profile.
-
Open Razer Synapse 2.0.
-
Select the Razer Chroma supported product.
-
Cllick on the "LIGHTING" tab.

-
Go to "CHROMA CONFIGURATOR".

-
Click on the "burger" icon at the bottom and select "IMPORT".

-
Browse to the profile you downloaded. It should have the file extension "razerchroma" (ex. xxxxx.razerchroma).

-
Click "APPLY" to save the changes.


