
You can view the video below for instructions or review a copy of the video transcript.
Before pairing your Gamer Room devices to the App and to Razer Synapse 4, ensure the following:
-
You installed Razer Gamer Room App from App Store or Google Play Store.
-
Your Wi-Fi supports 2.4 GHz bandwidth.
-
Your PC and mobile phone are connected to the same Wi-Fi network and have Bluetooth enabled.
Gamer Room App
-
Plug in your Gamer Room device and set it to pairing mode.
Note: For more information on how to set your Gamer Room device to pairing mode, refer to the manual guide.
-
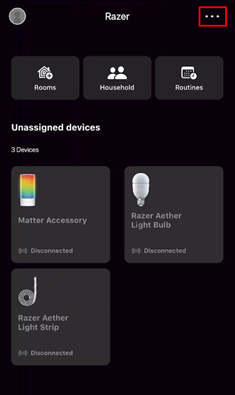
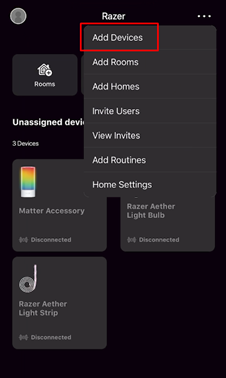
Open the Razer Gamer Room App from your mobile device and tap on the menu icon.
-
Tap on “Add Devices”.
-
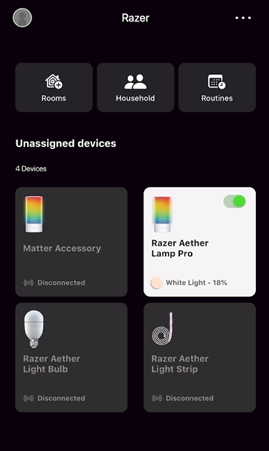
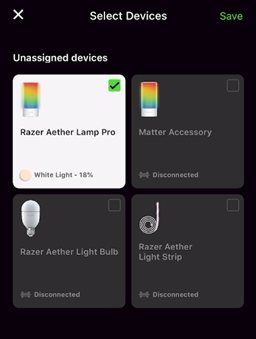
You can either “Scan a Matter QR code” or tap on your device to pair it directly without scanning the Matter QR code.

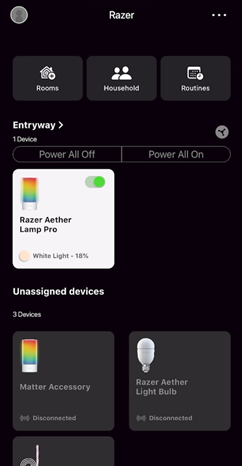
Once you are done pairing, the Gamer Room device will appear on the dashboard of the Gamer Room App.
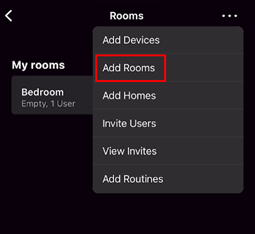
To assign your Gamer room devices:
-
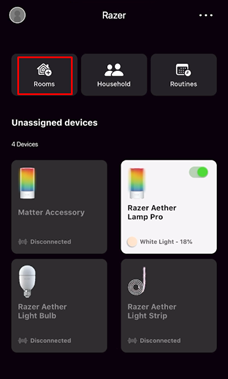
Tap on “Rooms”.
-
Tap on “Add Rooms”.

-
Add devices you have paired with the app to your Rooms.
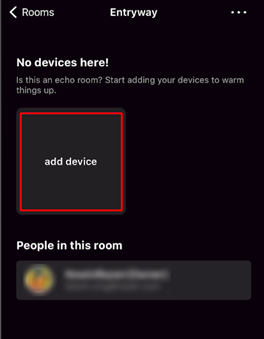
Once done, you can see the device on your Razer Gamer Room App dashboard.
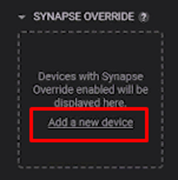
Razer Synapse 4
-
Launch Razer Synapse 4 on your PC.
-
Click on “GAMER ROOM” at the top menu.

-
Click on “Add a new device”.
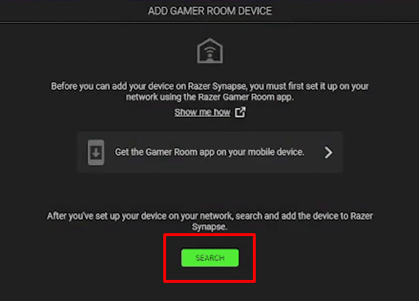
-
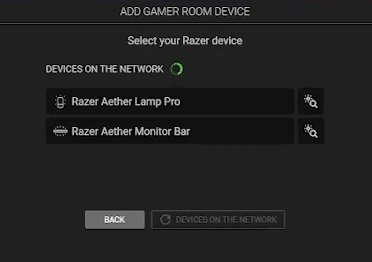
Click “SEARCH” on the pop-up window and choose Gamer room device once it appears.
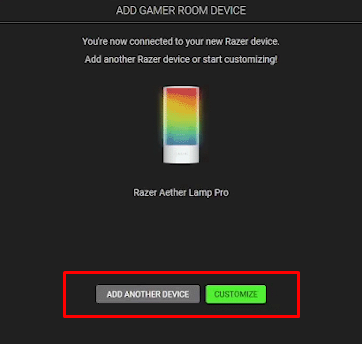
After pairing, you can either add another device or start customizing the lighting for your Gamer Room device.
If you want to control the device via the Gamer Room App, simply click on the device and turn off “SYNAPSE OVERRIDE" or go to your Gamer Room App and tap on “TAKE CONTROL”.


