
Applicable models:
Properly disassemble your Razer Iskur V2 X to prevent damage while being stored or transported.
Tools needed:
-
Rubber mallet
-
Hex key
-
Microfiber cloth
-
Penetrating lubricant
-
Penknife
Step-by-step process on how to disassemble the Razer Iskur V2 X
Important: Put the chair over a smooth work surface to protect it from scratch and any other types of damage during the process.
-
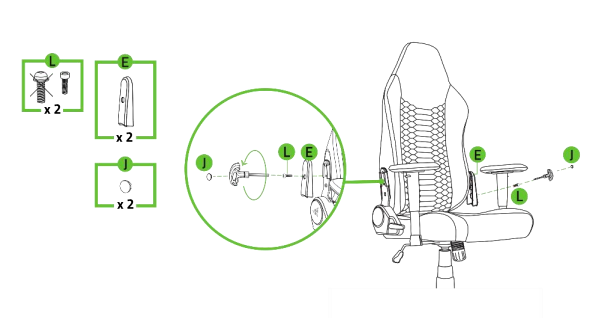
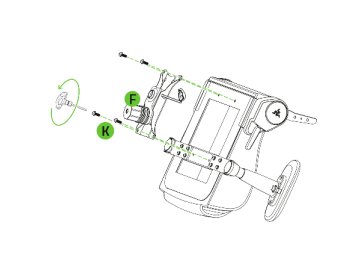
Remove the plastic screw caps “J” using a penknife, unfasten screws “L” and remove the cover “E”.
-
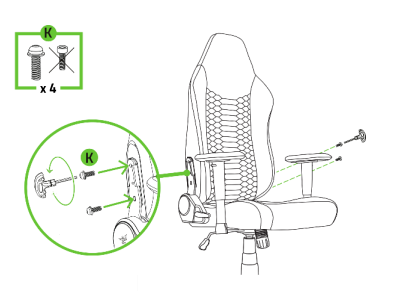
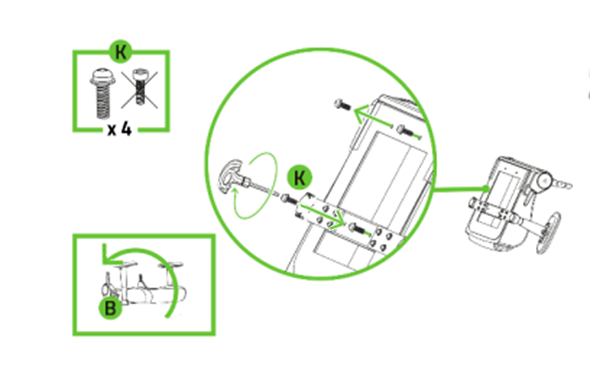
Unfasten the screws “K” using the hex key.
-
Detach the backrest from the seat.
-
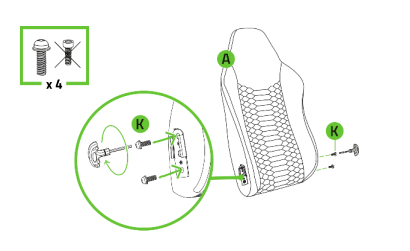
Fasten the screws into the backrest.
-
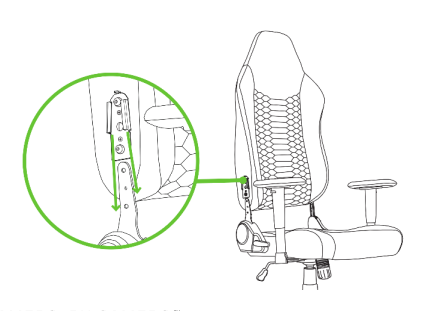
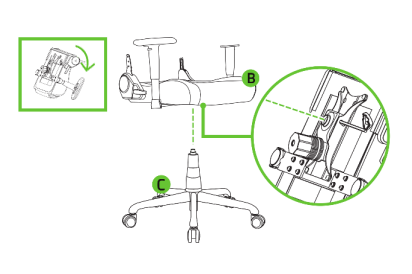
Remove the piston and starbase from the seat.
-
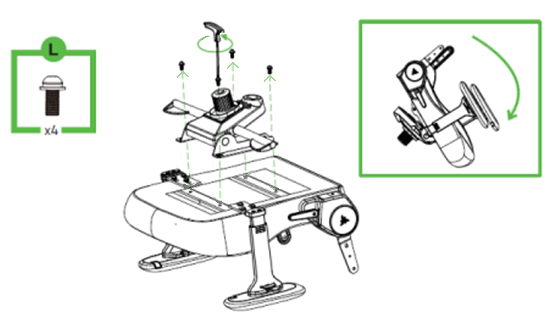
Unfasten screws “K” using the hex key to detach the tilt mechanism.
-
Remove the tilt mechanism from the seat base.
-
Fasten the screws “K” into the seatbase.
-
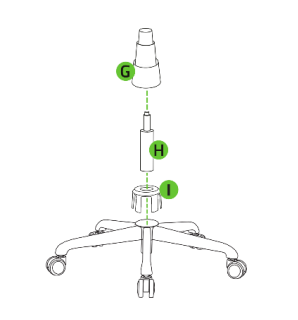
Apply some penetrating lubricant between the gas lift cylinder “H” and the tilt mechanism and leave it for five minutes.
-
Remove the gas lift cylinder “H” from the tilt mechanism by gripping it firmly and hitting the tilt mechanism with the rubber mallet wrapped in a microfiber cloth. Then, separate the cylinder cover “G” from the cylinder “H”.
-
Grab the base “C” then pull out the caster wheels “D”.
Note: Apply some penetrating lubricant between the wheel and wheelbase if the caster wheels are difficult to pull out.
-
Put all the disassembled parts inside the box accordingly.

