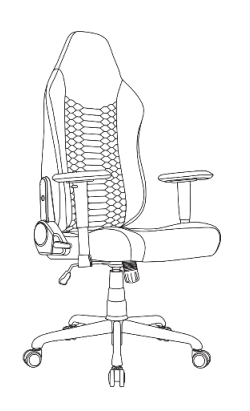
Applicable models:
Properly assemble your Razer Iskur V2 X to prevent unnecessary discomfort, wobbling, or noise that affects your posture and gaming.
You can view the video below for instructions or review a copy of the video transcript.
Tools needed:
-
Rubber mallet
-
Hex key
-
Microfiber cloth
-
Penetrating lubricant
-
Penknife
Step-by-step process on how to assemble the Razer Iskur V2 X
-
Remove all components of the chair from the box.
-
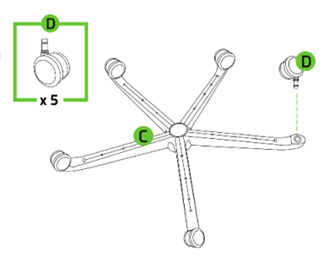
Grab the base “C” and push each caster wheel “D” on the slots of the wheelbase to click in.
-
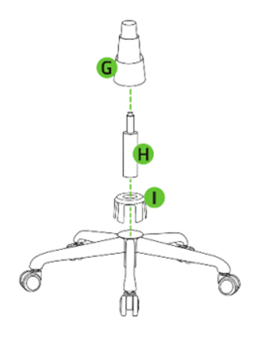
Insert the cylinder “H” on the wheelbase and cover it with the cylinder cover “G”.
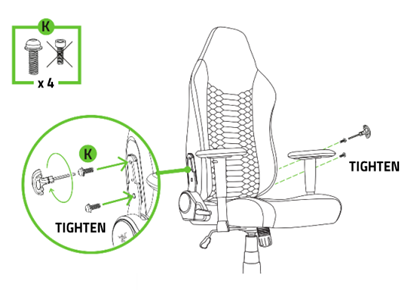
-
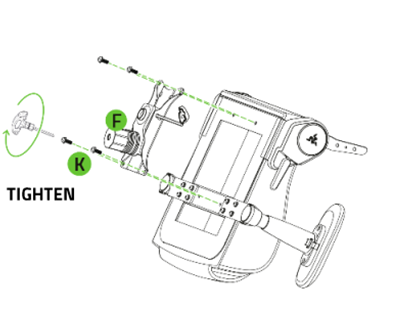
Unfasten the screws “K” using the hex key.

-
Fasten the tilt mechanism “F” into the seatbase using the screws “K”.
-
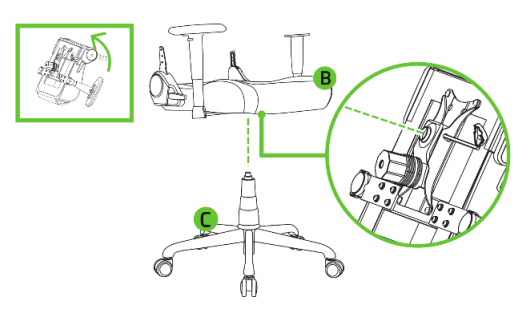
Attach and tighten the wheelbase to the chair.
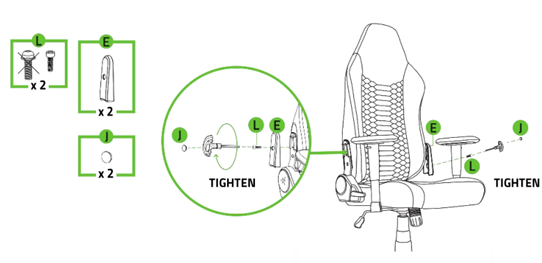
-
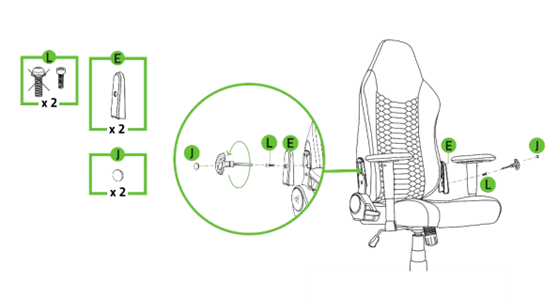
Remove the plastic screw caps “J” using a penknife, unfasten screws “L” and remove the cover “E”.
-
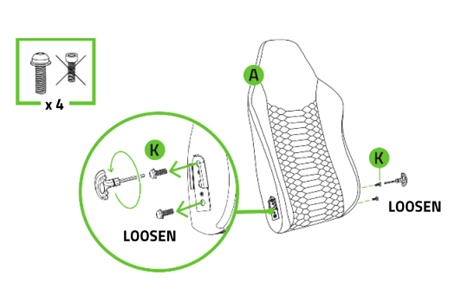
Unfasten the screws “K” from the backrest using the hex key.
-
Attach the backrest to the seat.
-
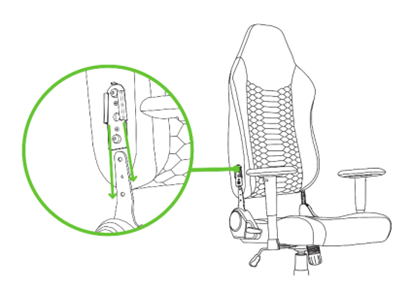
Fasten the screws “K” on the support brackets using the hex key. Repeat for both sides.
-
Cover the screws “K” with cover “E”, fasten with screw “L”, and cover with screw caps “J”.
You have now assembled the Razer Iskur V2 X gaming chair.