
The Razer Sila allows you to connect a USB storage device and access it across your network as a shared drive or a network-attached storage (NAS) device.
Follow the detailed instructions below to enable band steering and beamforming, configure channel bandwidth, and change Quality of Service (QoS) prioritization on your Razer Sila.
Select action
Enable band steering
Via mobile app
-
Tap the Razer Sila icon from the main screen.
-
Disable "Separate Networks" by tapping the toggle switch.
Via web browser
-
Go to sila.razer.com or 192.168.8.1.
Note: Using the URL sila.razer.com offers better security.
-
Enter your admin password to log in.
-
Select "Wireless Configuration" from the left menu.
-
Disable "Use different SSID for 2.4Ghz and 5Ghz" under "Enable Multi-SSID".
-
Click "Apply".
Enable beamforming
Beamforming allows the device to focus its wireless broadcast to a specific direction. When a router is powered on, it broadcasts its wireless signal in all directions, by default, spreading the data to all areas within its range. When beamforming is enabled, the router detects the wireless devices that have beamforming capabilities as well and focuses its broadcast to the direction of these devices, resulting in a fast and more stable connection.
Follow the steps below to enable beamforming:
- Access the web UI of the Razer Sila.
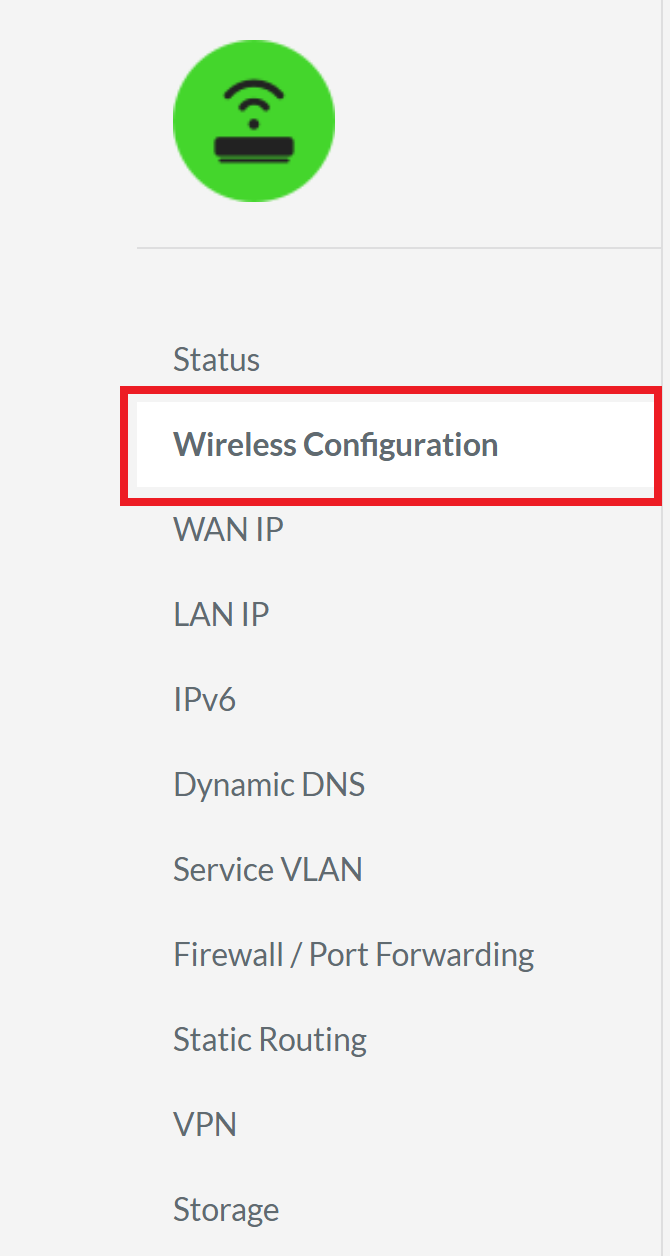
- Click “Wireless Configuration” in the left navigation panel.
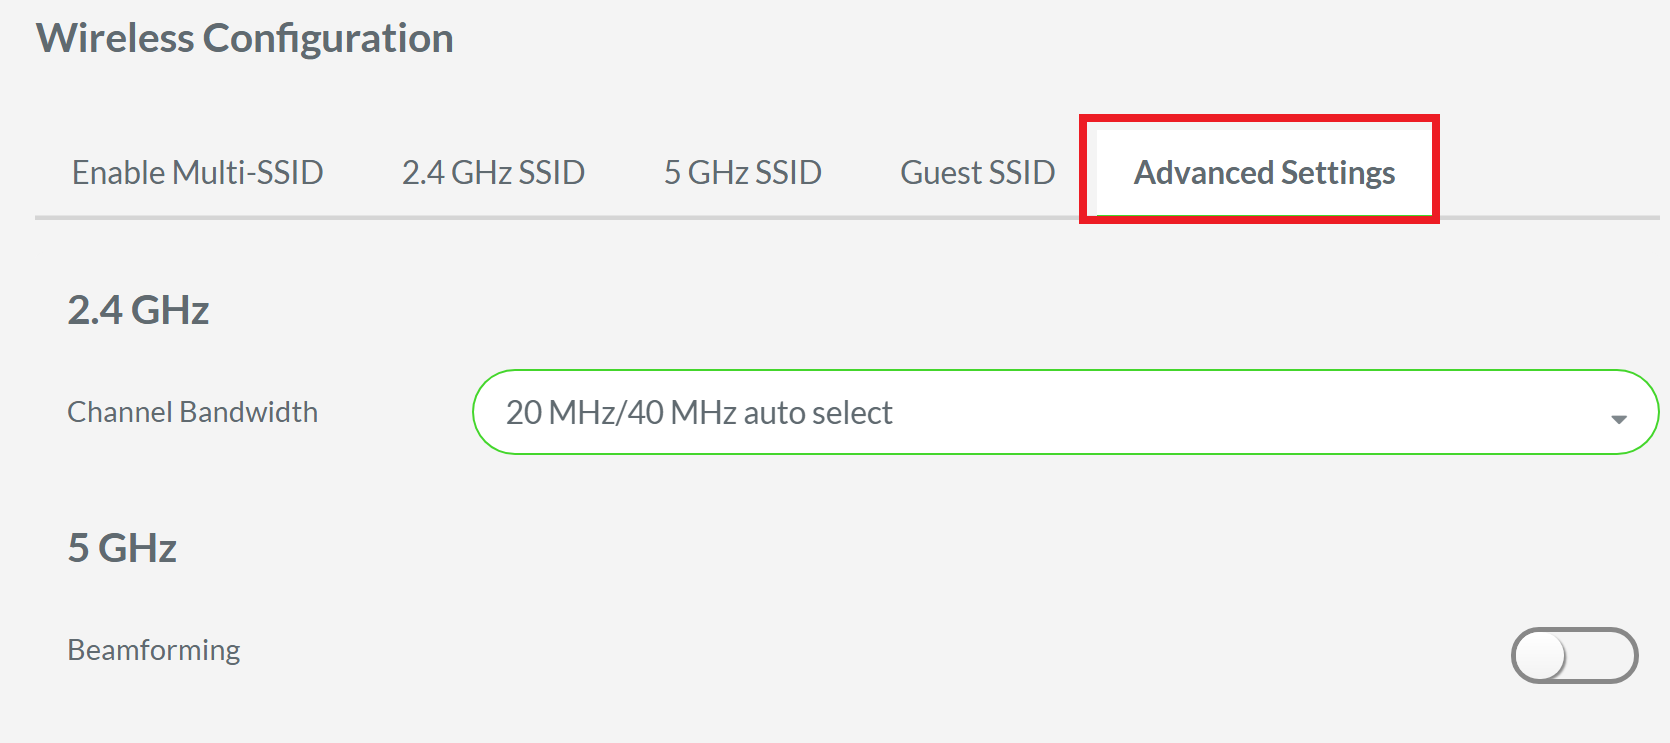
- Click “Advanced Settings”.
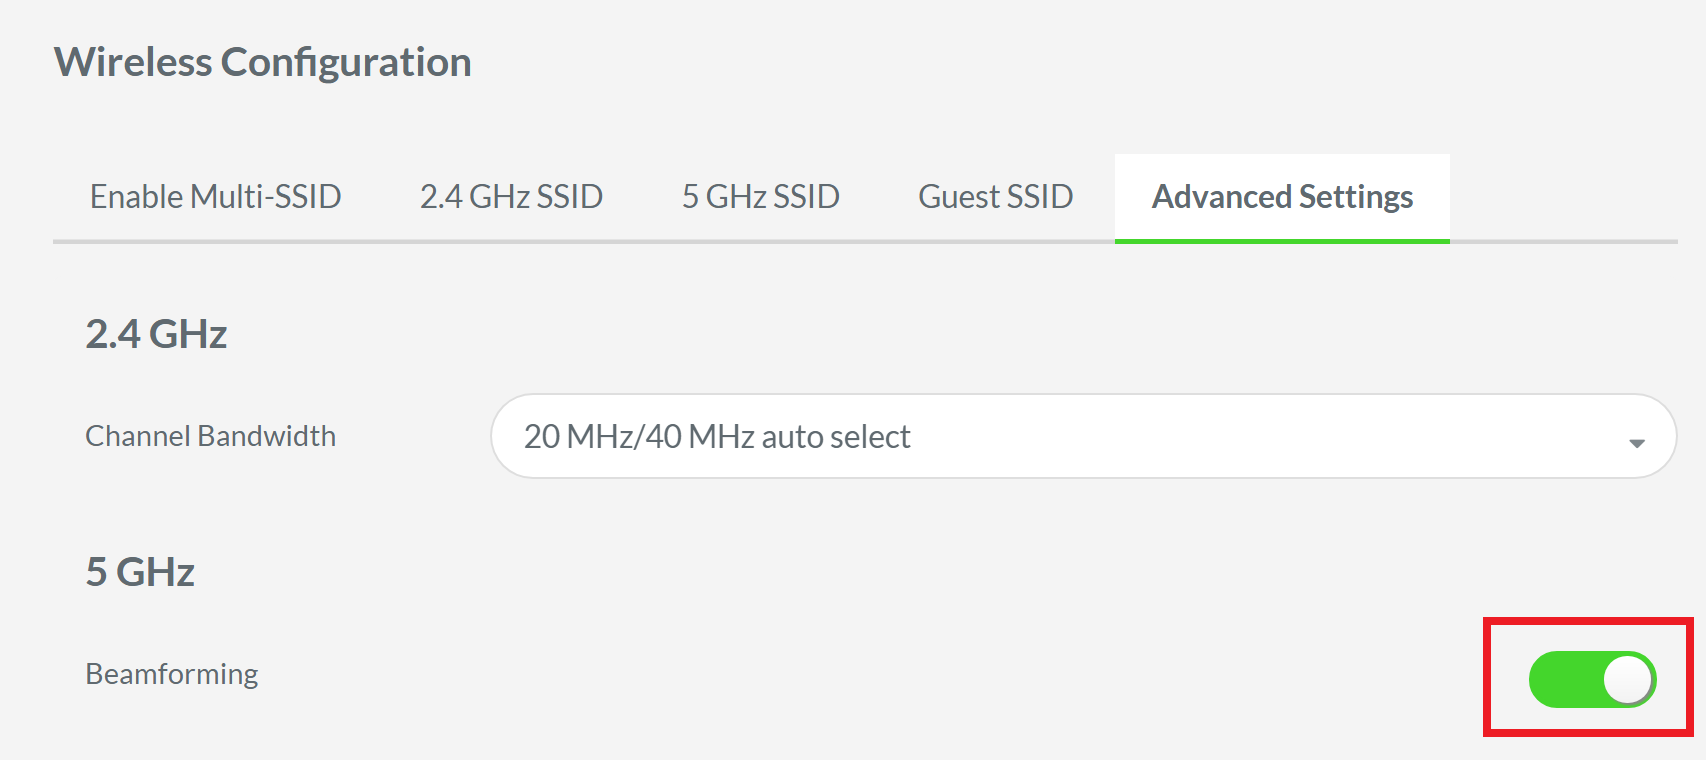
- Tap the “Beamforming” toggle switch under 5 GHz.
- Click “Apply.”
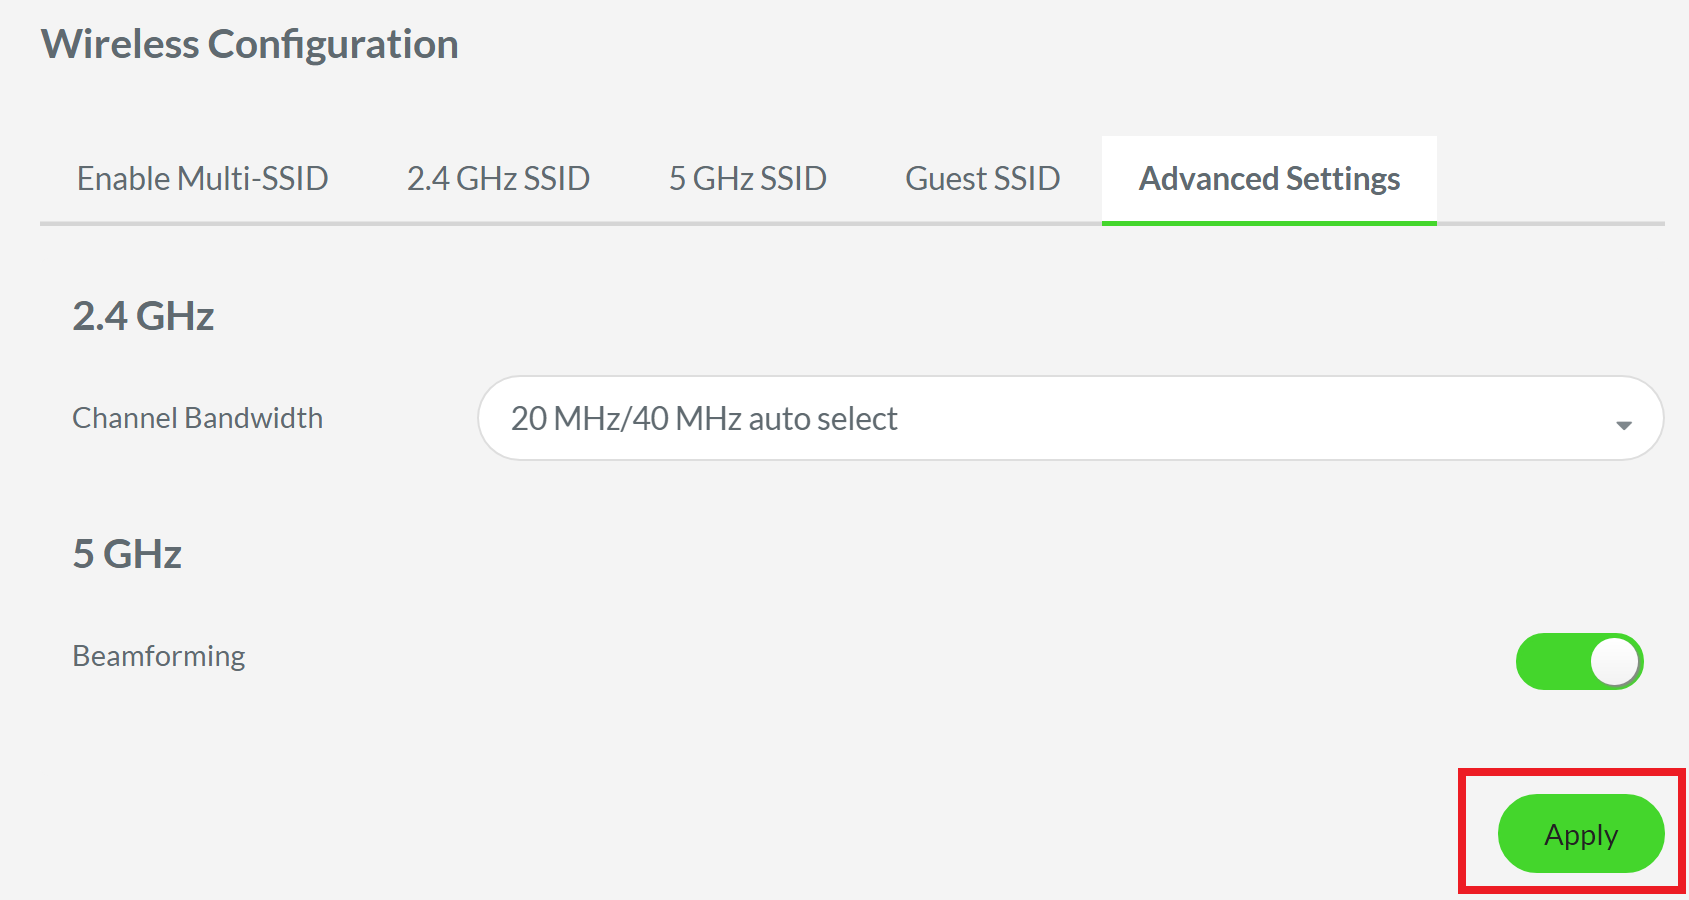
You should now have the beamforming enabled on your Razer Sila.
Configure channel bandwidth
Unlike most routers, the Razer Sila can provide access to unused bandwidth frequencies, avoiding congested networks and traffic interference.
While the Razer Sila is designed to operate as stable as possible, there may be times when you’ll have trouble connecting to your network caused by the configuration of the channel bandwidth on the wireless network.
There are two-channel bandwidths on the Razer Sila that you can set based on the radio broadcast you are using on your wireless network.
- 20 MHz - this channel is recommended if you are using 2.4 GHz radio broadcast to accommodate devices that are using older technology on your network.
- 40 MHz - this channel is recommended if you are using 5 GHz radio broadcast to accommodate newer devices on your network supporting the 802.11n wireless technology.
1. Access the web UI of your Razer Sila and click “Wireless Configuration” from the left navigation panel.

2. Click “Advanced Settings”.
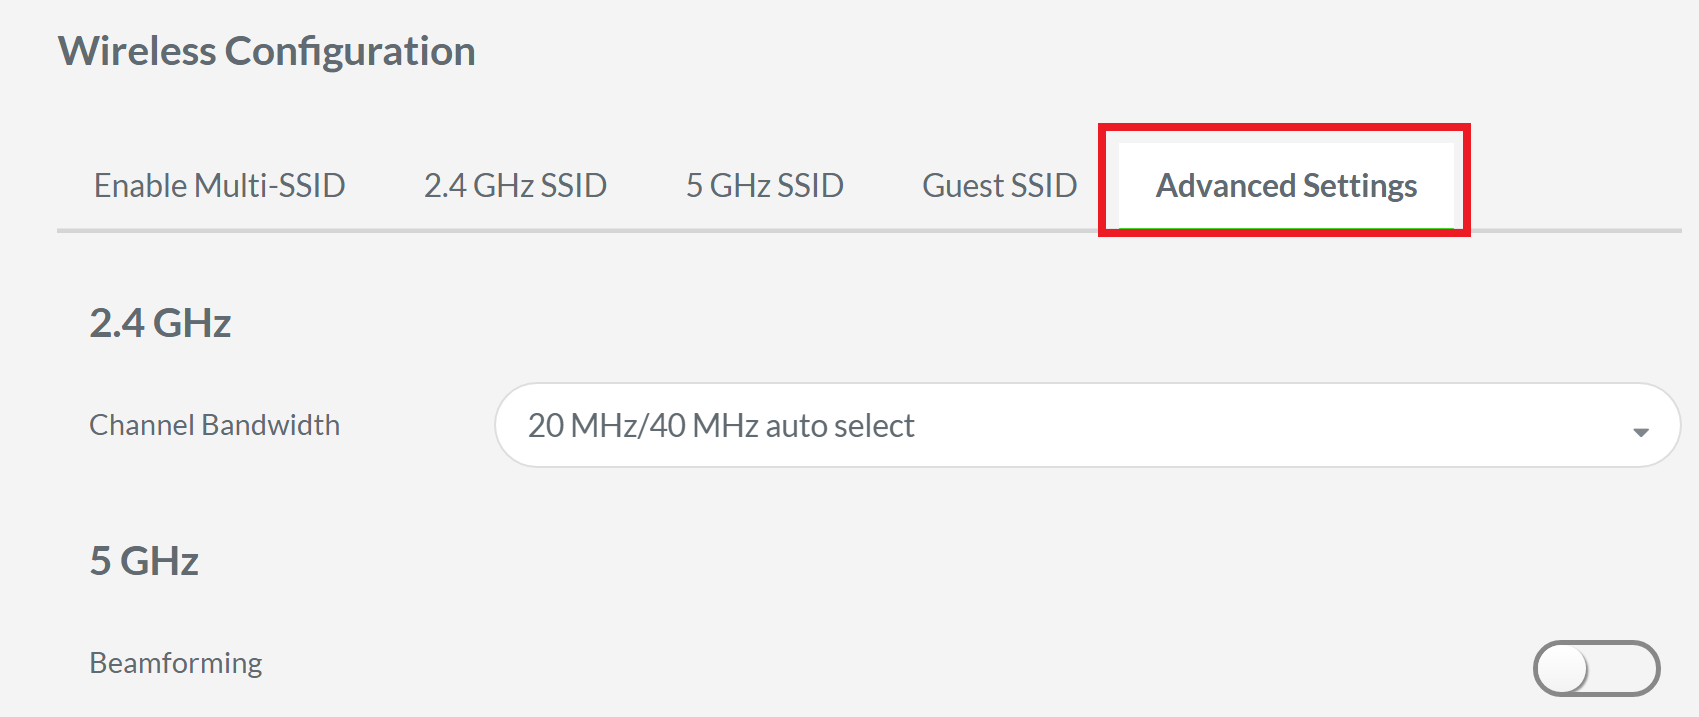
3. Click the drop-down arrow for the channel bandwidth and choose your desired setting based on the devices on your network. In this example, 20 MHz is chosen.

Note: Choosing the “20 MHz/40 MHz” option allows the router to automatically select the channel bandwidth depending on the devices connected to the network that it detects. This is best to choose if you have a combination of old and new devices connected to the Razer Sila. Choosing the “Forced 40 MHz” option forces your router to use the channel even if the radio broadcast used is 2.4 GHz if the connected devices require this method.
4. Click “Apply” to save your settings.
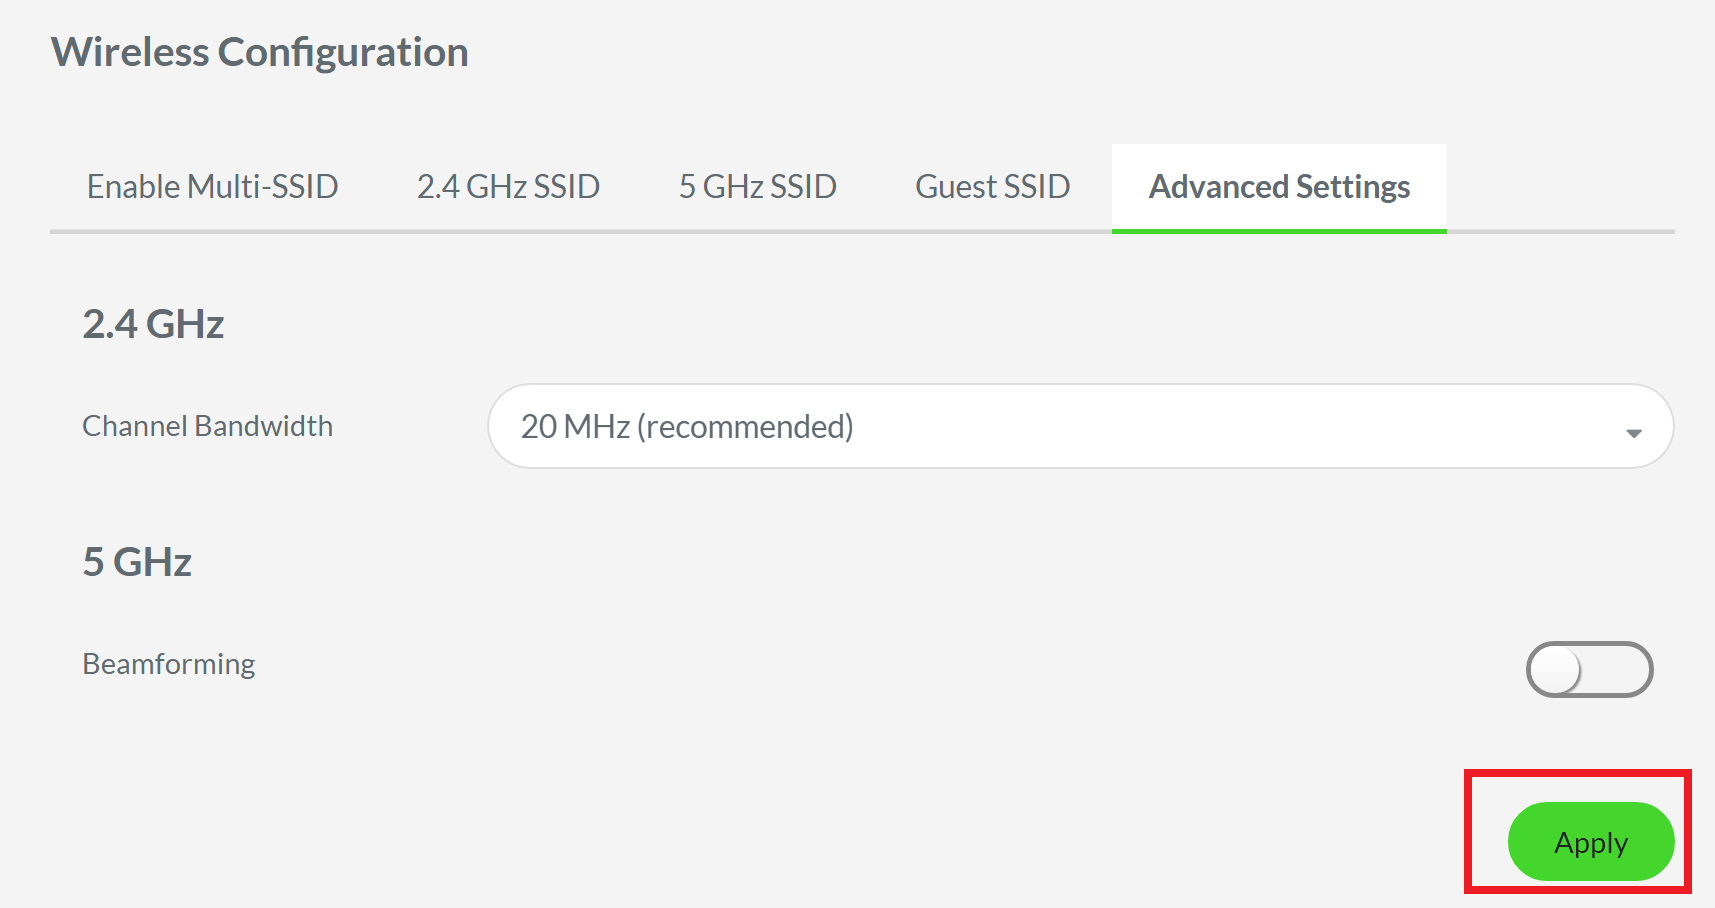
You should now have configured the channel bandwidth on the Razer Sila.
Change Quality of Service (QoS) prioritization
Quality of Service, also known as QoS, is a technology used efficiently in managing data flow to minimize packet loss over the network, thus, reducing lag and intermittent connection. QoS works by setting up priorities for the data traffic of specific applications, online games, LAN ports, or even MAC addresses of specific devices on the network.
QoS is a helpful feature found in the Razer Sila router that allows you to set prioritization for your connected devices. This would mean that the device you specify will be prioritized to send and receive data traffic over the network compared to other devices, resulting in a faster, uninterrupted, and more stable connection.
Step-by-step process:
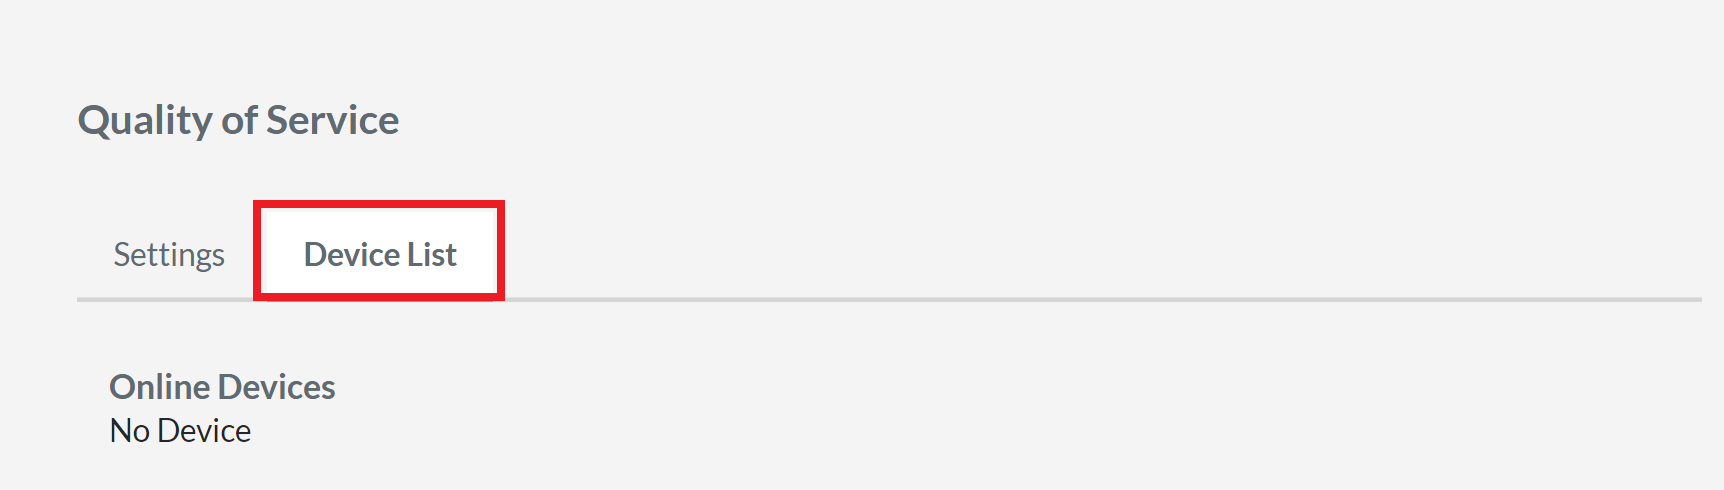
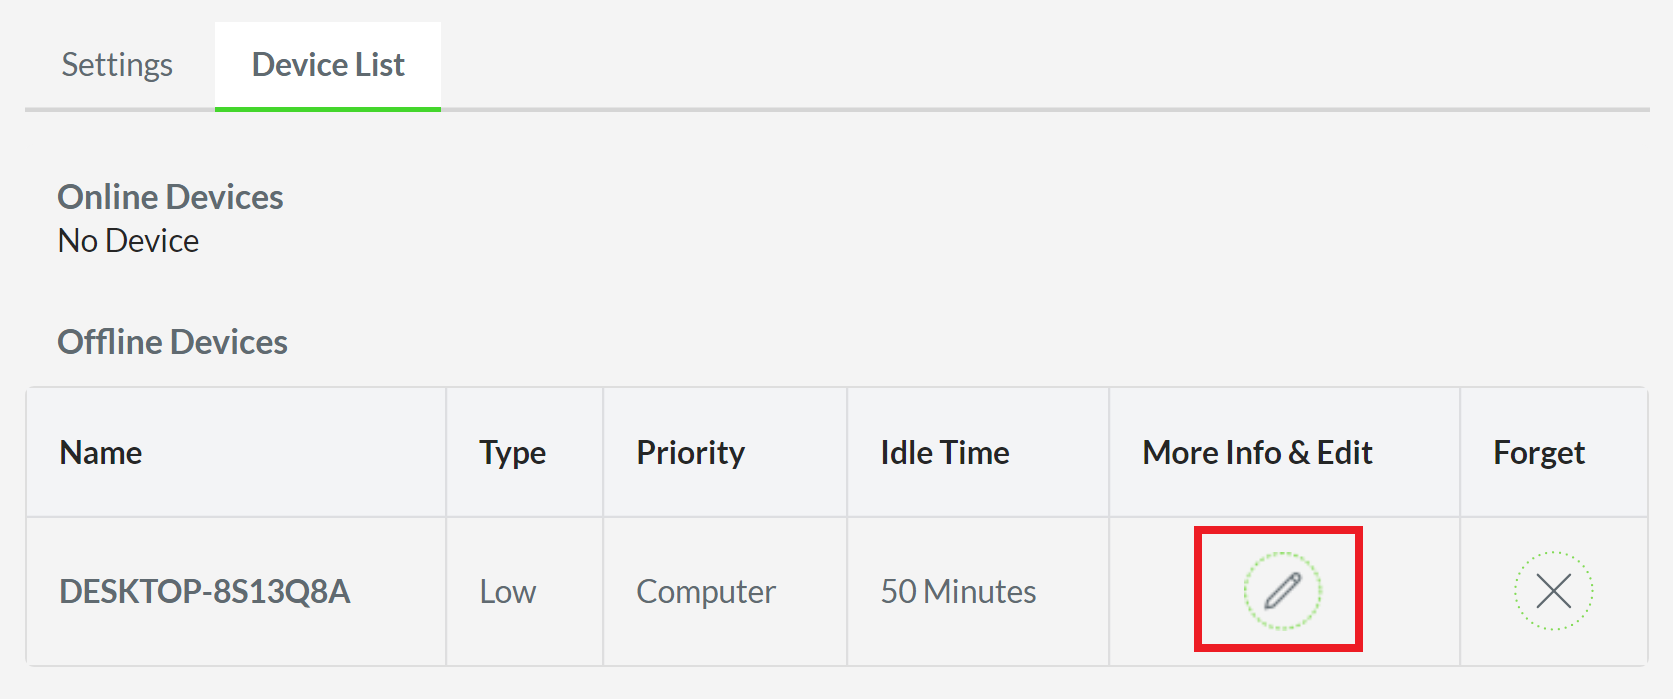
The table that lists down all connected devices will then be displayed. In this example, only one device is connected.
-
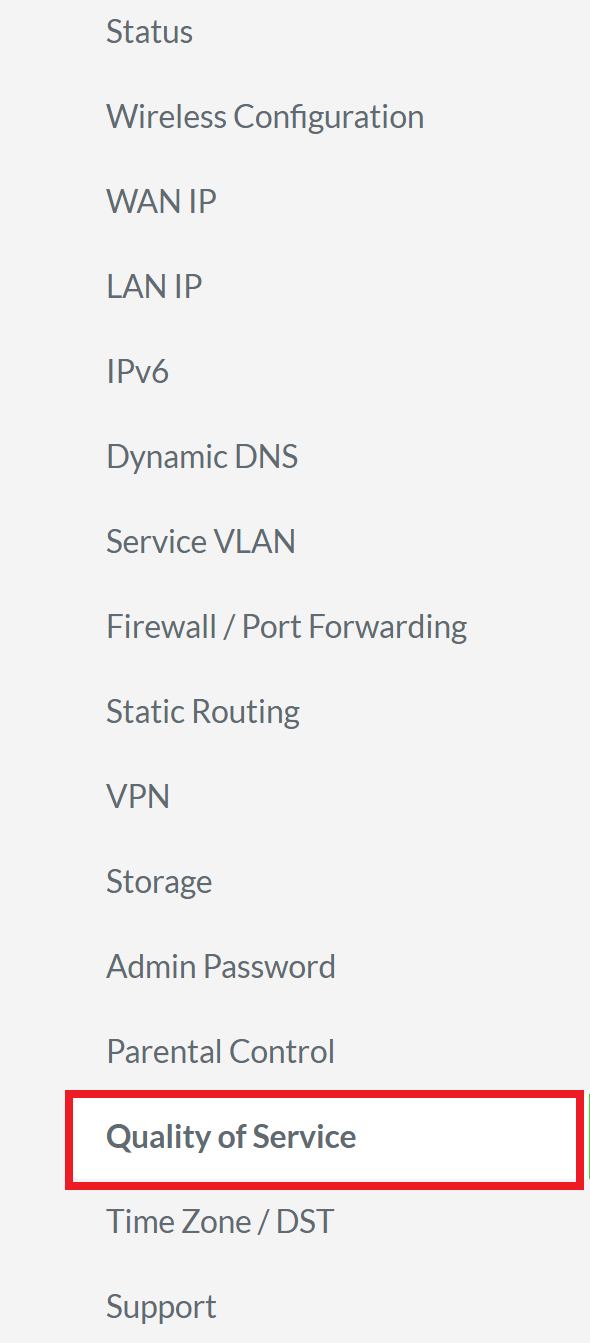
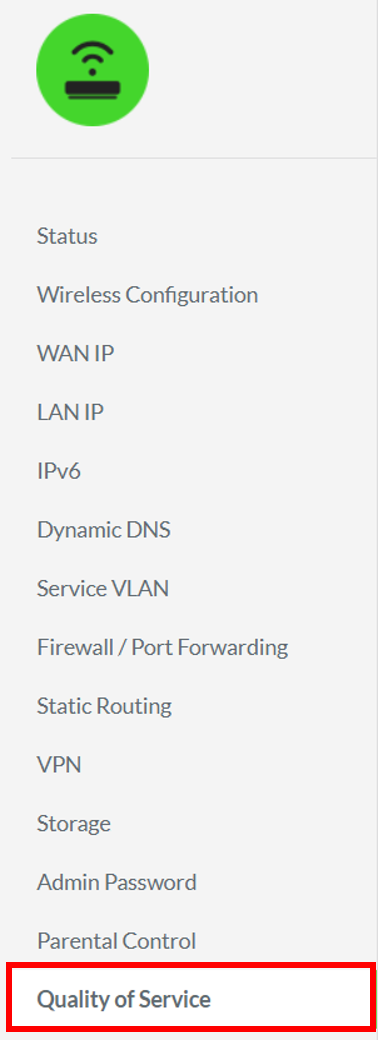
Access the web UI of the Razer Sila and click “Quality of Service” from the left navigation panel.
-
Click “Device List” to display the list of connected devices.
-
Click the edit icon in the “More Info & Edit” column.
-
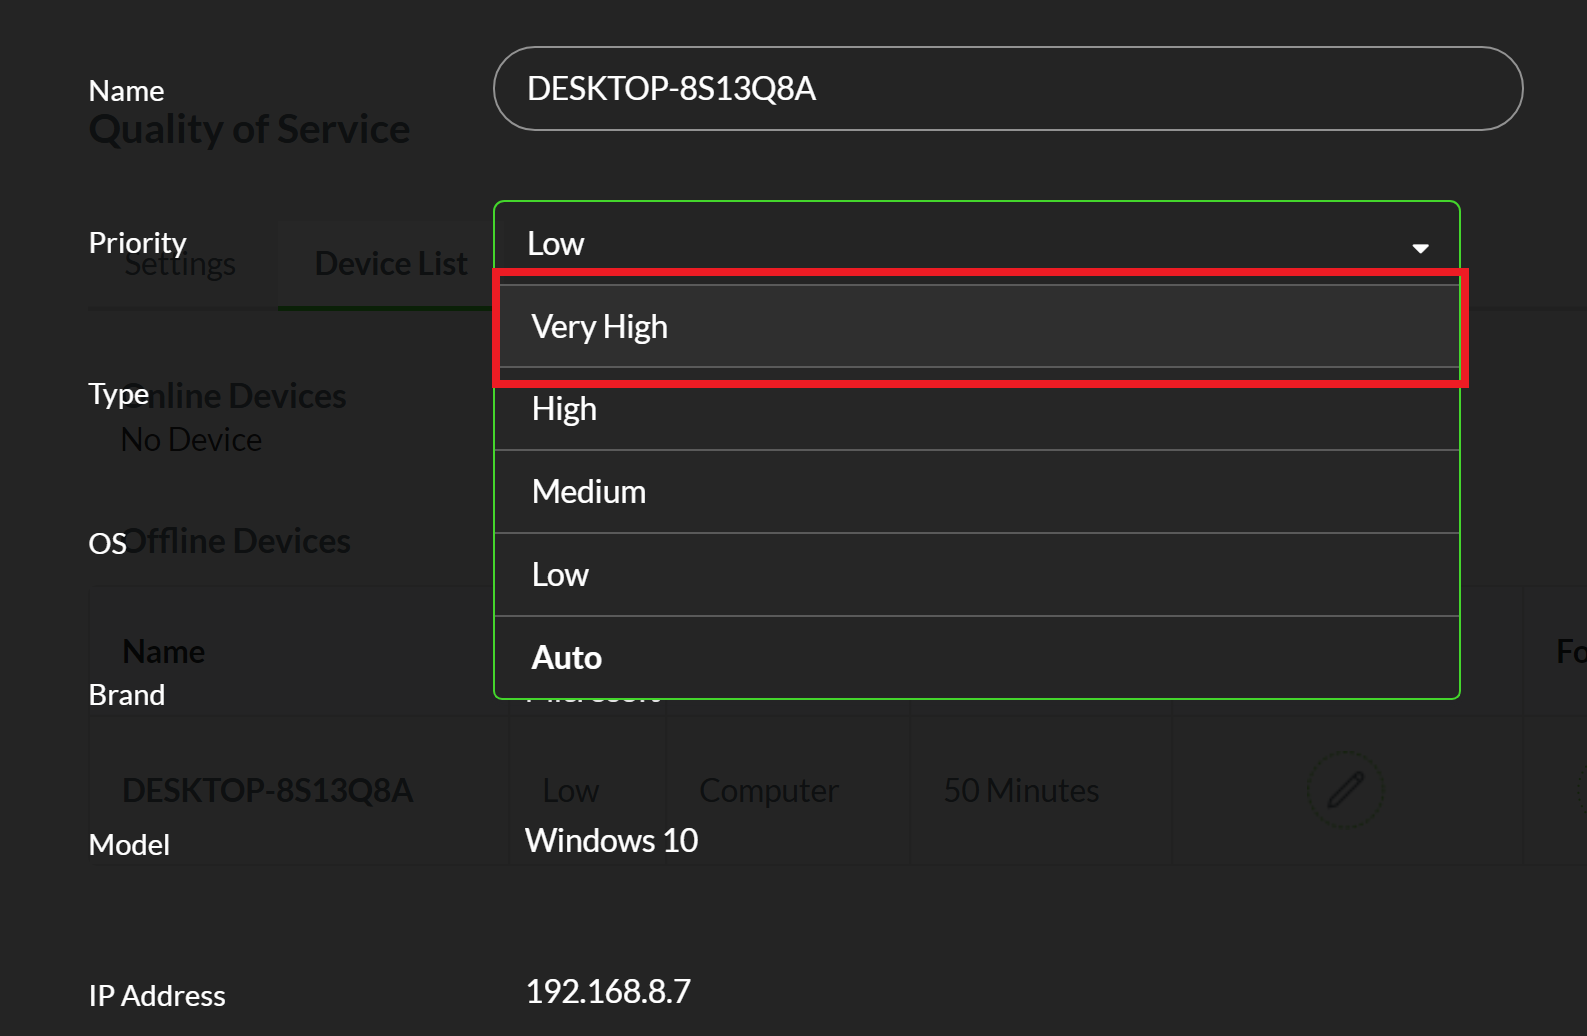
Click the Priority drop-down arrow and choose “Very High”.
-
Click “Apply”.
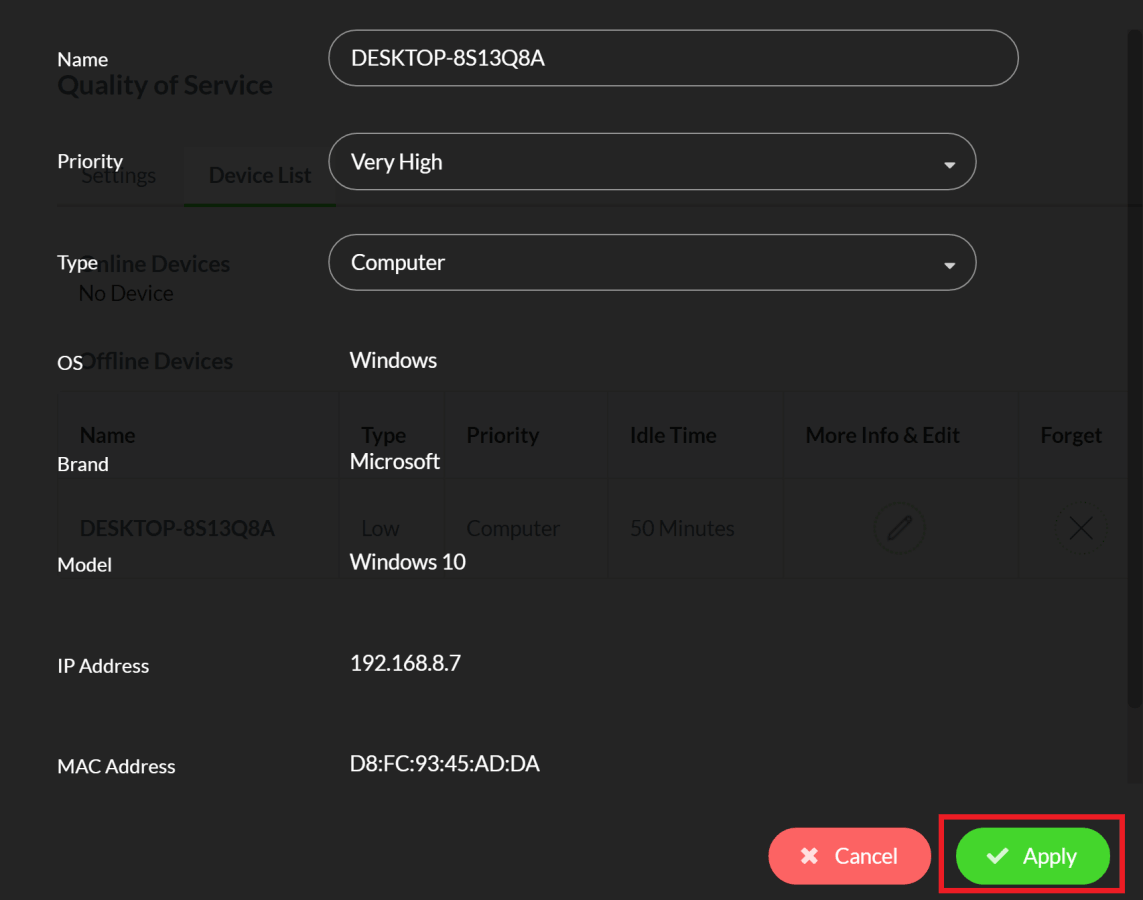
The device is now the top priority for sending and receiving data over the network.
Configure Razer laptop QoS detection
Due to Quality of Service (QoS) recognition engine limitations, it is unable to detect the LAN port of the Razer laptops. Manually change the configuration to leverage a gaming status for the device during the device prioritization to resolve this issue.
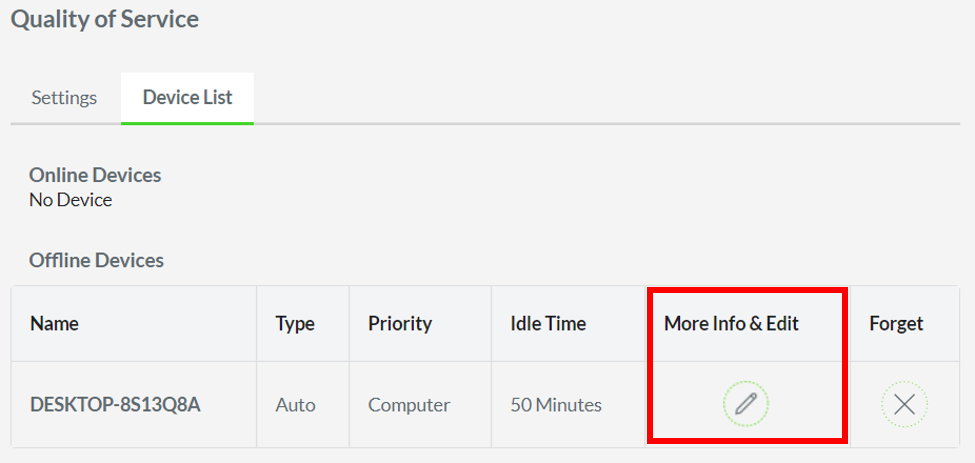
- Go to “Quality of Service” menu in the Razer Sila web UI.
- Click on “Device List”.

- Click the “More Info & Edit” icon.
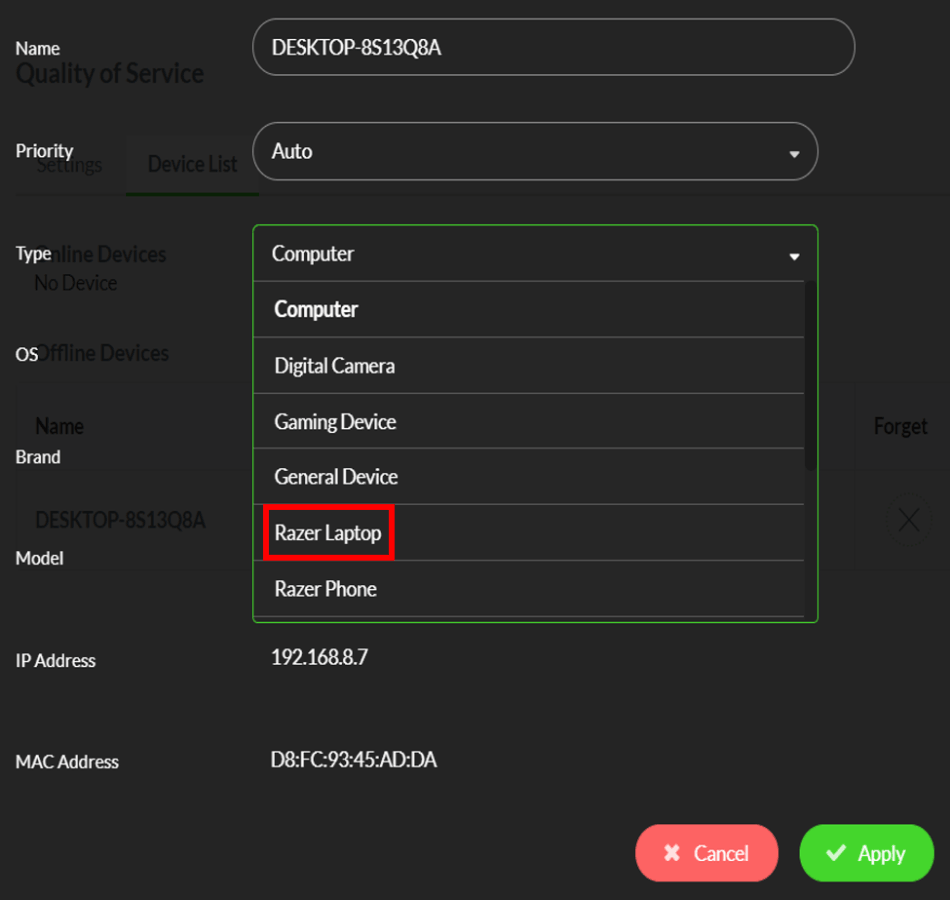
- Select the “Razer Laptop” as the Type.
- Click “Apply”.
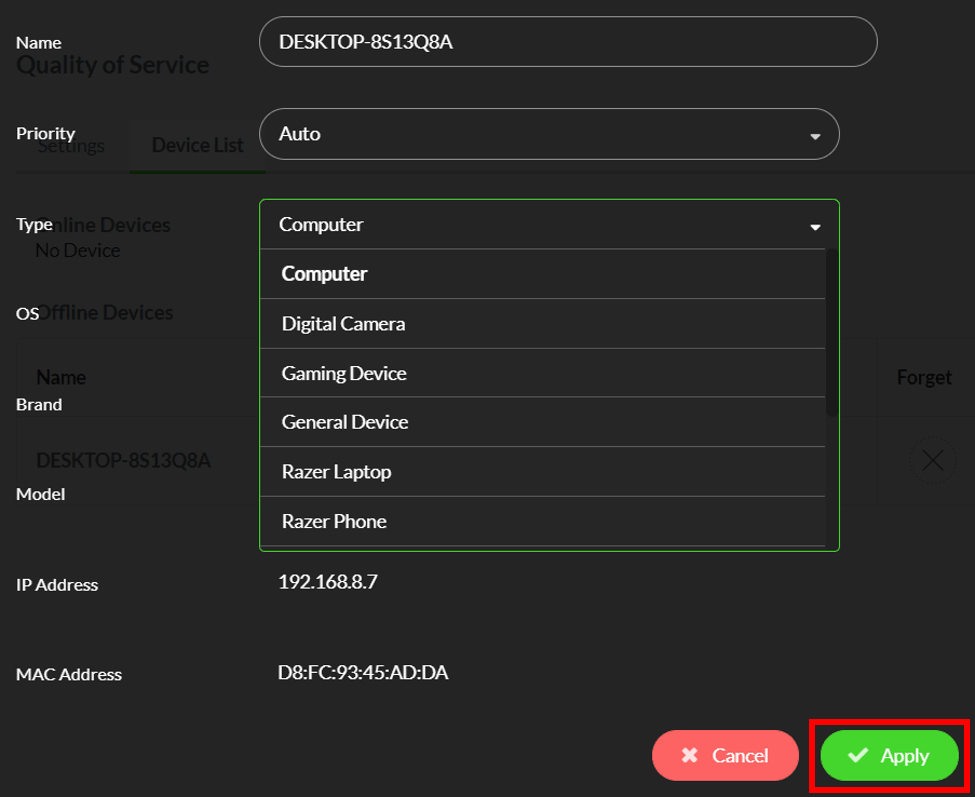
The Razer Laptop will then be given the highest priority.

