
Surface Calibration allows you to optimize the Razer Precision Sensor to any surface for better tracking. You can configure all Razer and third-party mouse mats with this feature.
Follow the detailed instructions below to use the Surface Calibration feature in Razer Synapse.
- Ensure your mouse is supported by Razer Synapse 4.
- Open Razer Synapse 4 application.
- Select the mouse you want to calibrate.

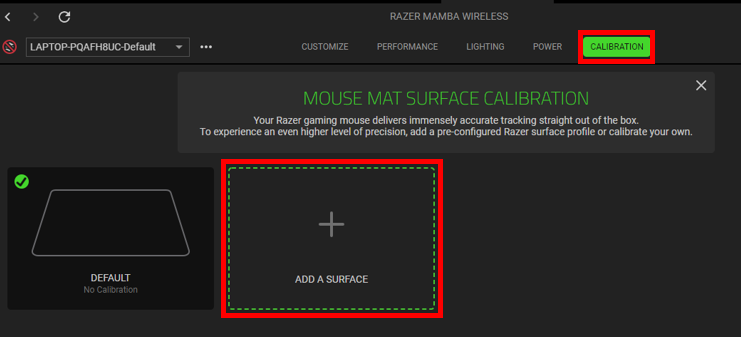
- Click on "CALIBRATION" and select "ADD A SURFACE".
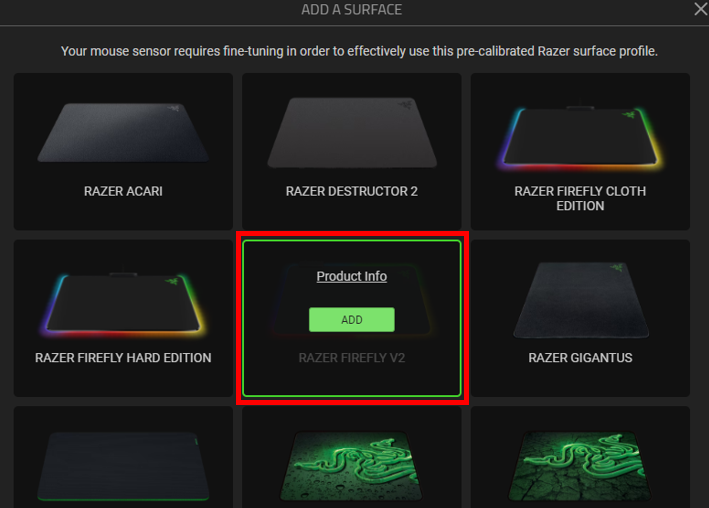
- Select the correct Razer mouse mat.
- Click “ADD”.
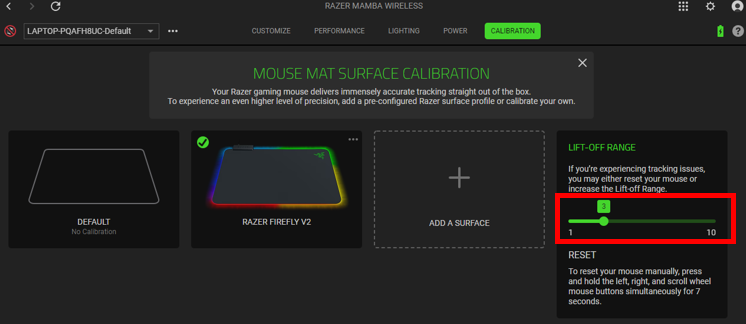
- Adjust the “LIFT-OFF RANGE” as desired.
Note: The mouse mat surface calibration settings differ on some devices.
After you have successfully calibrated your mouse, the calibration profile will be automatically saved.

