
The Razer Core is an external enclosure for your graphics card (eGPU) that boosts gaming experience by enhancing graphical performance. The external GPU allows plug and play option for enhanced graphical performance. This is especially useful for laptop with no option to upgrade graphics card.
The following is a list of graphics cards that are compatible with the Razer Core:
- NVIDIA® GeForce® GTX 1080 Ti
- NVIDIA® GeForce® GTX 1080
- NVIDIA® GeForce® GTX 1070
- NVIDIA® GeForce® GTX 1060
- NVIDIA® GeForce® GTX Titan X
- NVIDIA® GeForce® GTX 980 Ti
- NVIDIA® GeForce® GTX 980
- NVIDIA® GeForce® GTX 970
- NVIDIA® GeForce® GTX 960
- NVIDIA® GeForce® GTX 950
- NVIDIA® GeForce® GTX 750 Ti
- NVIDIA® GeForce® GTX 750
Step-by-step process:
-
Unlatch the back panel of the Razer Core using the lever and pull the tray out.

-
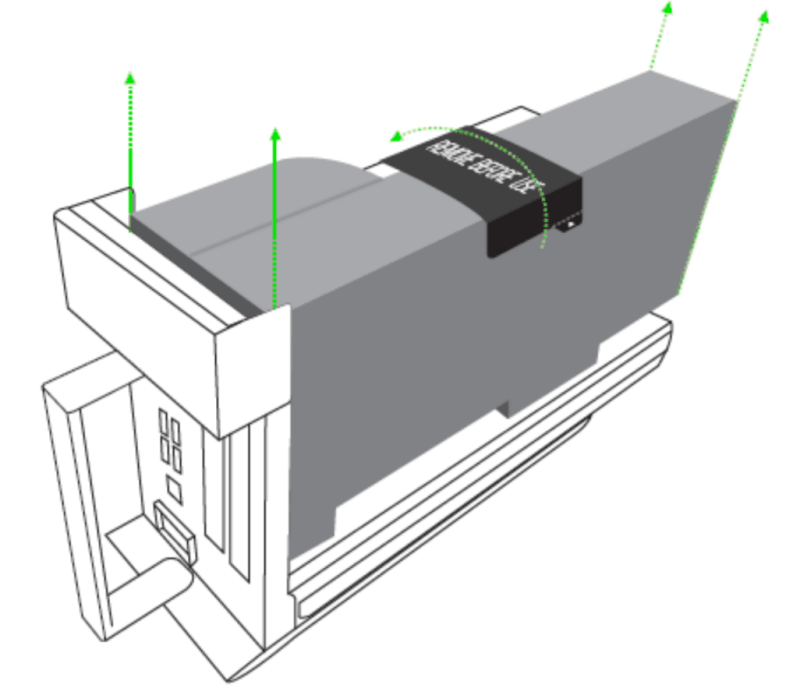
Remove the foam that covers the tray.
-
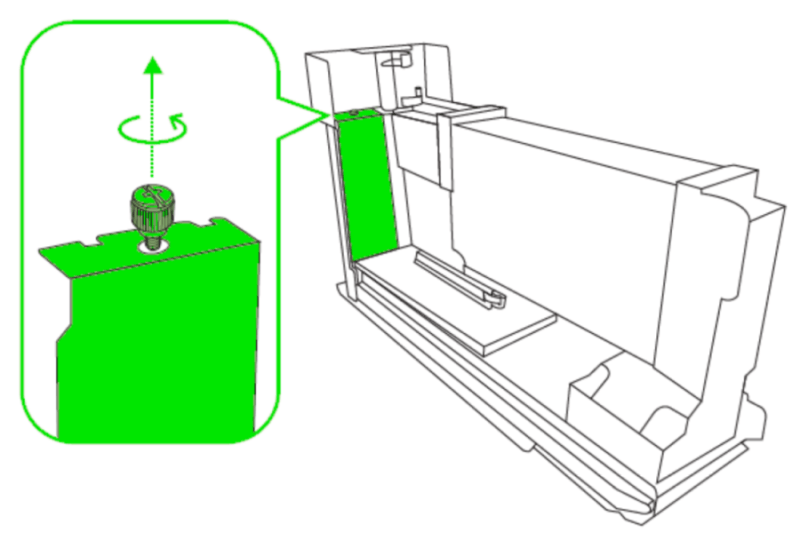
Turn the thumbscrew counter-clockwise to remove it then slide the PCI-e slot cover upwards.
-
Get the graphics card and carefully insert it into the slot until you hear a clicking sound, an indication that it is in place.

-
Secure the graphics card by inserting back the thumbscrew into place.

-
Plug the power connectors to the graphics card. The Razer Core comes with two 8-pin connectors but some cards may require using only one.

-
Lift the tray gently and slide it back into the enclosure then move the latch back in place to lock it.

You now have the graphics card installed properly on the Razer Core and proceed setting up the Razer Core to work with your system.

