
Setting up multiple monitors will allow you to view multiple windows or programs simultaneously which helps you increase your productivity. This guild will help you setting up multiple monitors.
Before starting your setup, make sure that your computer’s graphics card supports multiple monitors. You may check with your GPU manufacturer’s website for more information.
You will need the following to make this setup possible:
- Graphics card with both HDMI and Displayport
- USB-C Port
- 3x Razer Raptor 27
Note:This procedure may also work if you have less than three Raptors to work with, given that the other monitors you use also have the equivalent specifications such as resolution and refresh rate. Using a lower resolution monitor with the Razer Raptor may result in scaling problems.
For Windows users:
-
Get your three monitors and line them up on your desk. There are several ways to achieving an immersive experience. We recommend experimenting with different positions to suit your needs.
-
Connect your monitors to your computer system with either an HDMI, DisplayPort, or USB-C.

Note:The USB-C port on the Raptor supports both display and USB functionality. This means that the USB-A ports on the Razer Raptor 27 can function as pass-throughs. If you are using two or more Raptors, only the monitor connected via USB-C will have this feature enabled.
-
After powering the monitors on, Windows will detect them as duplicate monitors by default. For an immersive gaming experience or an effective way of multitasking, you may want to extend them.
-
To do this, go to "Settings" > "System" > "Display".
-
Click on “Identify” to determine the current position of your monitors.

-
Drag and drop the displays so that Windows can understand the physical location of the monitors on your desk.
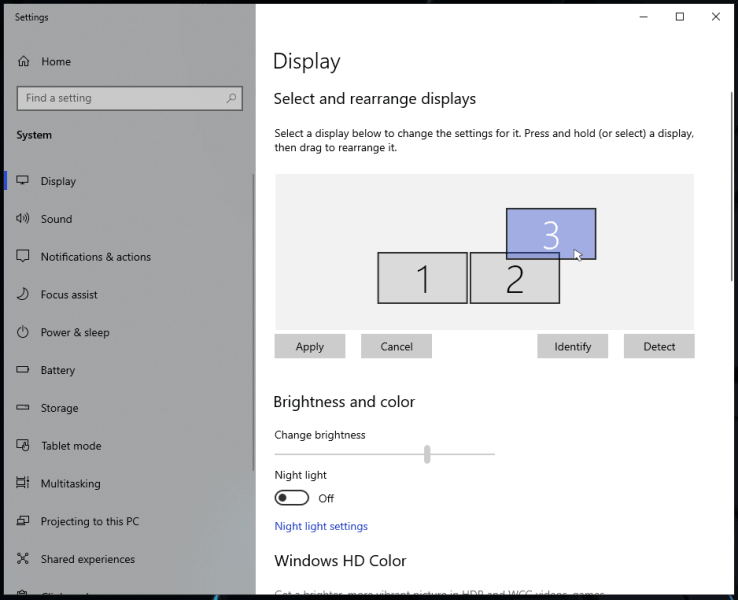
Note: If Windows did not one of your monitors, click “Detect".
-
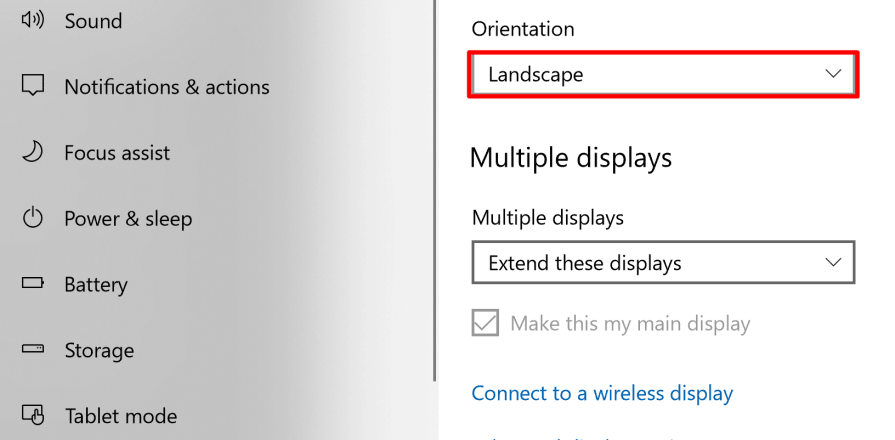
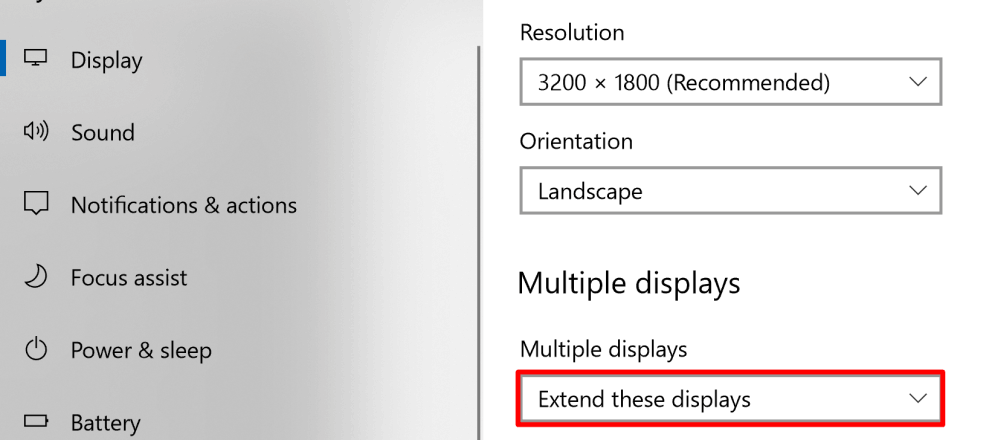
Ensure that your orientation is set to “Landscape".
-
Under Multiple displays, choose “Extend these displays".
-
Click on “Keep Changes” when prompted.
For Mac users:
-
Check the availability of ports on your Mac. If you lack one or more of the ports needed to drive your monitors, consider using an adapter that will support HDMI, USB-C, and DisplayPort.
-
Determine how many monitors your Mac can support. Click on the "Apple icon" > "About this Mac" > "Support" > "Specifications". A webpage will appear that will show you the number of displays that your Mac can support under “Video Support”.
-
After lining up your monitors on your desk in your preferred orientation, connect the included display cables.
Note: The USB-C port on the Razer Raptor 27 supports both display and USB functionality. This means that the USB-A ports on the Razer Raptor 27 can function as pass-throughs. If you are using two or more Raptors, only the monitor connected via USB-C will have this feature enabled.
-
Turn on the extended desktop mode by going back to System Preferences and clicking on “Displays”.
-
Click on the “Arrangement” tab.
-
Uncheck the “Mirror Displays” checkbox.
-
On the same page is a visual representation of how your Mac sees your connected monitors. You may click and drag the displays around to suit your preference.
-
If you want to change your primary display, drag the white bar to another monitor.

