
DPI settings on compatible Razer mice are managed through Razer Synapse or through the sensitivity buttons on your mouse. You can also assign sensitivity functions such as Cycle Up/Down Sensitivity Stages and the Sensitivity Clutch to a mouse button.
Follow the detailed instructions below to set the DPI and sensitivity on your Razer mouse.
Select an option
Adjust DPI with Sensitivity Stages in Razer Synapse
Open Razer Synapse.
Select your mouse from the “DASHBOARD”.
Go to the "PERFORMANCE" tab.
Toggle "Sensitivity Stages" on.

Select the DPI stage you want to apply.

If you prefer a specific DPI level, key in the specific DPI value you want to apply or use the slider.

Note: If you prefer different DPI levels for horizontal (X) and vertical movement (Y), proceed to the next step.
Hover on the slider and click the “x/y” icon.

Move each slider or input your preferred DPI levels.

Adjust DPI with the sensitivity slider in Razer Synapse
Open Razer Synapse.
Select your mouse from the “DASHBOARD”.
Go to the "PERFORMANCE" tab.
Click and drag the sensitivity slider to your preferred DPI level. Alternatively, key in the specific DPI value you want to apply.

Note: If you prefer different DPI levels for horizontal (X) and vertical movement (Y), proceed to the next step.
Hover on the slider and click the “x/y” icon.
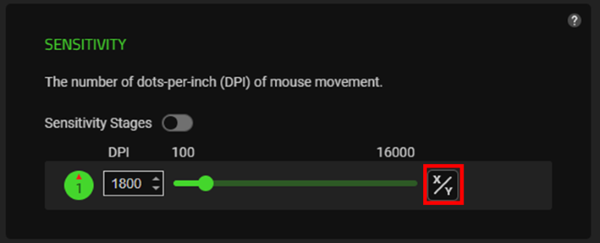
Move each slider or input your preferred DPI levels.

Adjust DPI with the sensitivity buttons on your mouse
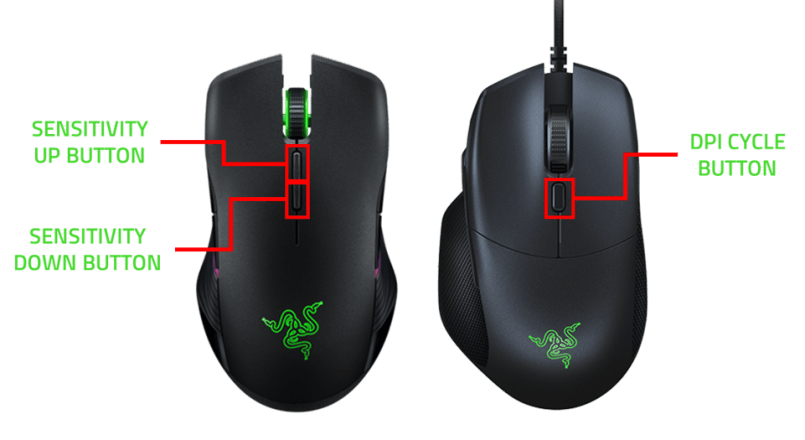
Check the DPI buttons at the back of the scroll wheel.
Increase, decrease, or cycle through the DPI stages using the sensitivity buttons of your mouse:
For dual sensitivity buttons:
The first button from the scroll increases the DPI upon click. Click this repeatedly until you reach your desired sensitivity.
The second button from the scroll decreases the DPI upon click. Click this alternately with the increase button to get the exact adjustment you want to achieve.
For single sensitivity buttons:
Click on the DPI cycle button repeatedly to cycle up until you reach the desired sensitivity.
Cycle up or down through Sensitivity Stages
Razer mice come with the Cycle Up/Down Sensitivity Stages, a feature that allows you to cycle up or down the dots-per-inch (DPI) stages via your mouse.
- Cycle Up Sensitivity Stages allows you to cycle up sensitivity stages. Once you reach the maximum DPI, you will go to the lowest DPI in the next press.
- Cycle Down Sensitivity Stages allows you to cycle down sensitivity stages. Once you reach the lowest DPI, you will go to the highest DPI in the next press.
Launch Razer Synapse 4.
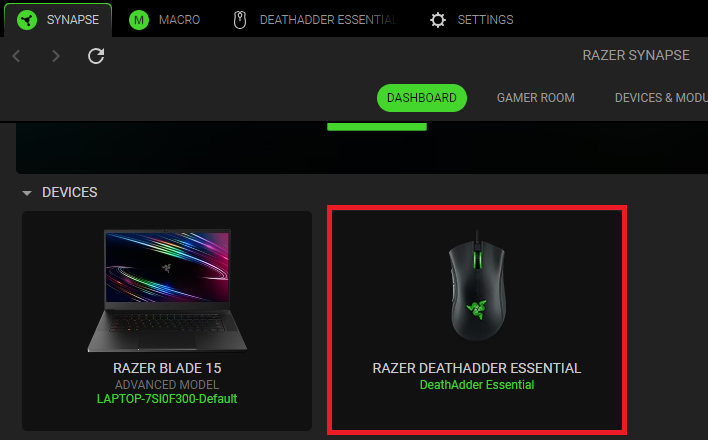
Select your mouse from the DASHBOARD.
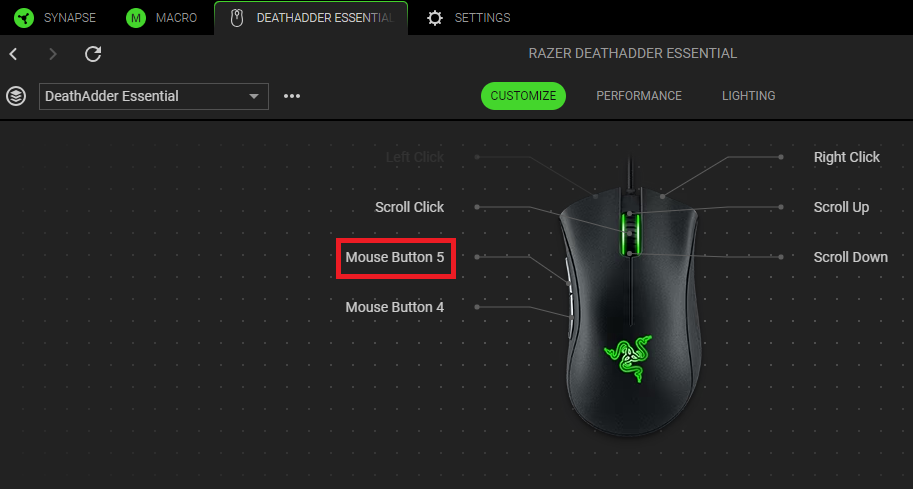
Select a button you want to customize.
Click “SENSITIVITY”.
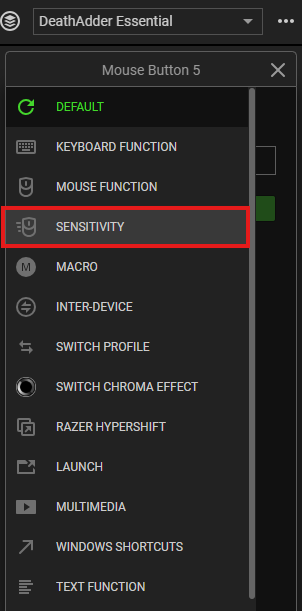
Choose either “Cycle Up Sensitivity Stages” or “Cycle Down Sensitivity Stages” from the SENSITIVITY dropdown list.
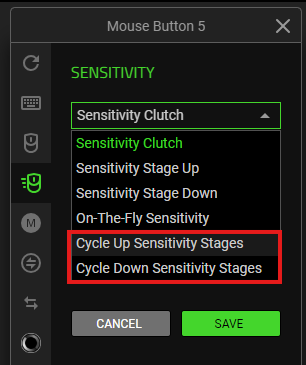
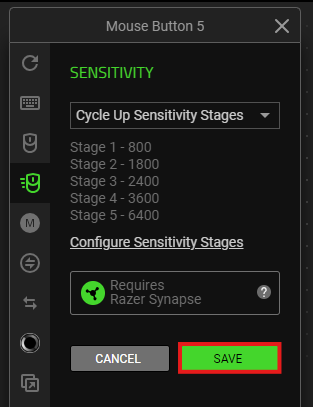
Click “SAVE” to complete the process.
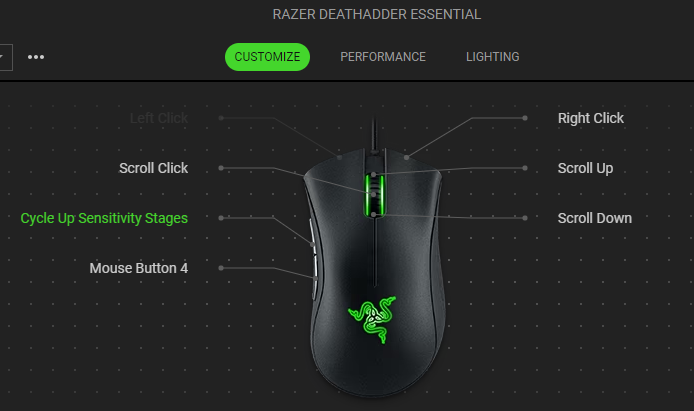
The device layout of your mouse now reflects the changes made.
Use the Sensitivity Clutch
You can utilize the Sensitivity Clutch to temporarily switch between predefined DPI levels, allowing you to seamlessly return to your original DPI setting without cycling through all sensitivity stages. By default, these stages increase in increments of 800 DPI, up to a maximum of 16,000 DPI in a standard configuration.

You can easily switch from 1,800 DPI directly to 16,000 DPI without passing through the intermediate levels of 4,500 DPI and 9,000 DPI by setting 16,000 DPI as your Sensitivity Clutch value on your Razer mouse.
Razer Synapse 4
Launch Razer Synapse.
Select your mouse from the DASHBOARD.
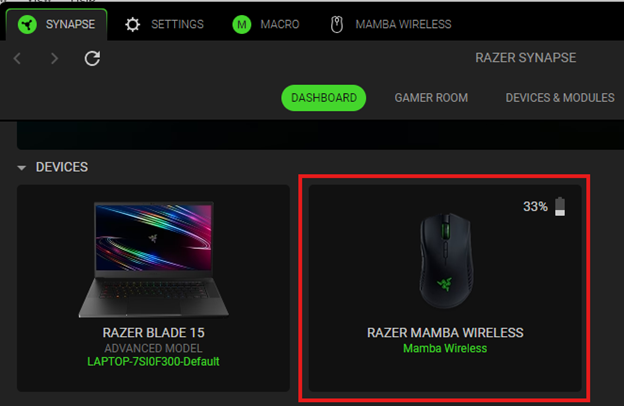
Select a button you want to customize.

Click “SENSITIVITY”.
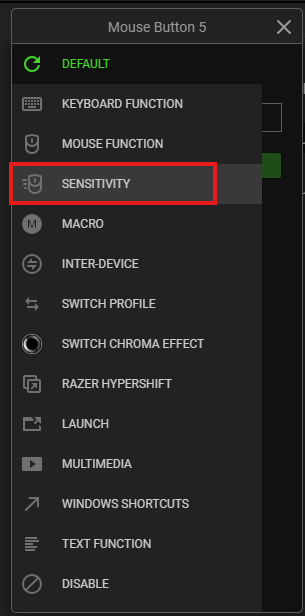
Choose “Sensitivity Clutch” from the SENSITIVITY dropdown list.
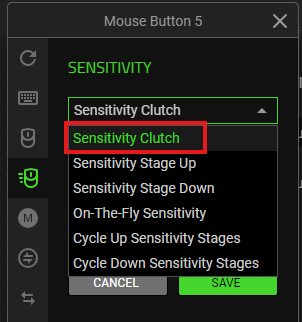
Set the DPI value for the clutch:
Note: Some mice may have varying settings.
Manual Input – Manually enter the figures of your desired value to set the DPI level.
Single Slider – Slide the DPI button left to right to increase or right to left to decrease the DPI level.
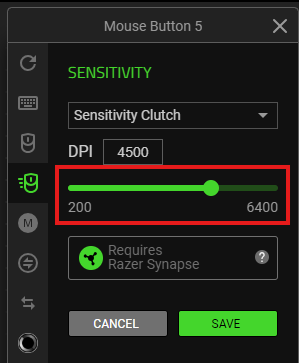
X and Y Sliders – Enable the X and Y axis and adjust the same way as the single slider to set the DPI level.
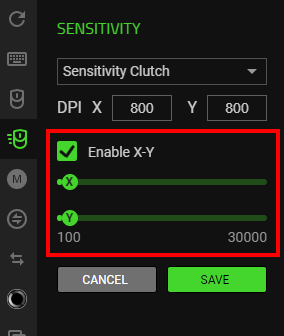
Click “SAVE” to complete the process.

Note: Keep Razer Synapse running in the background to use this function.
The programmed button is displayed after the shortcut on your device layout.
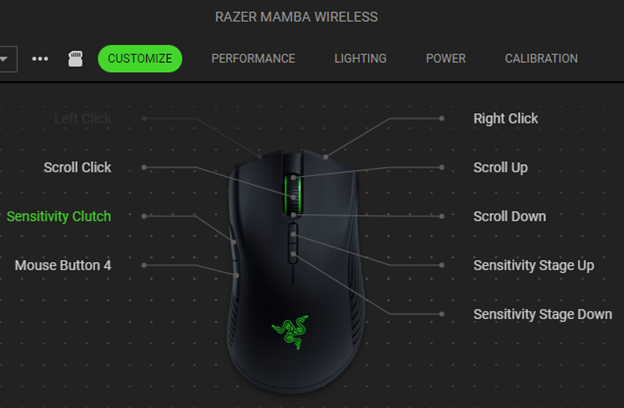
To use the Sensitivity Clutch, hold down the assigned button and release it to revert to your original DPI setting.

