
The Razer Core has the following features:
- Thunderbolt™ 3 External Graphics Enclosure
- Supports PCIe desktop graphics cards
- Plug and play with compatible GPU
- USB 3.0 ports and Ethernet
- Powered by Razer Chroma™
Scenario:
I have a Razer Core that is connected to my Razer Blade Stealth. It shows that it is being detected in my system when I plug it in but when I try to boot up a game, it runs the game off the integrated graphics rather than the external GPU, which is in my Razer Core.
Troubleshooting:
The issue above may be to the app being set to use only the integrated graphics card. You need to force the app to use the dedicated external graphics card to resolve this issue. Follow the steps below:
- Right-click on an empty space on your desktop to display the context menu.

- Choose “NVIDIA Control Panel”.

- Click the “Desktop” tab.

- Click the “Add “Run with graphics processor” to Context Menu” to put a checkmark on it.

- Go back to your desktop and right-click on the app that you want to use the eGPU on to display the context menu.

- Click “Run with graphics processor”.
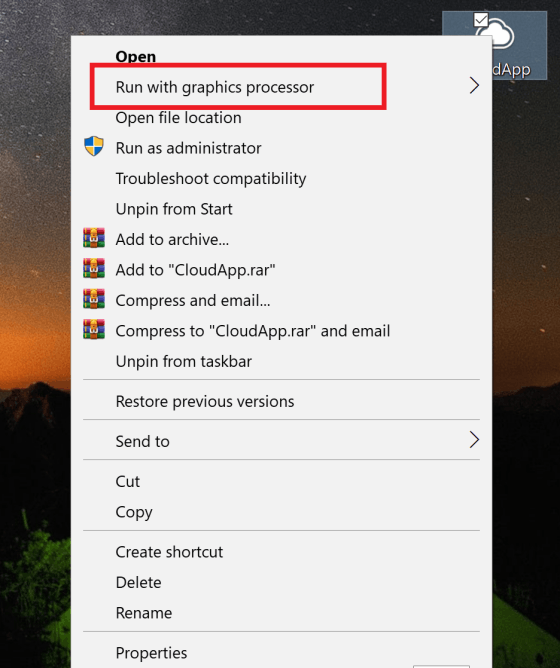
- Choose “High-performance NVIDIA processor”.

The app or game will now run using your dedicated GPU.

