
Follow the detailed instructions below to export and import profiles and configurations in Razer Synapse.
Select preferred action
Export Profiles
-
Open Razer Synapse 4.
-
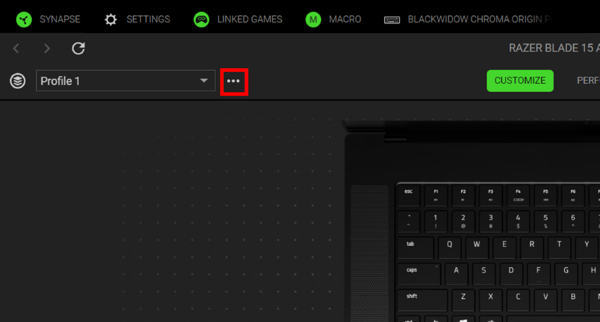
Select your device from the “DASHBOARD”, navigate to “CUSTOMIZE” function.
-
Click the ellipsis icon beside the profile dropdown.
-
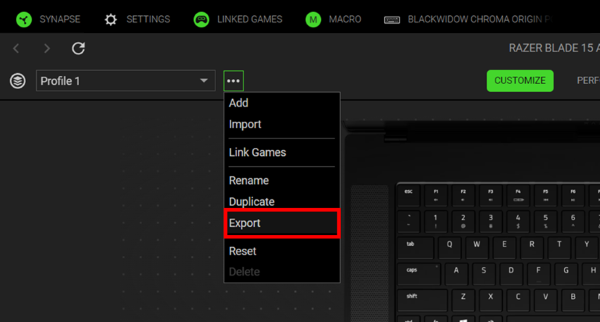
Click "Export".
-
Select the profile to export by clicking the corresponding checkbox.
-
Click the "EXPORT" button.

-
Select your preferred location to save the profile then click the “Save file” button.
Import Profiles
-
Open Razer Synapse 4.
-
Select your device from the “DASHBOARD”.
-
Click the ellipsis icon under the "CUSTOMIZE" tab.

-
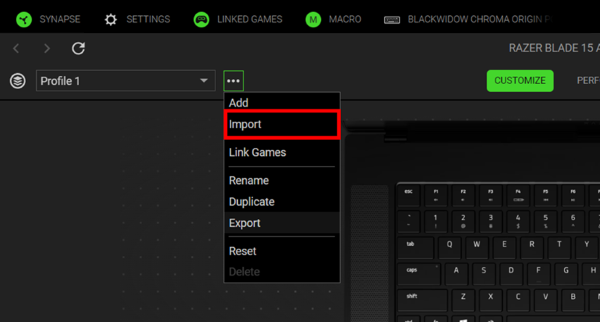
Click "Import".
-
Select the source of the profile to import, “Local” or “Cloud”.
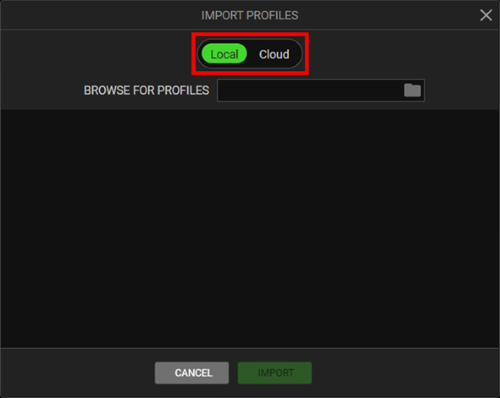
To import locally:
-
Select “Local” then click the folder icon.

-
Open the location folder of the profile.
-
Select the file and click the “Open” button.
Note: Razer Synapse 4 profile has a file extension "synapse4" and a file type "SYNAPSE4 File".

-
Click the “IMPORT” button.

To import a profile from the cloud via RazerID:
-
Select “Cloud” as the source.
-
Select the profile to import then click the "IMPORT" button.
-

