Properly setting up the Razer Core X V2 is important to avoid issues or any damage to components.
Setup requirements:
-
USB4, Thunderbolt 4, or Thunderbolt 5-enabled systems with external graphics support
-
Compatible PCI-E graphics card
-
Compatible Power Supply Unit (PSU)
Note: Ensure the PSU has at least 230 extra watts available to power the Razer Core X V2, in addition to whatever your graphics card needs.
-
External monitor (optional)
Warning: Ensure the Razer Core X V2 is switched off and unplugged from a power outlet to avoid electric shocks.
See the step-by-step instructions below on how to set up the Razer Core X V2.
-
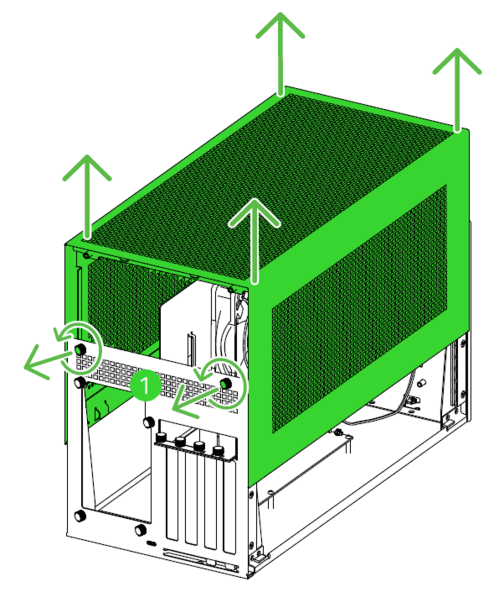
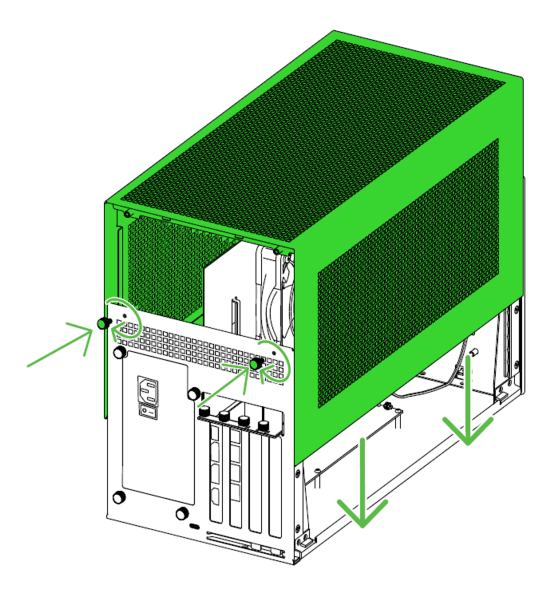
Unfasten the thumbscrews and remove the chassis cover.
-
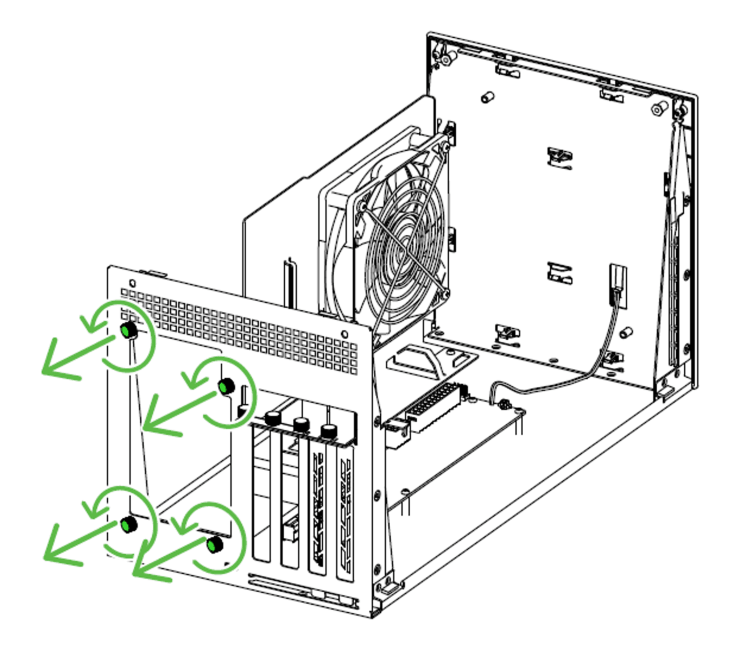
Remove the power supply mount screws.
-
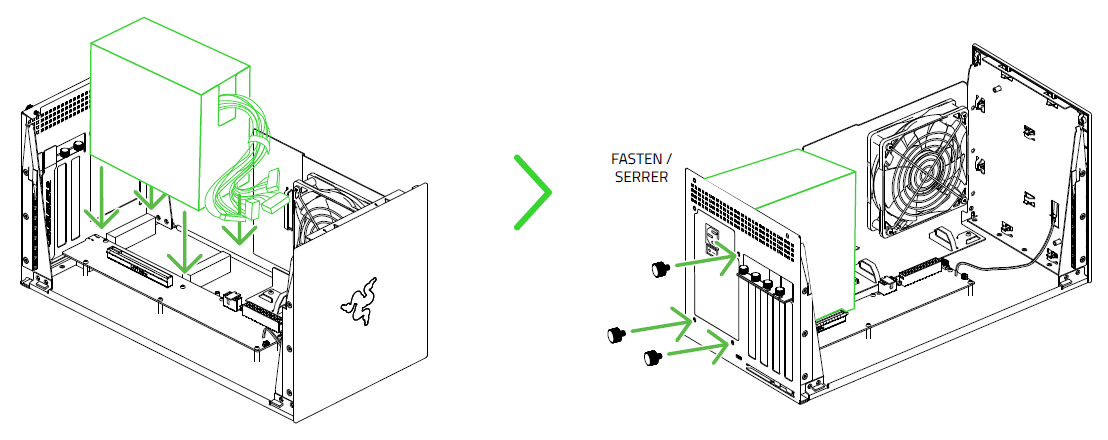
Install the power supply and fasten the power supply mount screws to hold it in place.
-
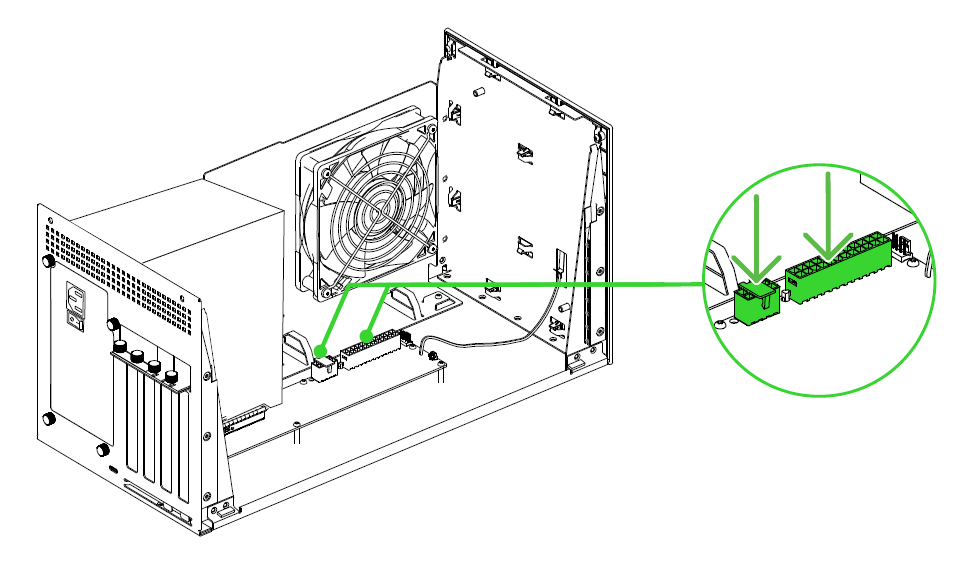
Connect the power supply to the 8-pin (or 4+4 pin) 12 V EPS and 24-pin ATX power connectors.
-
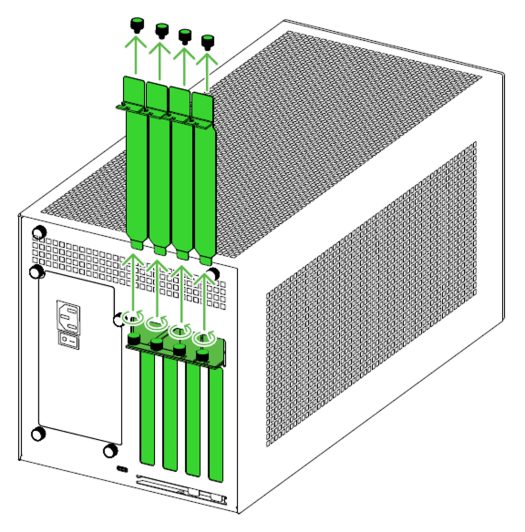
Remove the graphics card slot covers.
-
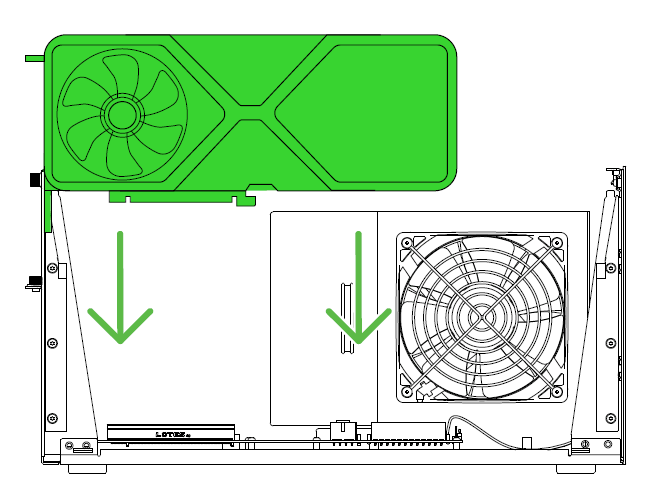
Install the graphics card into the PCIe port.
-
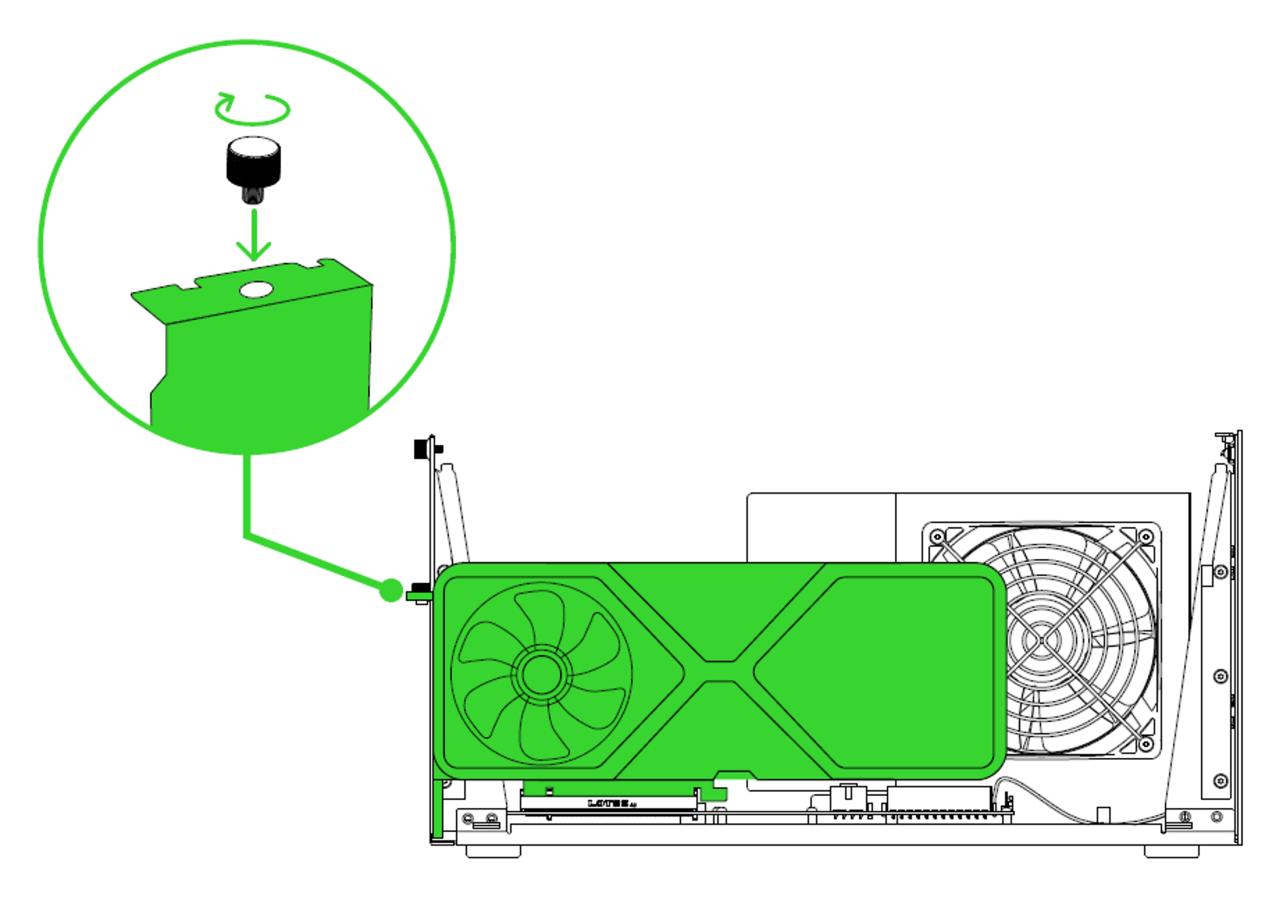
Secure the graphics card with thumbscrews.
Important: Ensure the bracket mounting hole of your GPU aligns with the thumbscrew hole of the Razer Core X V2.
-
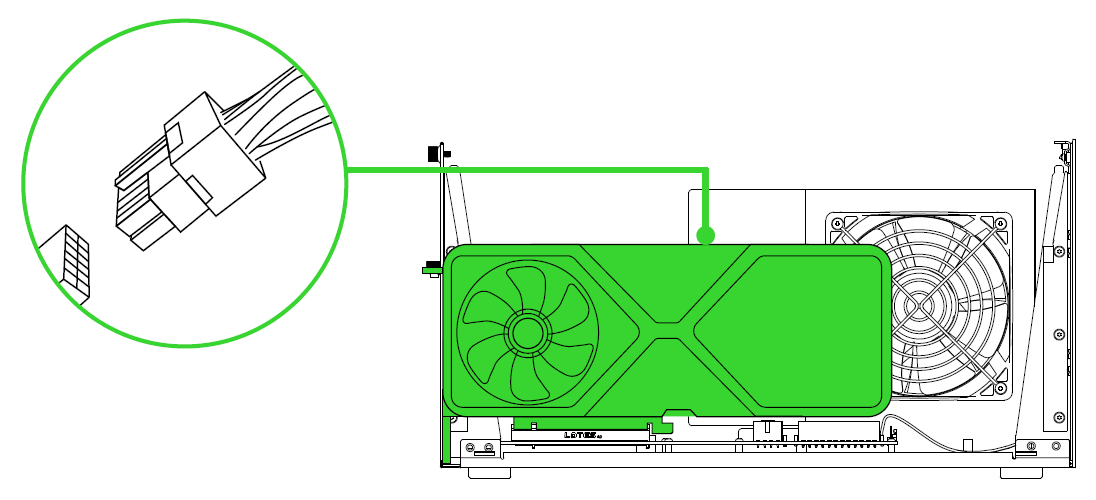
Connect the appropriate power connector from the power supply required for the graphics card.
Note: Ensure the power cables are kept away from the fans.
-
Reinstall the chassis cover and secure it with thumbscrews.
-
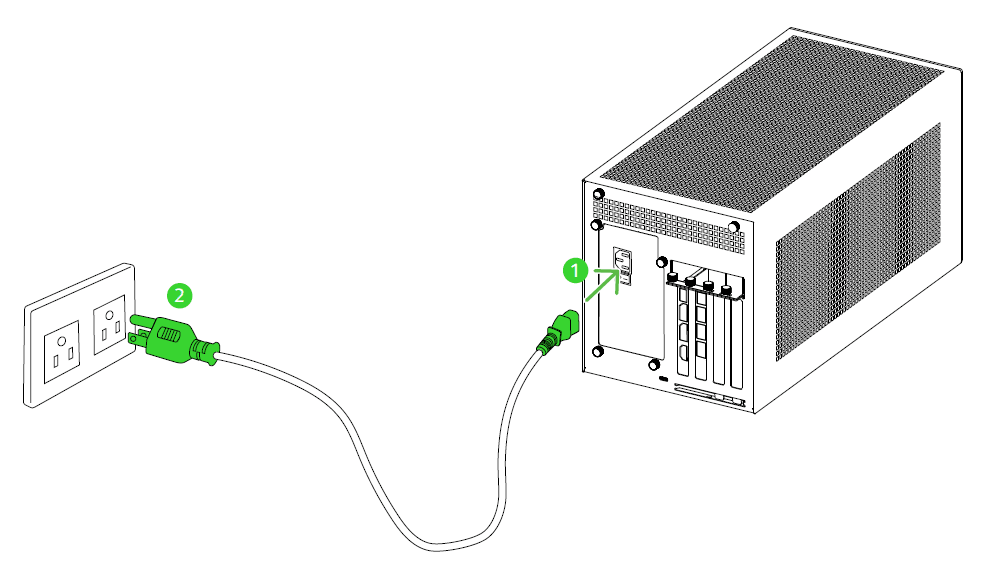
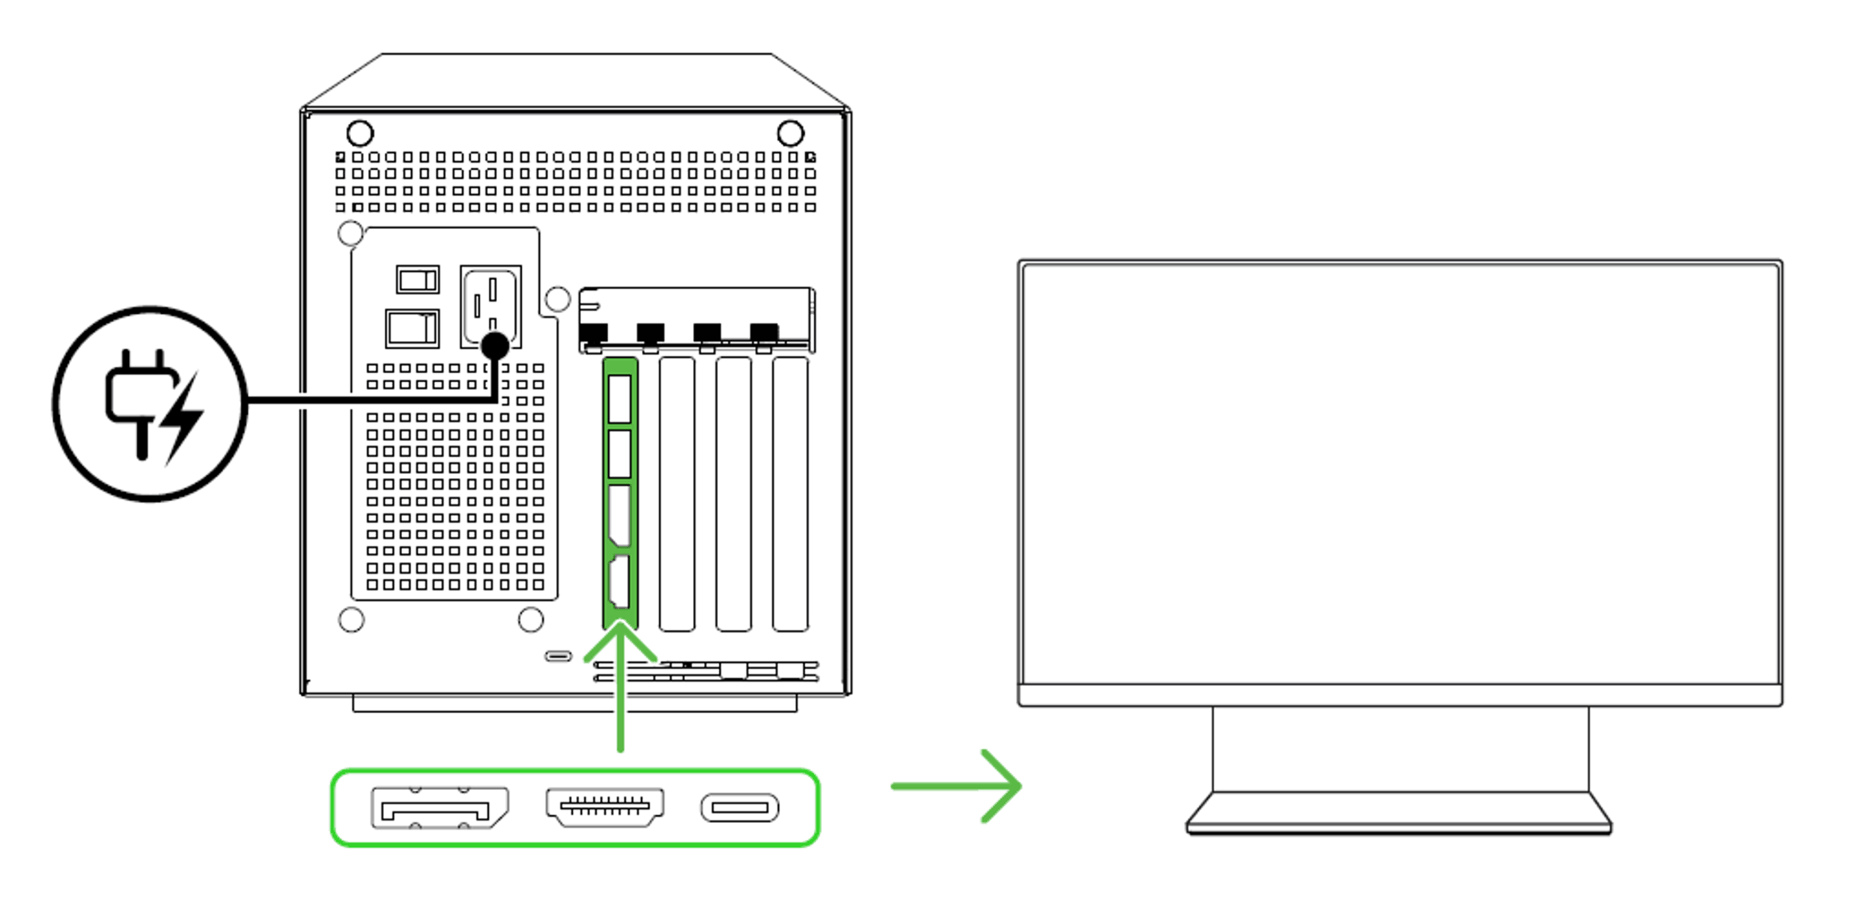
Plug the Razer Core X V2 into a power outlet.
-
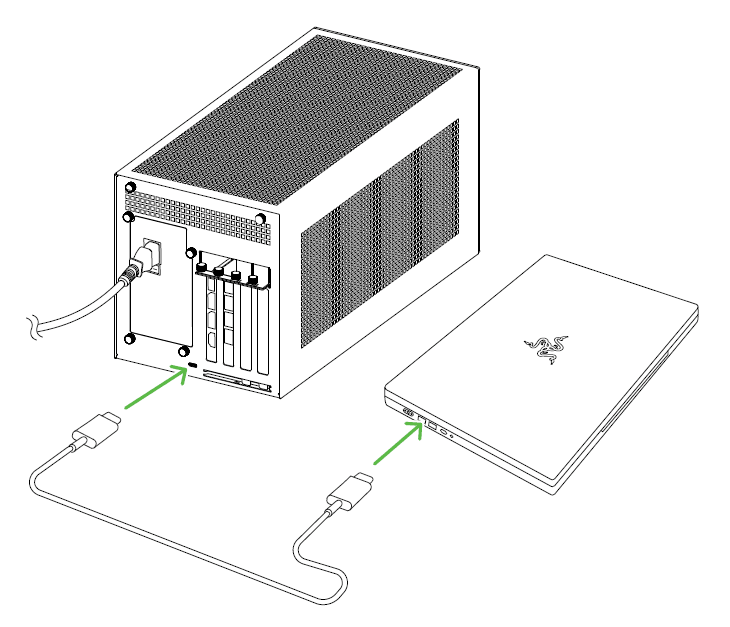
Connect the Razer Core X V2 to the Thunderbolt 5 port of your compatible Thunderbolt 5 external graphics-enabled system using the provided Thunderbolt 5 (USB Type C) cable.
-
Optionally connect the Razer Core X V2 to your external monitor using any of the display ports on the installed graphics card.
-
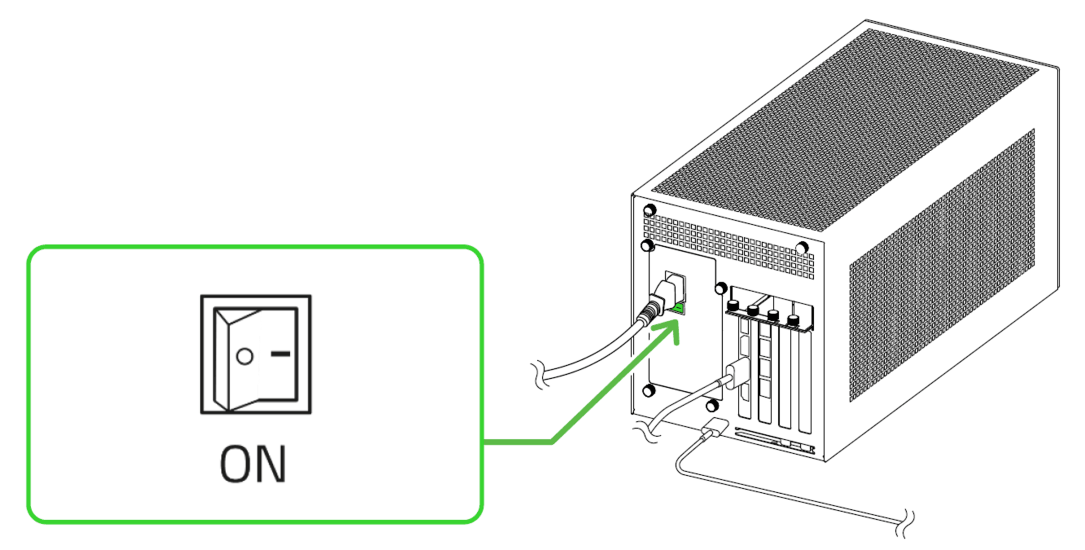
Switch on the power supply.