
The issue of a GPU not being detected in a Razer eGPU setup is possibly caused by the following scenarios:
-
Improper GPU installation
-
Razer Core has no power
-
The Razer eGPU was disconnected and reconnected while the system was powered on
-
The connected port does not support high-bandwidth traffic (for example, USB 3.1 Gen 1 compared to USB4, Thunderbolt 4, or Thunderbolt 5)
See the step-by-step instructions below on how to fix Razer Core X V2 that is not detecting the GPU.
Select an option
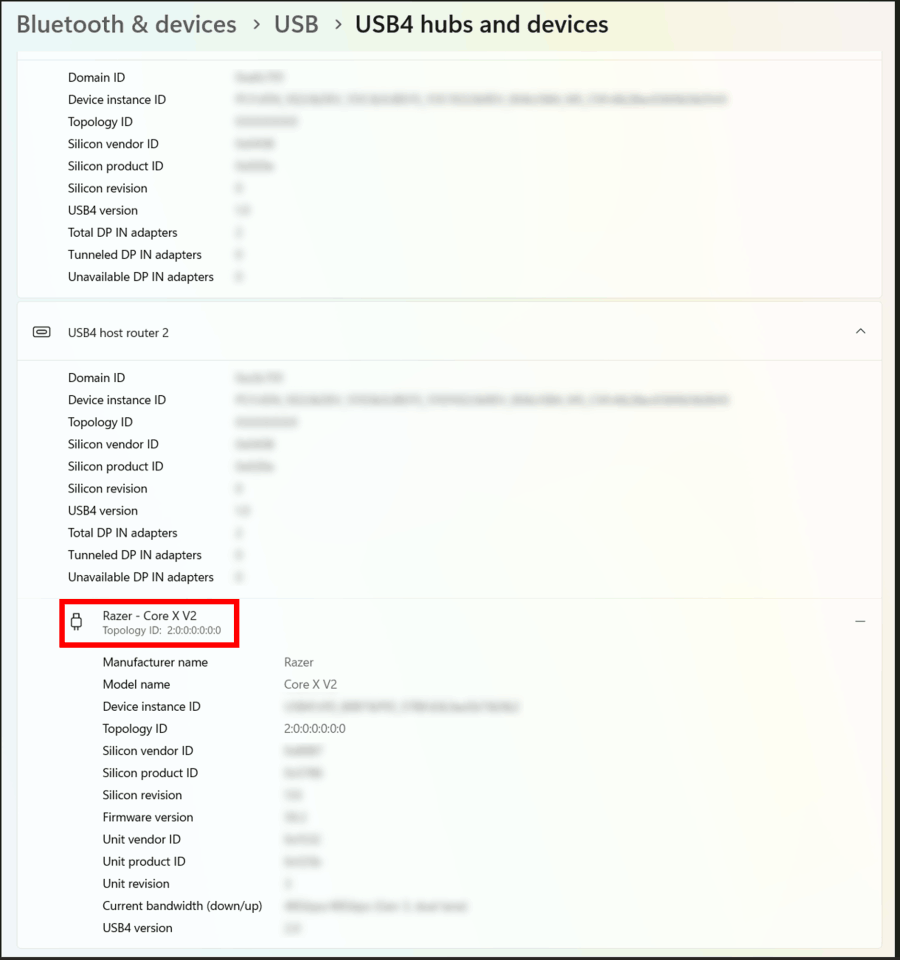
Check the system’s USB settings
-
Go to Settings > Bluetooth & devices > USB > USB4 hubs and devices.
-
Make sure the Razer eGPU model name and topology ID are displayed.
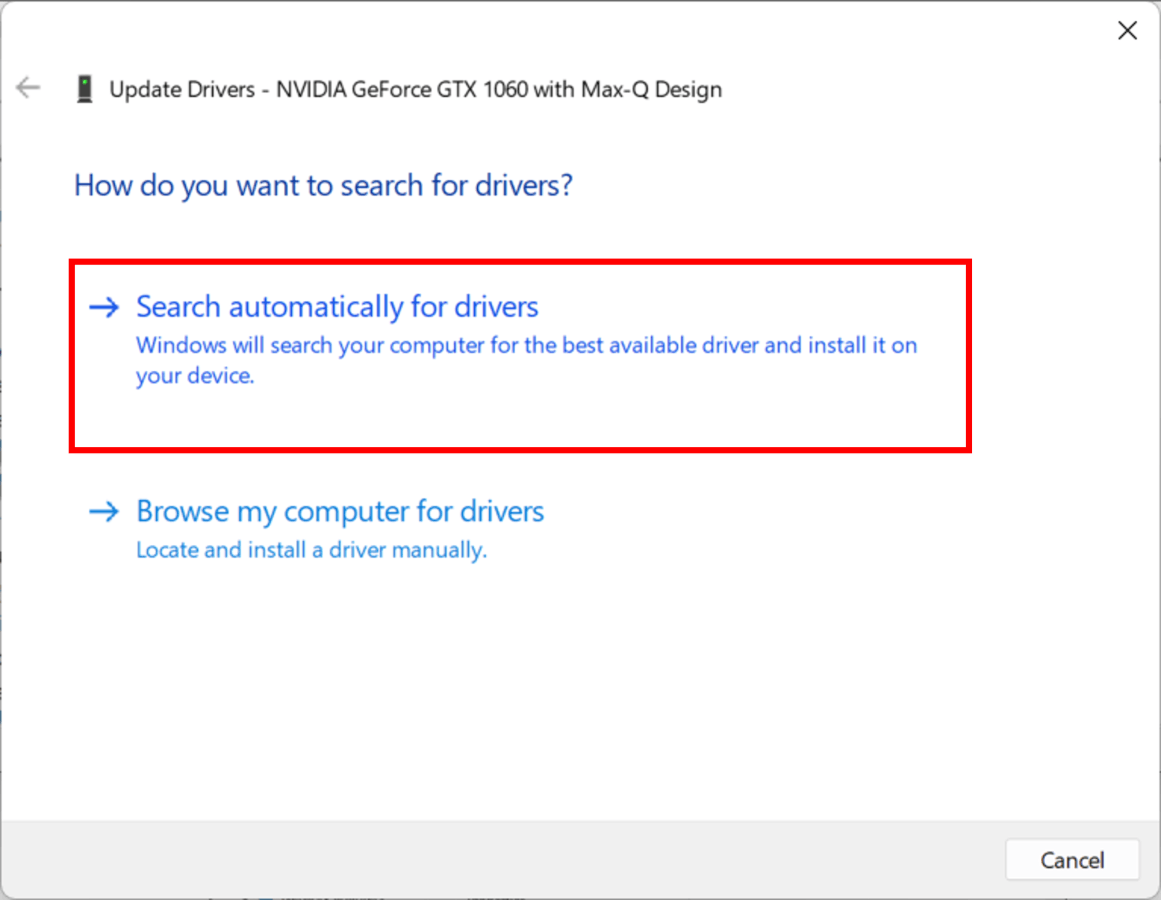
Ensure the GPU driver is installed and updated
-
Open “Device Manager”.
-
Expand “Display adapters”.
-
Right-click on the device and select “Update driver”.

-
Click “Search automatically for drivers”.
-
Follow the on-screen instructions.
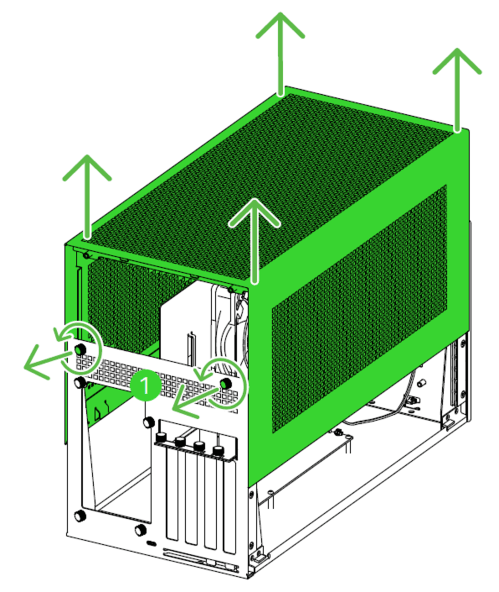
Ensure the GPU is properly installed
-
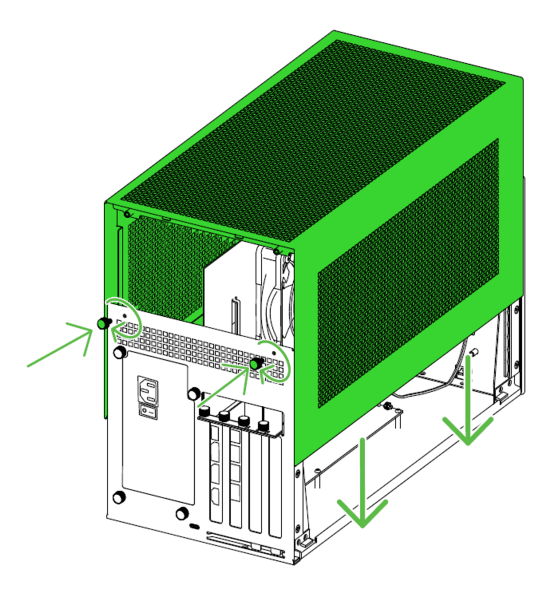
Unfasten the thumbscrews and remove the chassis cover.
-
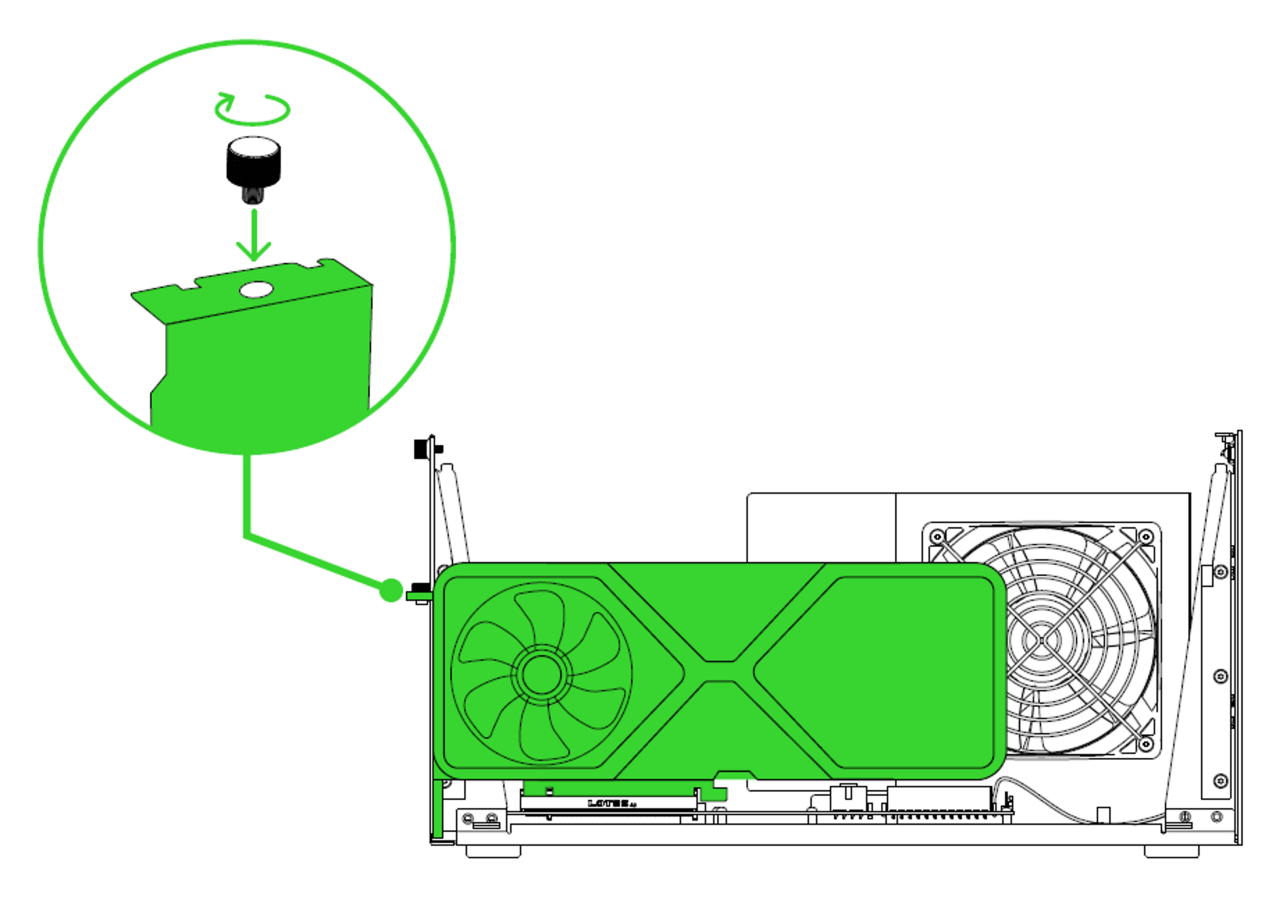
Verify that the graphics card is securely seated in the PCI-E port.
-
Tighten or reinsert the slot thumbscrew.
-
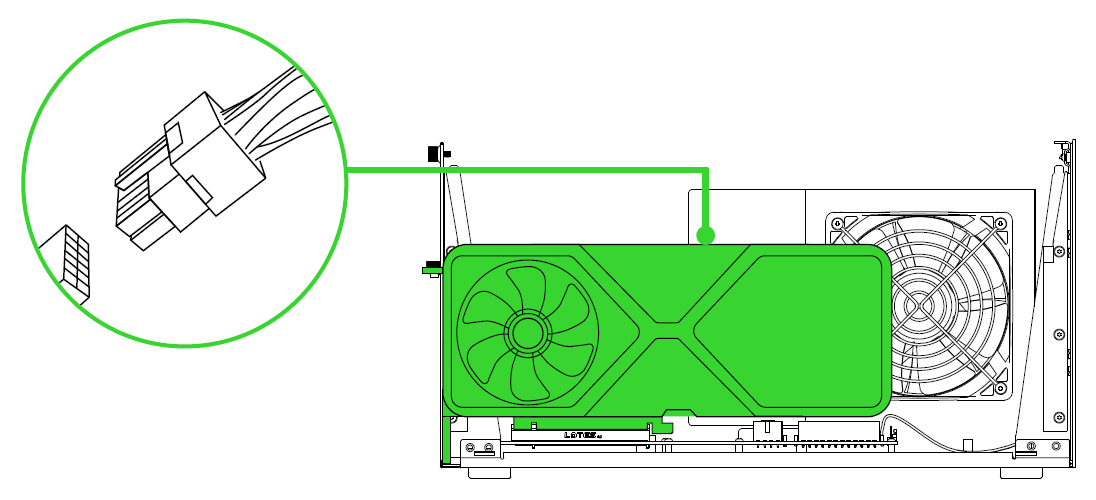
Make sure the GPU power connectors are securely plugged in.
-
Reattach the chassis cover and secure it with thumbscrews.
Ensure Razer Core X V2 is receiving power
Important: Ensure the installed PSU meets the GPU’s power requirements plus an additional 230 W to power the Razer Core X V2.
-
Inspect the power cord, adapter, and outlet. Make sure all connections are secure.
-
Test the power source using another device.
-
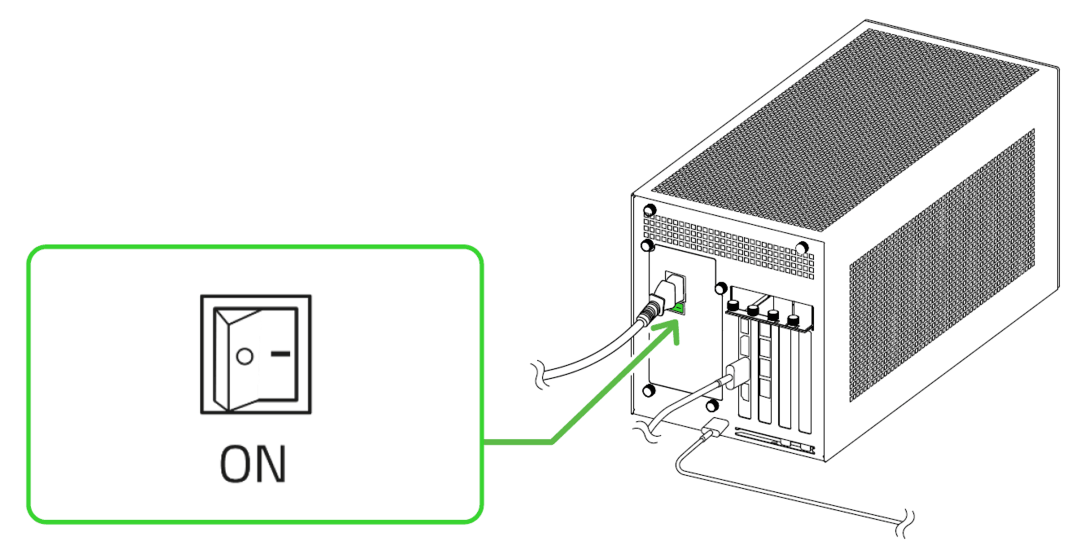
Ensure the PSU’s power switch is turned on and that the fans are spinning.
Avoid disconnecting and reconnecting the Razer Core X V2 while the system is powered on
-
Disconnect Razer Core X V2 and shut down the system.
-
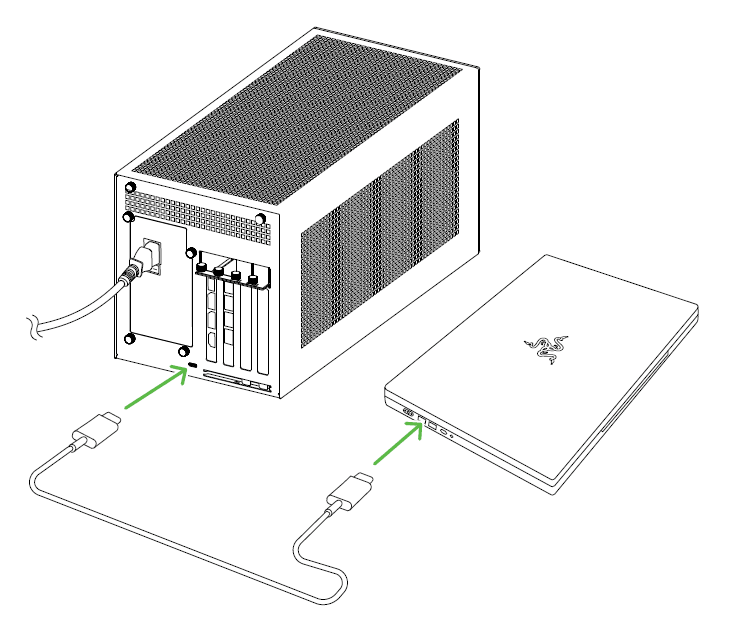
Reconnect the Razer Core X V2 while the system is powered off.
-
Power on the system. The GPU should now be detected.
Important: If disconnection is necessary while the system is running, wait for the confirmation prompt that the GPU has been safely removed before reconnecting.

