
Configuring custom macros on your Razer mouse through Razer Synapse enables automation of commands for enhanced productivity and performance.
Follow the detailed instructions below to create macros on a Razer mouse.
-
Plug the Razer mouse into your computer.
-
Open Razer Synapse 4.
-
Select "MACRO" > "New Macro".

Note: By default, macro profiles will be named Macro 1, Macro 2, and so on.
-
Rename your macro for easier identification.
- Click on the macro to rename.
- Click the ellipsis button then click “Rename”.

- Enter your desired macro name.

-
Record your keystrokes or mouse functions to add to the macro.
- Click the drop-down button next to RECORD.
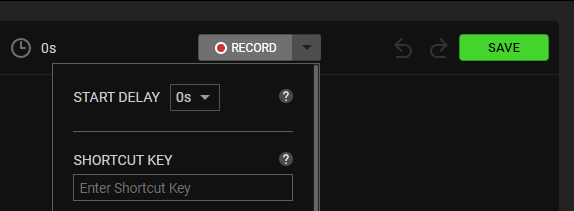
- Set the delay functions and how the mouse movement is recorded. If you select Record Delay, there is a countdown before Razer Synapse 4 starts recording.

- Click “RECORD”.
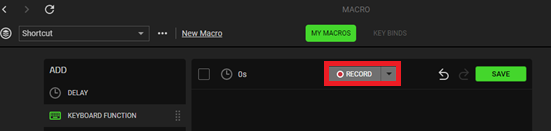
- Click “STOP” to stop recording.

- Click “SAVE” to save your recorded macro.

- Click the drop-down button next to RECORD.
Once your macro is saved, you can then assign it to any applicable Razer Synapse-enabled product.

