
When the external Nvidia GPU is not detected, the Device Manager may display it as "Microsoft Basic Display Adapter" or list it as "Nvidia" with an error.
Follow the steps below to safely install the graphics driver for the Nvidia GPU in the Razer Core X V2 when the host PC also has an Nvidia dGPU.
- On Windows, download the latest Nvidia graphics driver for the dGPU installed in the eGPU enclosure.
- Disconnect the system from the internet by disabling Wi-Fi and unplugging all LAN connections.
- Run the Nvidia driver installer.
- Install the Nvidia app.
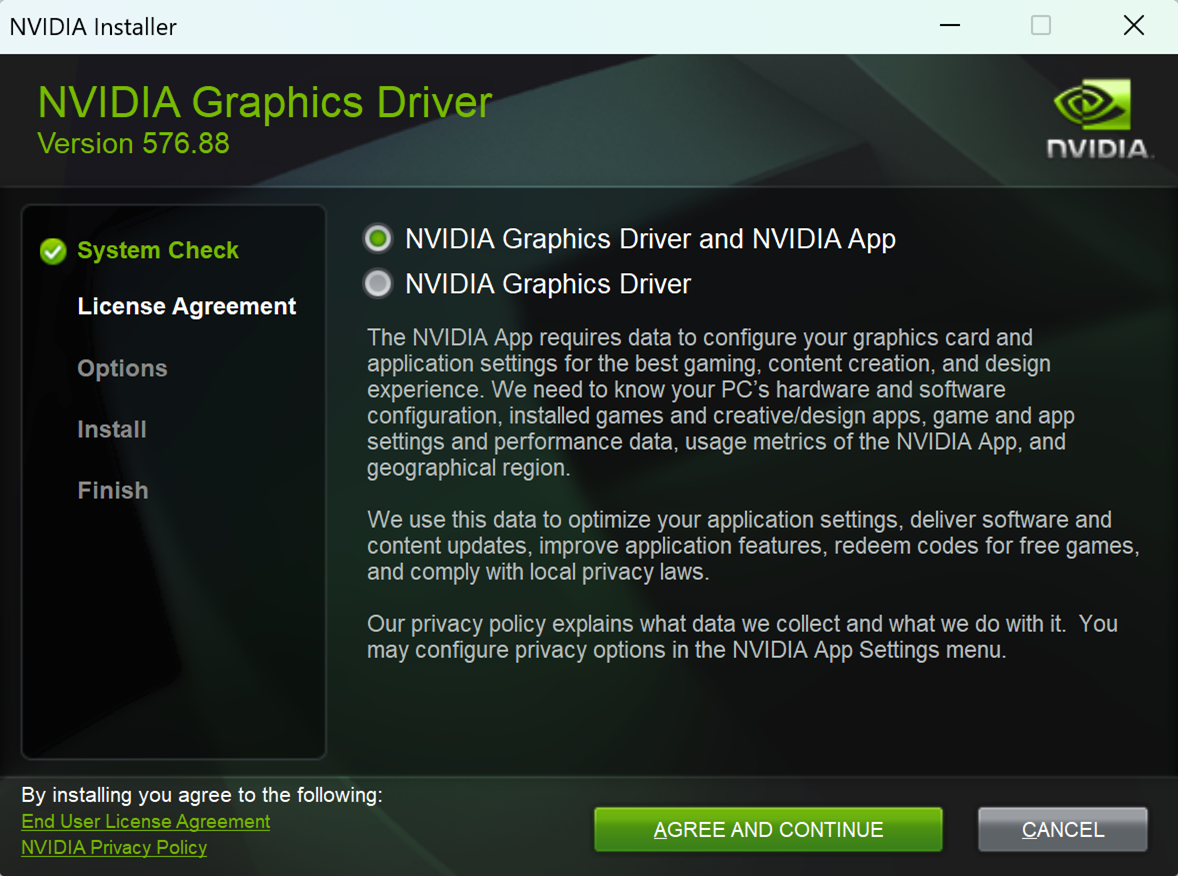
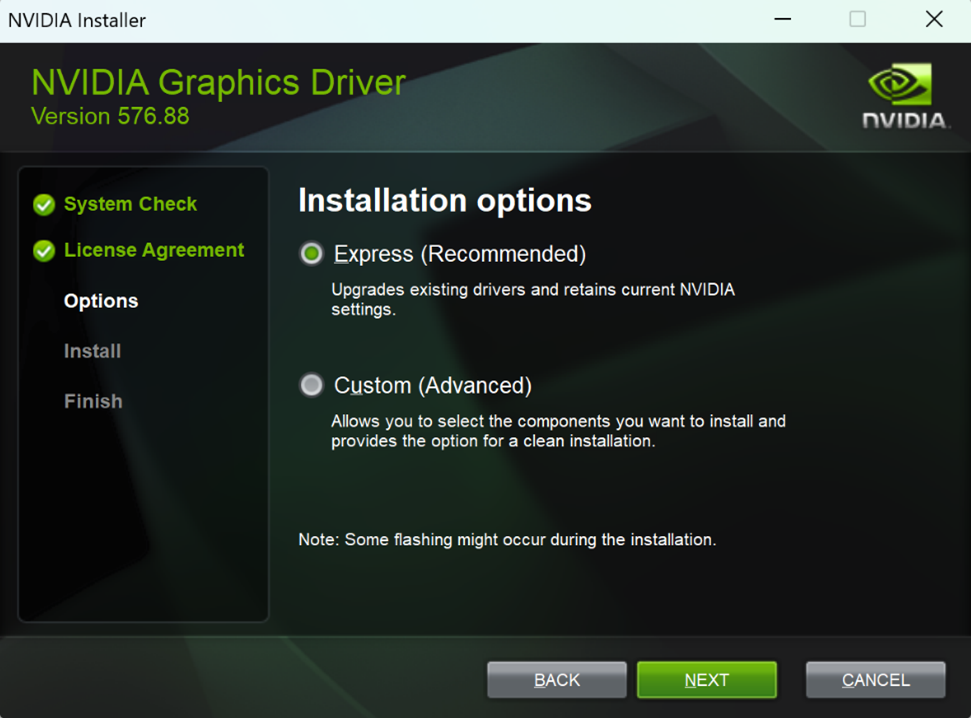
- Use the Express installation feature.
- After installation, restart the PC.
- Install the Nvidia app.
- Install the dGPU into the dGPU enclosure.
- Connect the enclosure to the system via the Thunderbolt port.
- Connect a display or monitor to the external dGPU.
- For monitors with multiple inputs, confirm that the correct input is set.
- Power ON the enclosure.
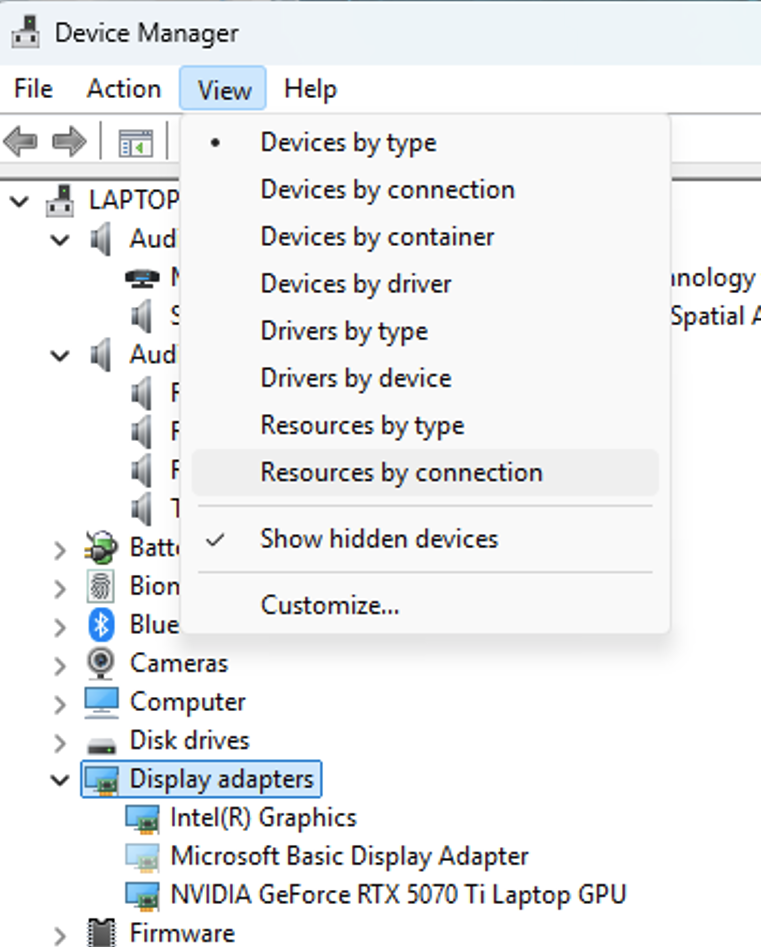
- Open the Device Manager and expand the view for Graphics Driver.
- Wait for a new graphics adapter to appear.
- After the external dGPU appears, it will disappear again after a while.
- To view it, enable ‘Show hidden devices’.
- Open File Explorer and navigate to C:\Windows\Temp.
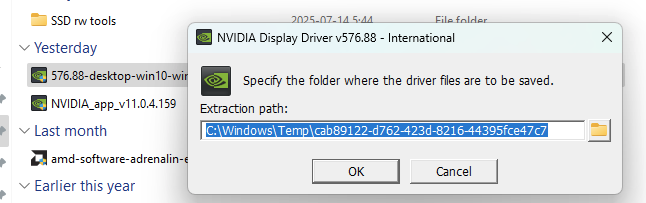
- Run the Nvidia graphics driver.
- Specify the location to save the installation files.
- Click OK and wait for the process to continue. When prompted to click “AGREE AND CONTINUE,” do not proceed with the installation.

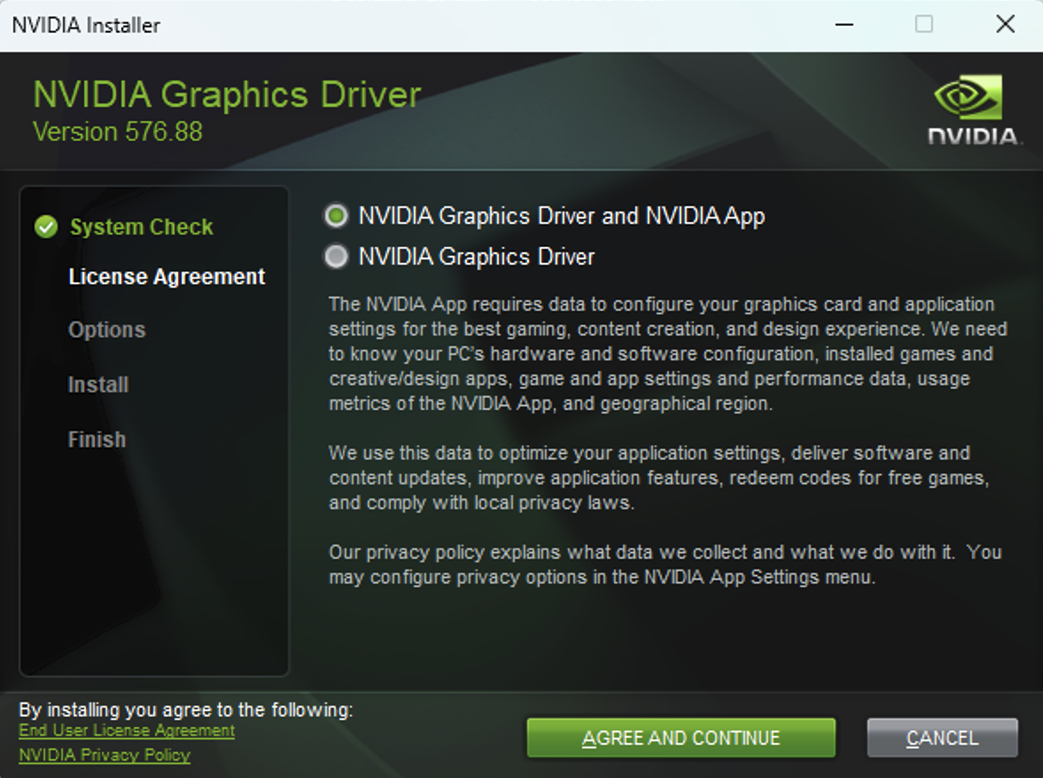
- Click OK and wait for the process to continue. When prompted to click “AGREE AND CONTINUE,” do not proceed with the installation.
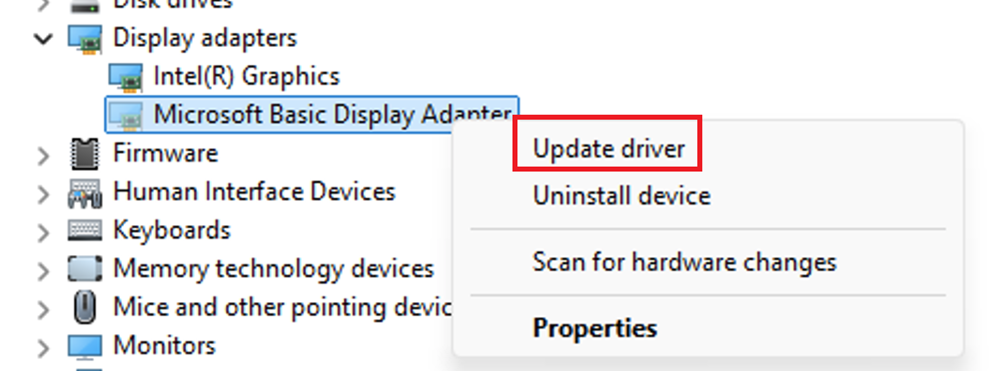
- Open Device Manager and right click on the dGPU (Microsoft Basic Display Adapter).
- Select “Update Driver”.
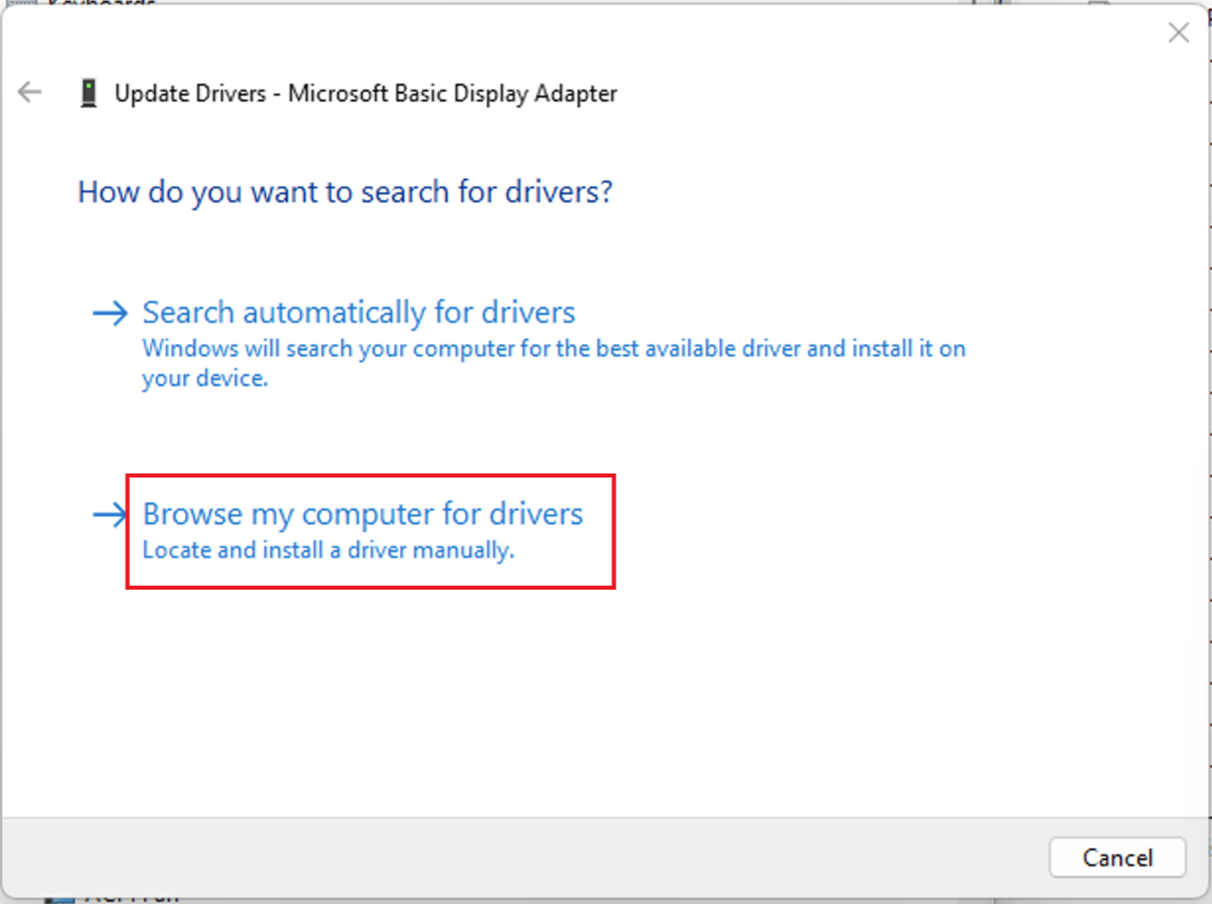
- Choose “Browse my computer for drivers”.
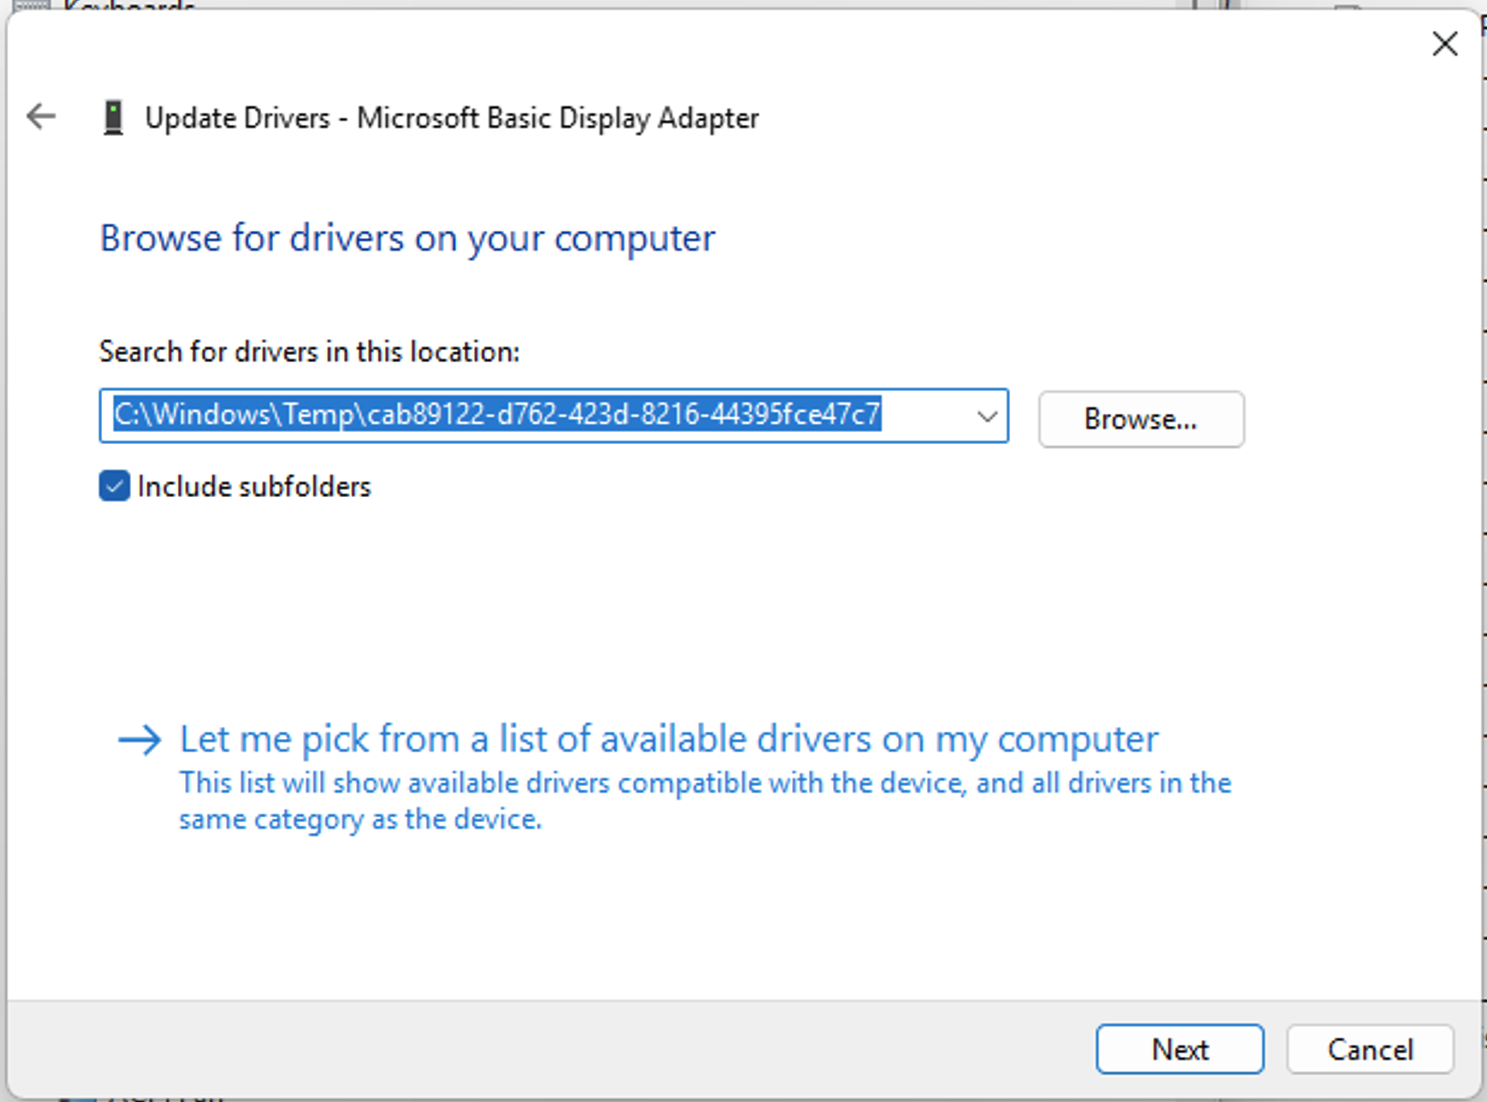
- Navigate to the Windows\Temp folder you used earlier to save the Nvidia graphics driver and click “Next”.
- The driver should be successfully installed for the external dGPU in the enclosure.

- Delete the Nvidia installer folder in Windows\Temp.
- Restart the PC.
- Select “Update Driver”.
- Once the PC boots into Windows, open the Device Manager.
- Wait a few minutes and confirm that both the laptop Nvidia GPU and the external dGPU are listed without any errors.
- Confirm the external dGPU is able to output to the connected monitor.
- Allow a few minutes for the external monitor to update.

