To properly configure the Razer Chroma Addressable RGB Controller, you need to download and install Razer Synapse. This will allow you to access in-depth lighting customization options and integrate games and applications across your ARGB and Razer Chroma-enabled devices.
Once successfully installed, launch Razer Synapse.
The list below shows the different tabs in Razer Synapse and the instructions on how to configure your Razer Chroma ARGB Controller properly.
Select a tab
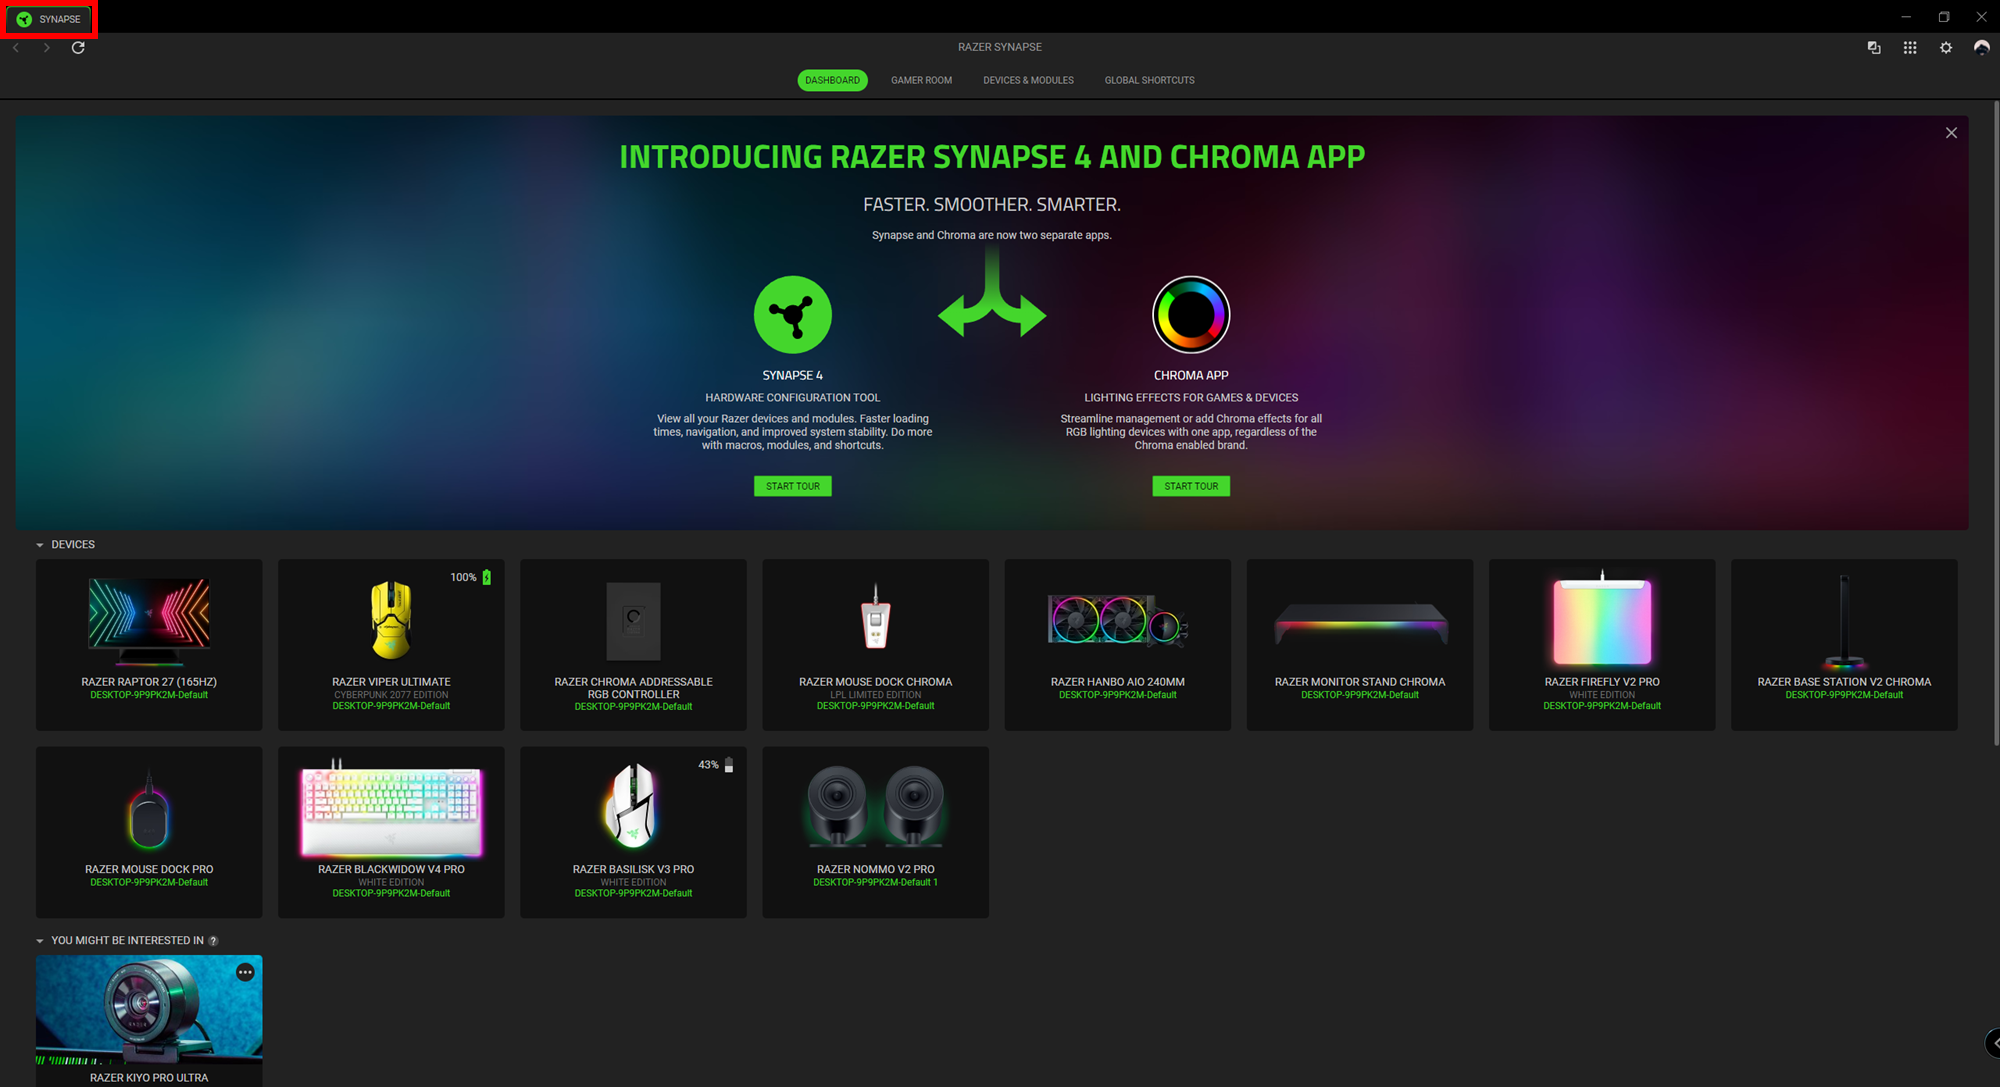
SYNAPSE TAB
The SYNAPSE tab is your default tab after launching Razer Synapse. This tab shows the DASHBOARD, GAMER ROOM, DEVICES & MODULES, and GLOBAL SHORTCUTS subtabs.
DEVICE TAB
The device tab is the main tab for your Razer Chroma ARGB Controller. From here, you will be able to configure the properties of connected ARGB strips or devices, customize ARGB LED strip bends (if applicable), and the lighting effect of any or all connected devices. Changes made under this tab are automatically saved to your system and cloud storage.
CUSTOMIZE
The CUSTOMIZE subtab displays all ports with connected ARGB strips or devices. This shows the type of ARGB strip or device connected to each port and identifies the number of LEDs on each connected ARGB device.

Auto-Detect / Manual Detection
By default, the ARGB controller is set to Auto-detect ( ). This allows Razer Synapse to automatically detect all ports with connected ARGB devices on startup.
When a device is connected or disconnected from any port, click on the Refresh button ( ) to manually trigger device detection on all ports. Active ports will then be re-displayed, while all inactive ports will be removed.
Port
Active ports will automatically be displayed together with the estimated LED count of their corresponding strip or device.
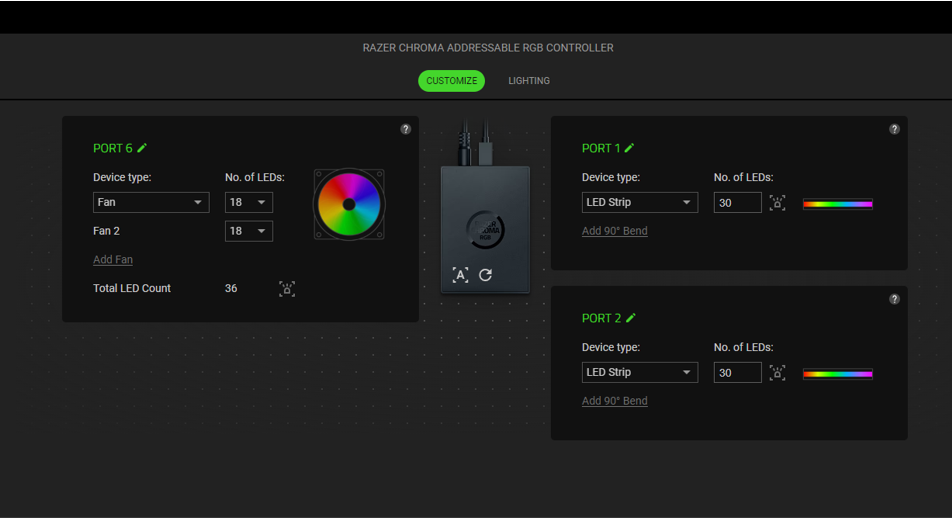
On each active Port, the following settings can be modified:
- Device Type - Determines the type of device connected to a corresponding port.
- No. of LEDs - Sets the number of LEDs a connected device will have. By default, Razer Synapse detects the number of LEDs each connected strip or device has.
- Add 90o bend (for LED Strips only) - Allows you to strategically mimic how an LED strip is bent on your physical setup. Each LED strip can be bent up to four (4) times.
Note: These bends are essential if you want to customize specific sections on any LED strip separately. However, LED-specific customizations can only be made using the Chroma Studio module.
LIGHTING
The Lighting subtab enables you to customize the lighting of any or all connected ARGB strips or devices.
PROFILE
A Profile is a data storage for keeping all your Razer devices’ settings. By default, the profile name is based on your system’s name. To add, import, rename, duplicate, export, or delete a profile, simply press the profile’s corresponding Miscellaneous button (IMG).
BRIGHTNESS
You can turn off the lighting of each connected ARGB strip or device by toggling the BRIGHTNESS option or adjusting the luminance on any port by using its corresponding slider. Alternatively, you can enable Global Brightness if you want to adjust a single brightness setting for all ports.
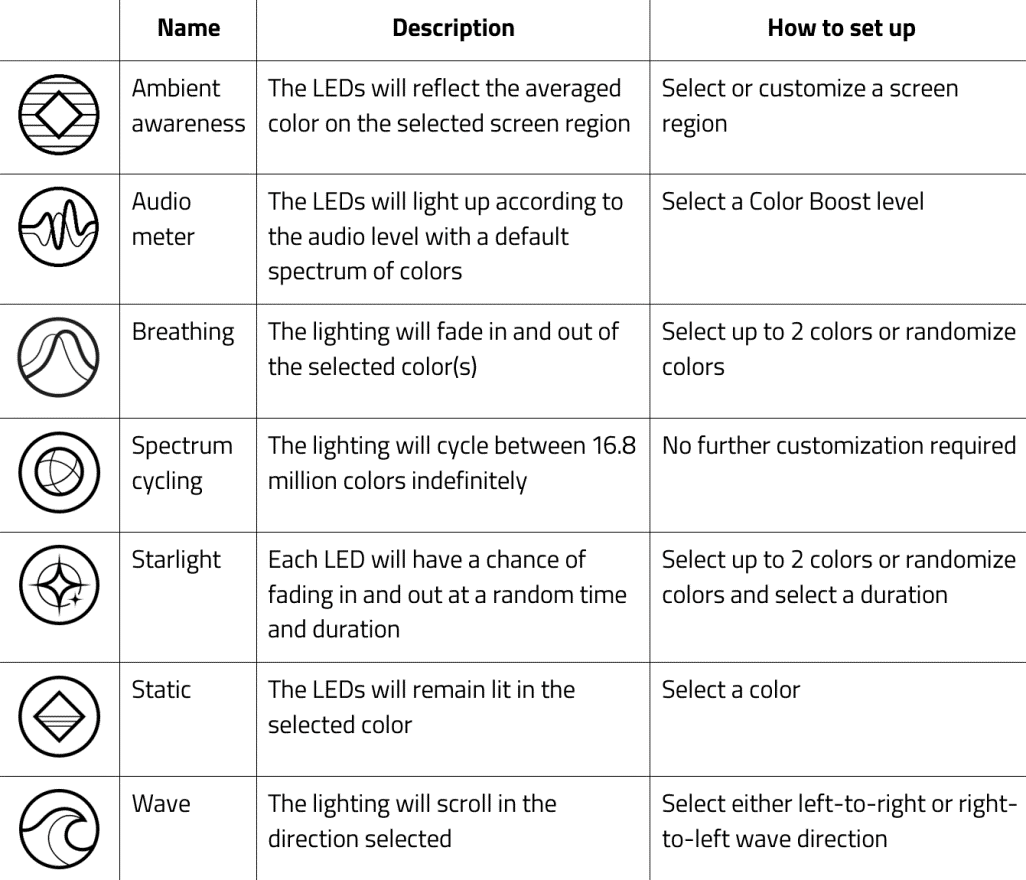
QUICK EFFECTS
A number of effects can be selected and applied to all connected LED strips and/or devices, as listed here:
If you have other supported Razer Chroma-enabled devices, you can synchronize their quick effects with your Razer device by clicking the Chroma Sync button (IMG).
Note: Only devices that support the selected lighting effect will synchronize.
ADVANCED EFFECTS
The Advanced Effects option allows you to choose a Chroma Effect you want to use on your Razer Chroma-enabled device. To start making your own Chroma Effect, press the Chroma Studio button (IMG).
SWITCH OFF LIGHTING
This is a power-saving tool that allows you to disable all lighting in response to your system’s display turning off.
PROFILES TAB
The Profiles tab is a convenient way of managing all your profiles and linking them to your games and applications.
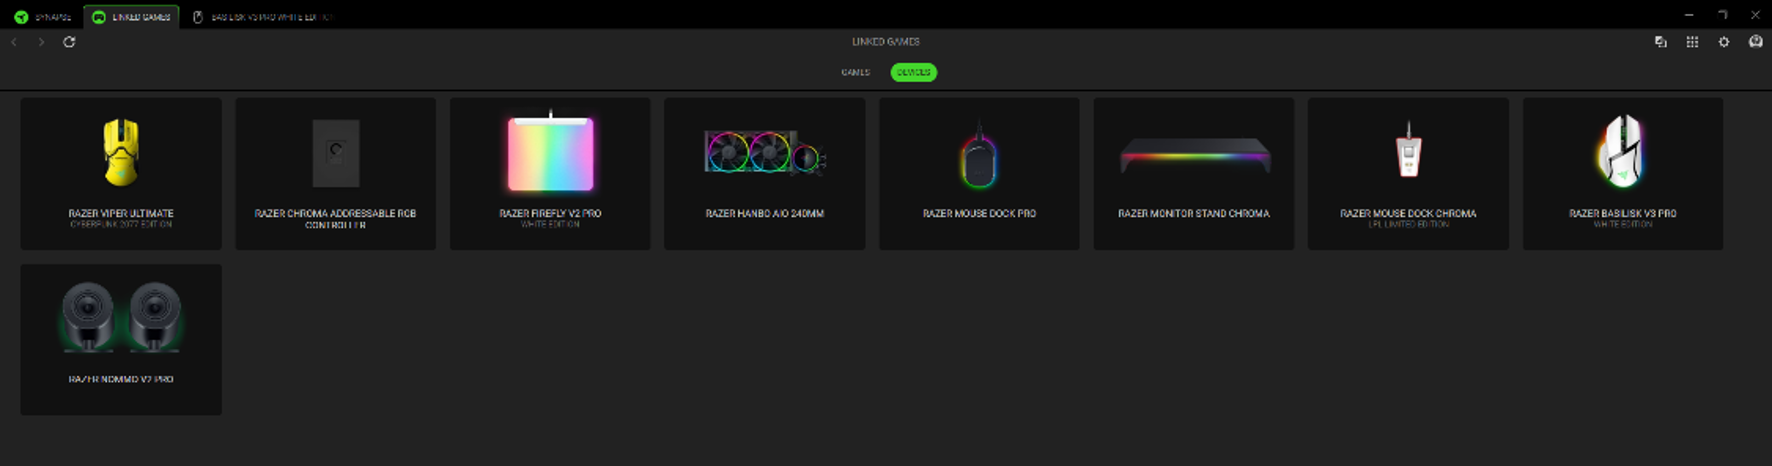
DEVICES
View which games are linked to each device’s profiles or which Chroma Effect is linked to specific games using the DEVICES subtab.
You can import Profiles from your computer or from the cloud through the import button (IMG) or create new profiles within the selected device using the add button (IMG). To rename, duplicate, export, or delete a profile, simply press the Miscellaneous button (IMG). Each profile can be set to automatically activate when you run an application using the Linked Games option.
LINKED GAMES
The LINKED GAMES subtab gives you the flexibility to add games, view devices that are linked to games, or search for added games. You can also sort games based on alphabetical order, last played, or most played. Added games will still be listed here even if it is not linked to a Razer device.
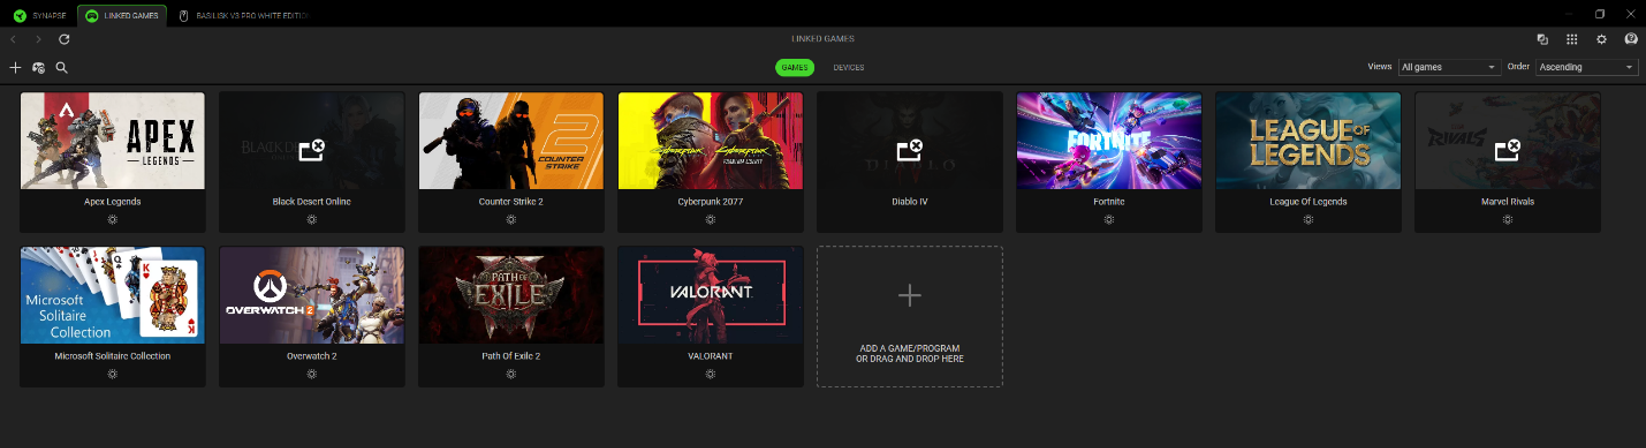
To link games to connected Razer devices or Chroma Effects, simply click on any game from the list, and then click Select a device and its profile to launch automatically during gameplay to select the Razer device or Chroma Effect it will link with. Once linked, you can click on the Miscellaneous button (IMG) of the corresponding Chroma Effect or device to select a specific Chroma Effect or profile.
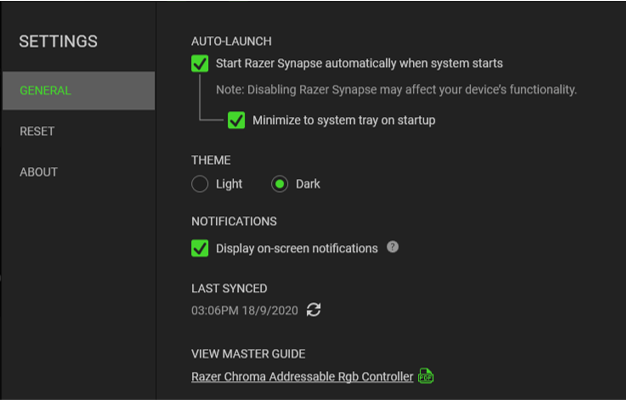
SETTINGS WINDOW
The SETTINGS window, accessible by clicking the (IMG) button on Razer Synapse, enables you to configure the startup behavior and display language of Razer Synapse, view the master guides of each connected Razer device, or perform a factory reset on any connected Razer device.