
Every BSOD is accompanied by a memory dump. This means when Windows crashes, it dumps whatever it is holding in the system memory to a file and saves the file on your hard drive for debugging purposes. When enabled, a memory dump will be created after a BSOD occurs.
To enable a memory dump, follow the steps below:
-
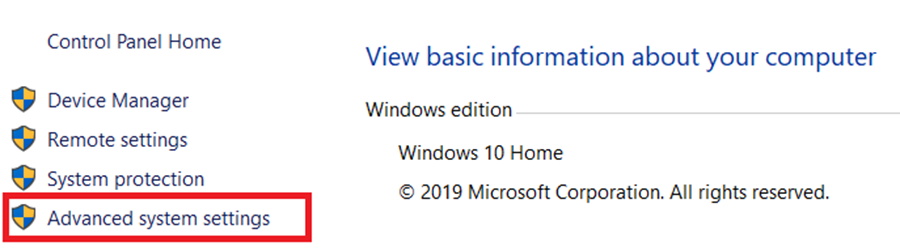
Open Control Panel > System and Security > System.

-
Select "Advanced system settings" under "Related settings".
-
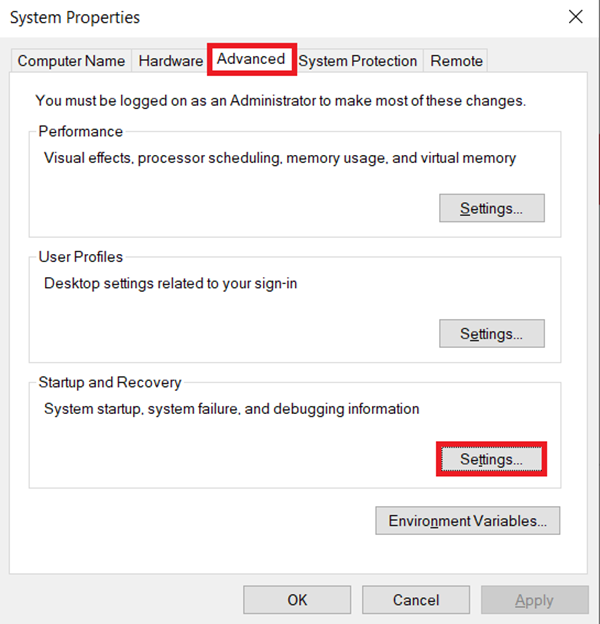
Go to the "Advanced" tab.
-
Click on "Settings" under "Startup and Recovery".
-
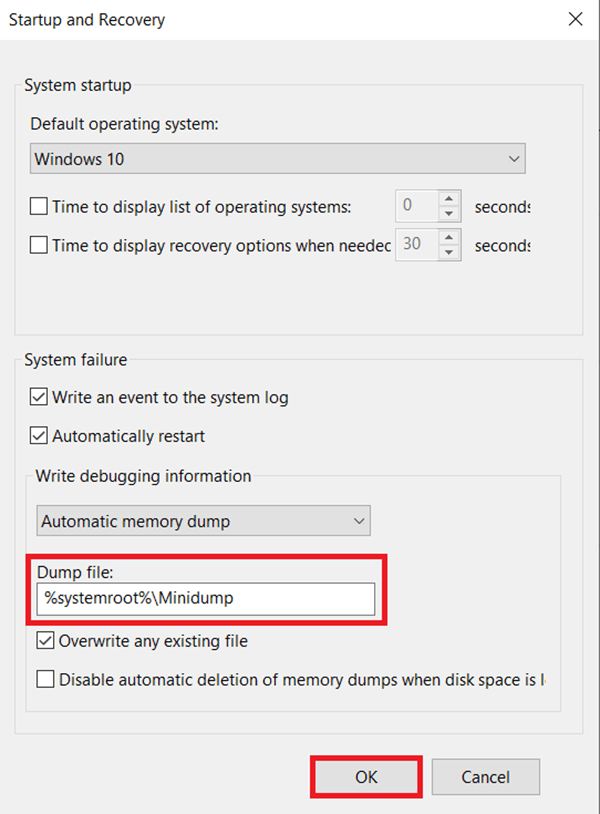
Set the "Write debugging information" to "Complete memory dump".

-
Set the directory to "%systemroot%\Minidump" and click "OK".
A memory dump is now enabled and a DMP file should be created when the system crashes.
To retrieve the memory dump file.
-
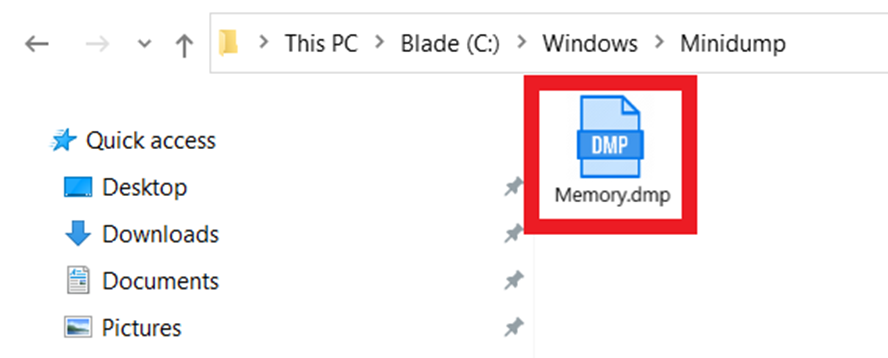
Go to "C:\Windows\Minidump".
-
Send the file and attach it to the case.
Note: A complete memory dump is the largest memory dump type as it contains a copy of all the data used by Windows in physical memory at the time of the crash. To reduce its size, you can zip the file before sharing. For a guide on how to upload files larger than 25 MB, see How to upload and share files larger than 25 MB with Razer Support.

