Proper disassembly and packing of the Razer Iskur X are as important as the proper assembly of the chair. It is to prevent damages while being stored or transported.
Tools needed:
- Rubber mallet
- Hex key “N”
- Microfiber cloth
- Penetrating lubricant
- Penknife
You can view the video below for instructions.
Below are the steps on how to disassemble the Razer Iskur X:
Note: It is recommended to put the chair over a smooth work surface to protect it from scratch and any other types of damage during the process.
-
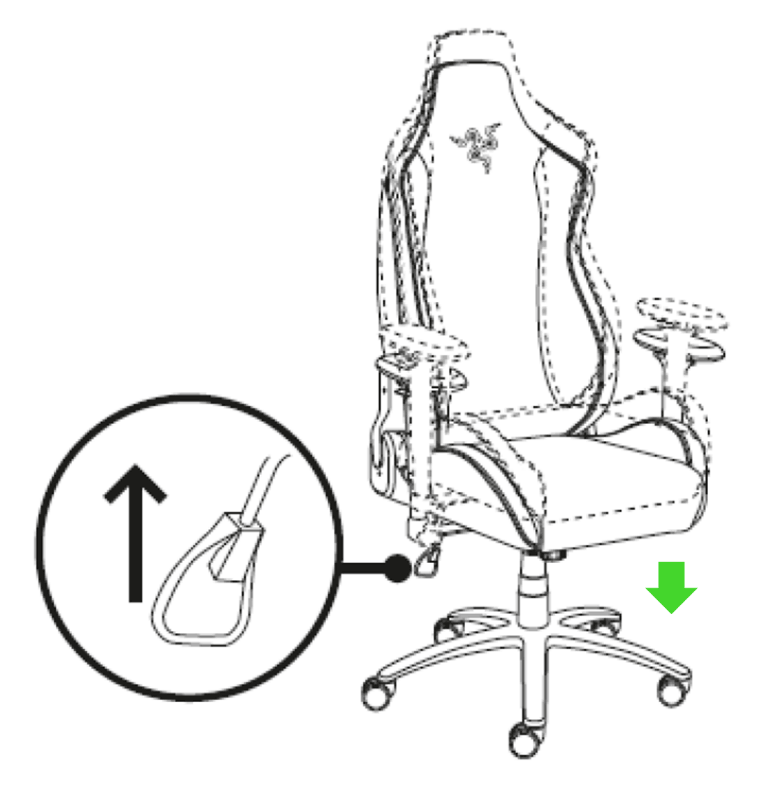
Straighten the backrest.

-
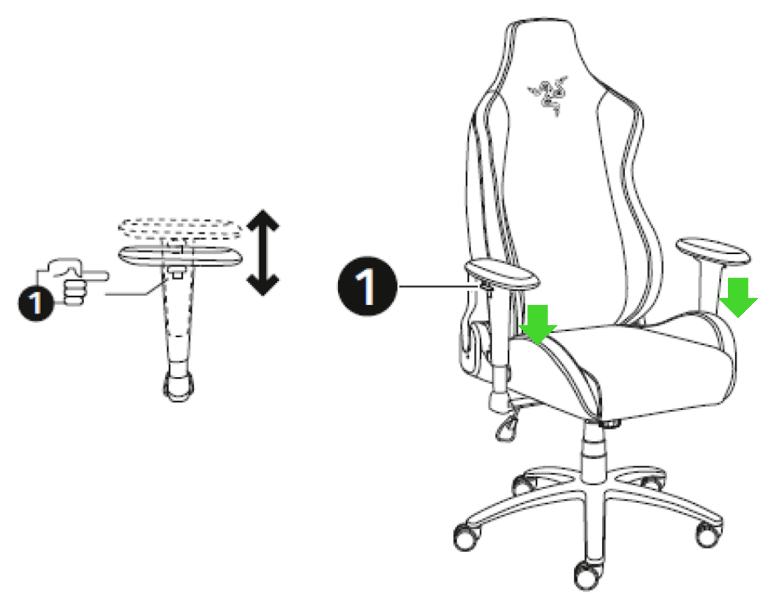
Align both armrests straight and adjust to the lowest height.
-
Set the chair to its lowest height.
-
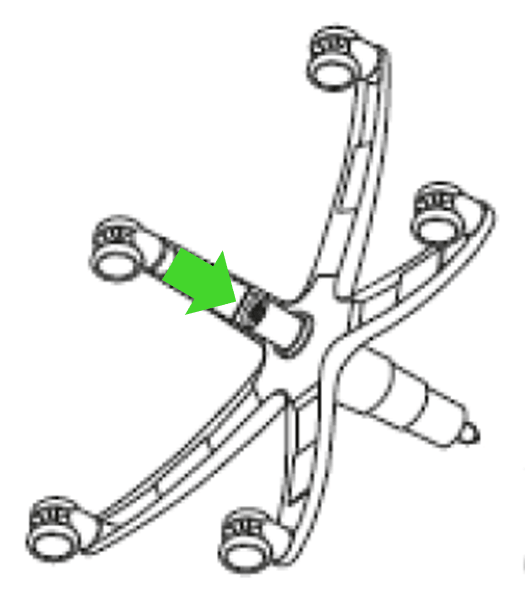
Turn the chair upside down. Grab the base “C” then pull out the caster wheels “F”. If the caster wheels “F” is difficult to pull out, you need to apply some penetrating lubricant between the wheel and wheelbase and leave it for five minutes before trying again.

-
Apply some penetrating lubricant between the gas lift cylinder “I” and wheelbase “C” and leave it for five minutes.
-
Dislodge the cylinder “I” by hitting it with the rubber mallet wrapped in a microfiber cloth. Make sure you hit only the outer rim of the gas lift cylinder and avoid using too much force when hammering.
-
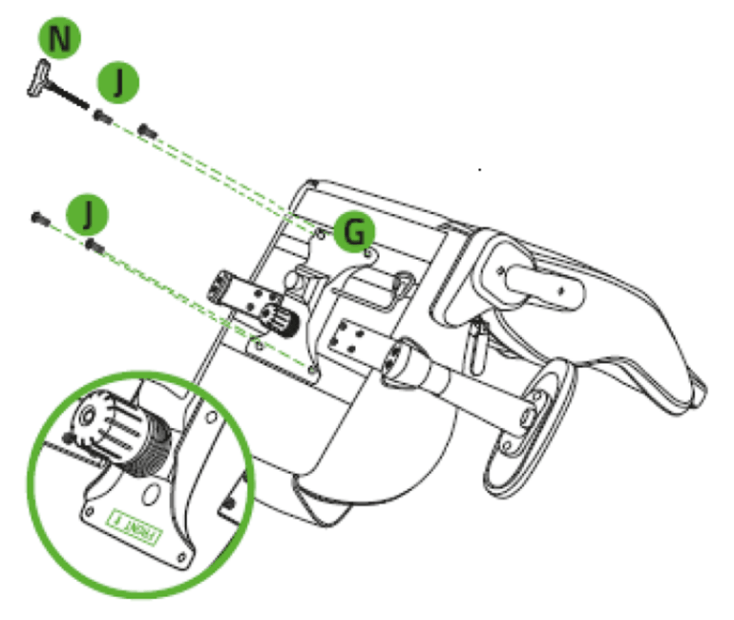
Detach the tilt mechanism “G” by unfastening the screws “J” using the hex key “N”.
-
Apply some penetrating lubricant between the gas lift cylinder “I” and tilt mechanism “G” and leave it for five minutes.
-
Remove the gas lift cylinder “I” from the tilt mechanism “G” by gripping it firmly and hitting the tilt mechanism “G” with the rubber mallet wrapped in a microfiber cloth. Then, separate the cylinder cover “H” from the cylinder “I”.

-
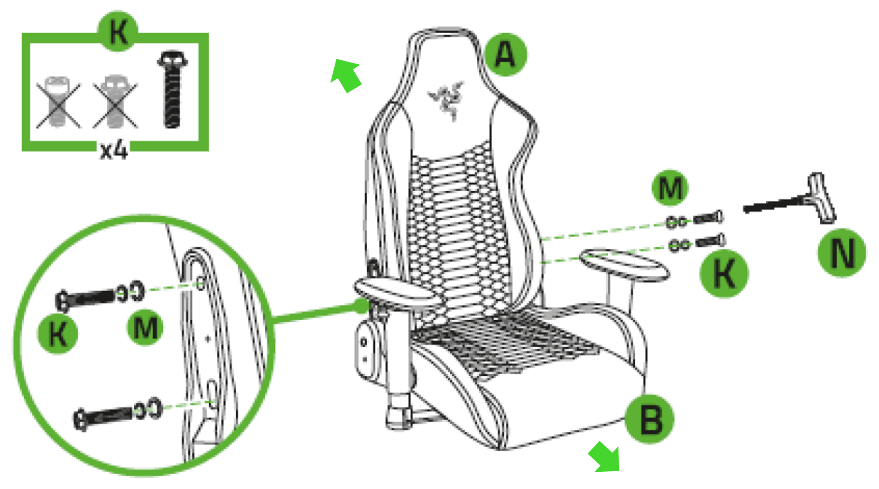
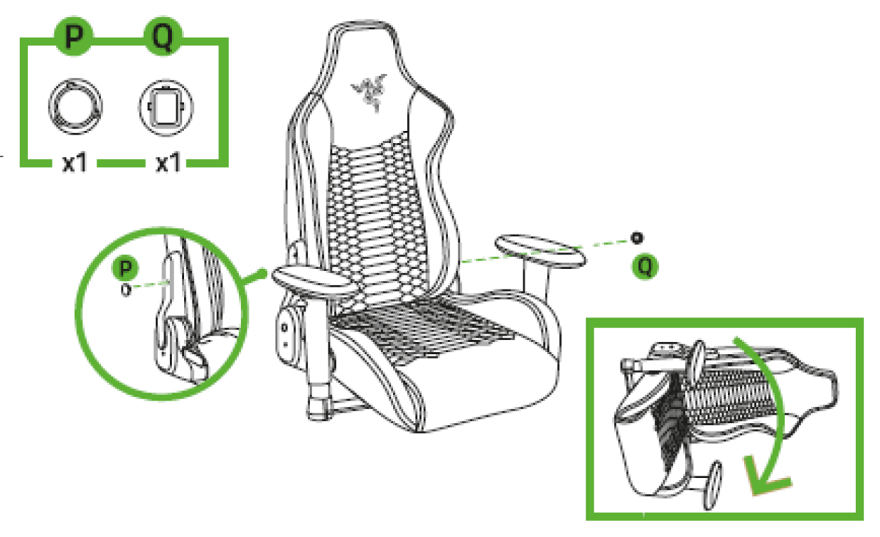
Remove the plastic screw caps “P” and “Q” using a penknife.
-
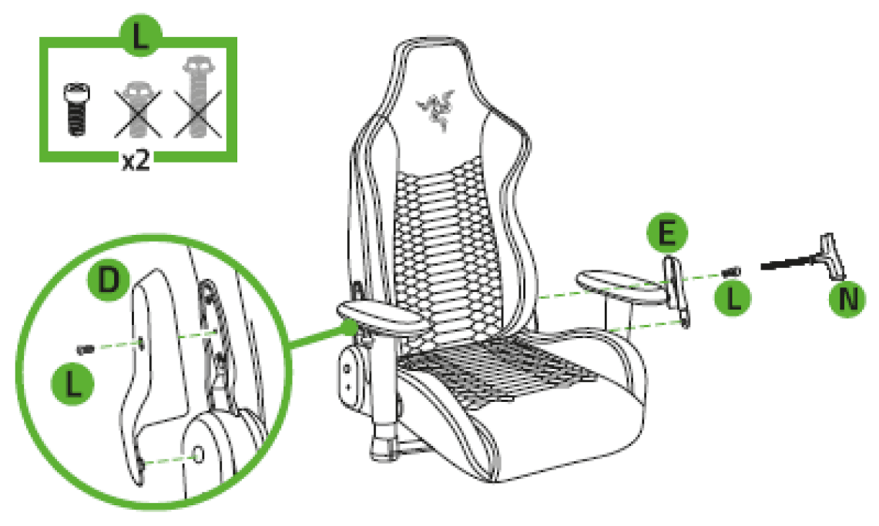
Unfasten the screws “L” to remove the side covers “D” and “E”.
-
Unfasten the screws “K” on the support brackets to detach the backrest “A” from the seat “B”.