
The Razer PWM PC Fan Controller allows you to customize the fan speed of up to eight PWM Case fans.
You can view the video below for instructions or review a copy of the video transcript.
Follow the steps below to set up the Razer PWM PC Fan Controller.
-
Connect up to eight 4-pin PWM case fans to the Razer PWM PC Fan Controller.

-
Connect the Razer PWM PC Fan Controller to the SATA port of your power supply unit using the SATA to DC power cable.

-
Connect the Razer PWM PC Fan Controller to a USB header using the included micro-USB to USB pin header cable. Refer to your motherboard’s user manual for the location of the USB headers.

-
Attach the Razer PWM PC Fan Controller to any metallic surface of your PC’s chassis using its magnetized base. The magnetized base will adhere only to steel surfaces, not aluminum and lead.

-
Open Razer Synapse and adjust your fan speed.
Fan modes:
-
Quiet
-
Normal
-
Performance
-
Manual
-
Advanced
These modes provide different RPM levels for your fans, allowing you to adjust thermal performance inside your PC.
Note: "Advanced" mode offers more customization, allowing you to fine-tune the fan speed to your preferences, while "Manual" mode provides a fixed fan speed.
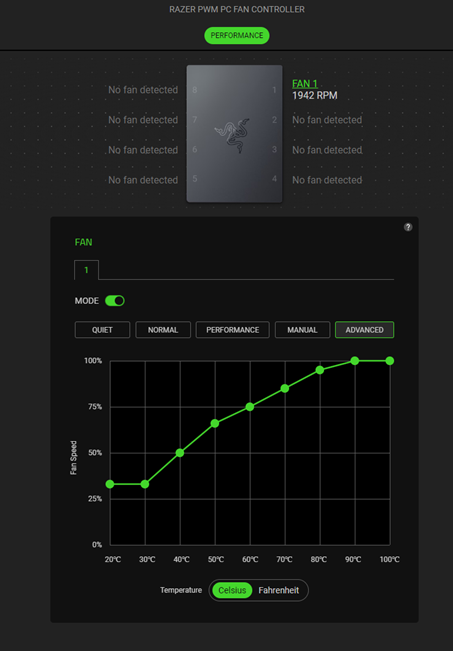
Advanced mode 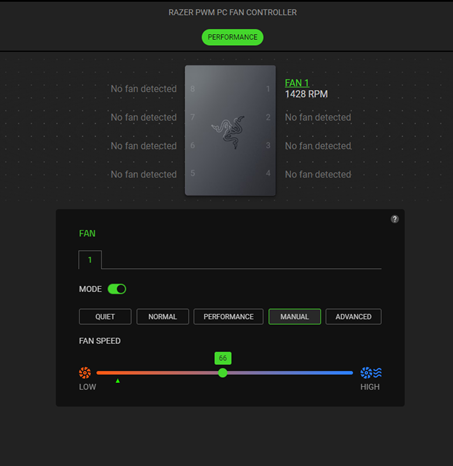
Manual mode -

