You can view the video below for instructions or review a copy of the video transcript.
Step-by-step process
- Ensure that your PC Case has enough space for the radiator of the Razer Hanbo All-In-One Liquid Cooler that you have. For mounting, we recommend the front intake position or top mounted position within your case, if applicable.
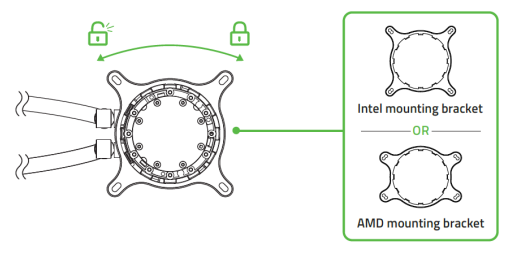
- Choose the appropriate mounting bracket for your CPU. Rotate the pre-installed bracket counterclockwise to unlock and remove, or clockwise to hold it in place.
- Attach the backplate to the bottom of the motherboard if applicable, and then install the appropriate standoff screws into the motherboard.

Note: Use the same standoff screws as LGA 115X/1366 if you are using an Intel LGA 1200 bracket.
- Align the AIO cooler with the standoff screws then secure it using the thumbscrew caps.

- Install your Razer Kunai Chroma fans onto your radiator using the fan screws.

Note: Do NOT over tighten or use any other screws except those that shipped with the radiator. Doing so can increase risk of damaging the radiator fins due to the length of other screws. Please only use the screws included with the radiator.
- Mount the radiator inside the PC chass then fasten it from the outside using the washers and the radiator screws. Refer to the image below for our suggested mounting positions.

Note: Do NOT over tighten or use any other screws except those that shipped with the radiator. Doing so can increase risk of damaging the radiator fins due to the length of other screws. Please only use the screws included with the radiator.
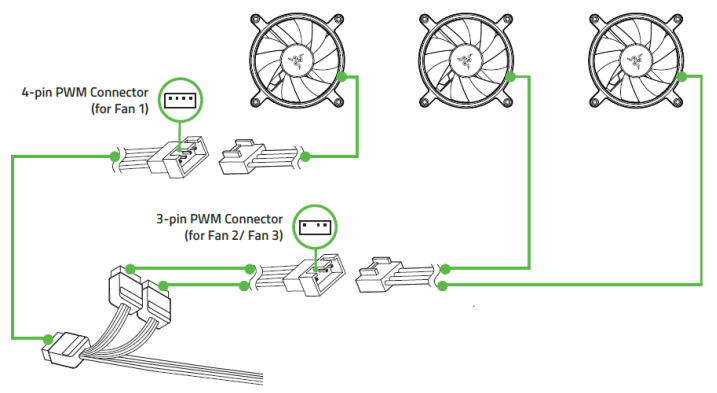
- Link one of the fans to the 12-pin breakout cable using the 4-pin PWM connector, then link the other fans in sequence using the 3-pin connector.
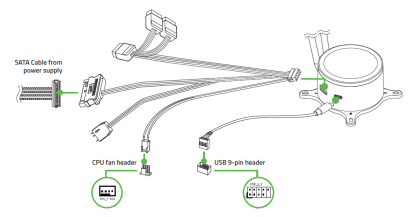
- Connect the USB Type-C cable and 12-pin breakout cable to your AIO cooler. Attach the rest of the connectors to the CPU fan header and USB 9-pin header of your motherboard and SATA cable from your power supply respectively.
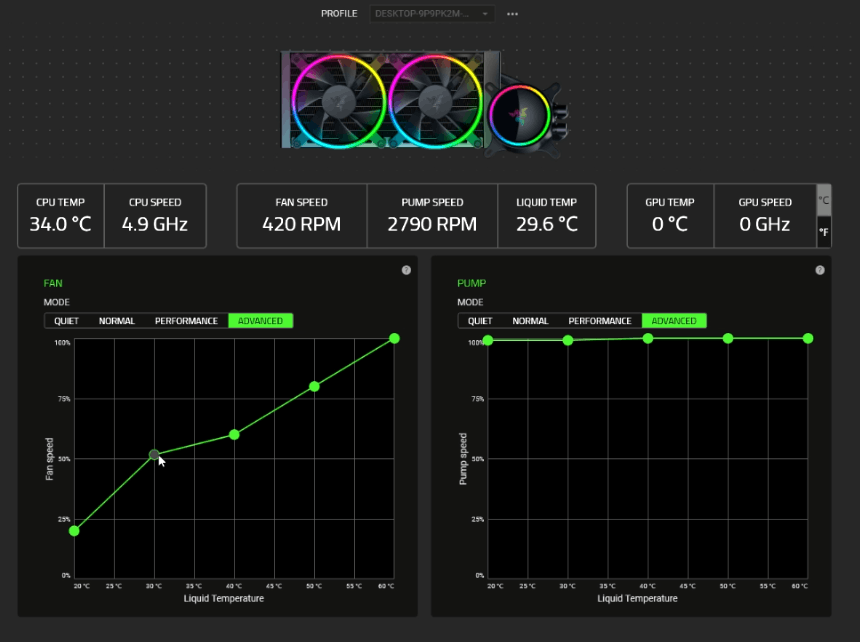
- Use Razer Synapse to access fan and pump speed adjustments, as well as lighting customization options.