
Select preferred action
Create a full backup with system image tool on Windows 10
-
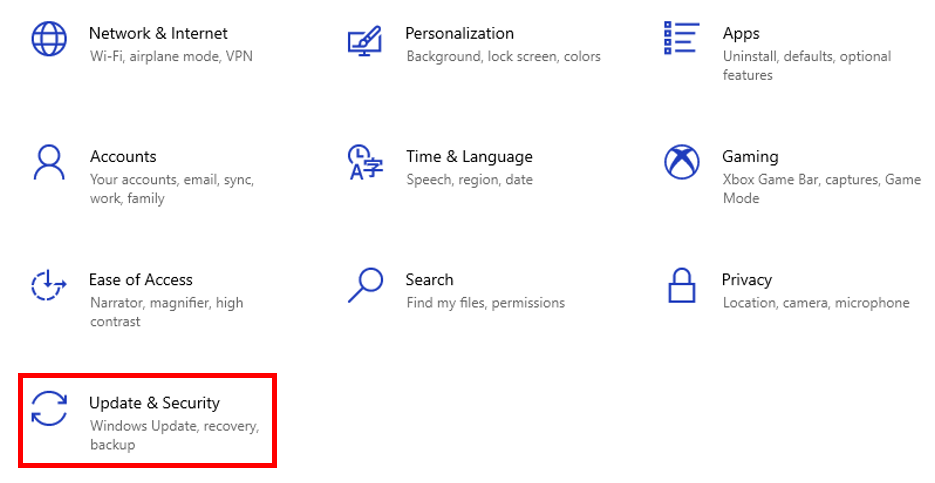
Click the “Start” icon and then click “Settings”.
-
Click “Update & Security”.
-
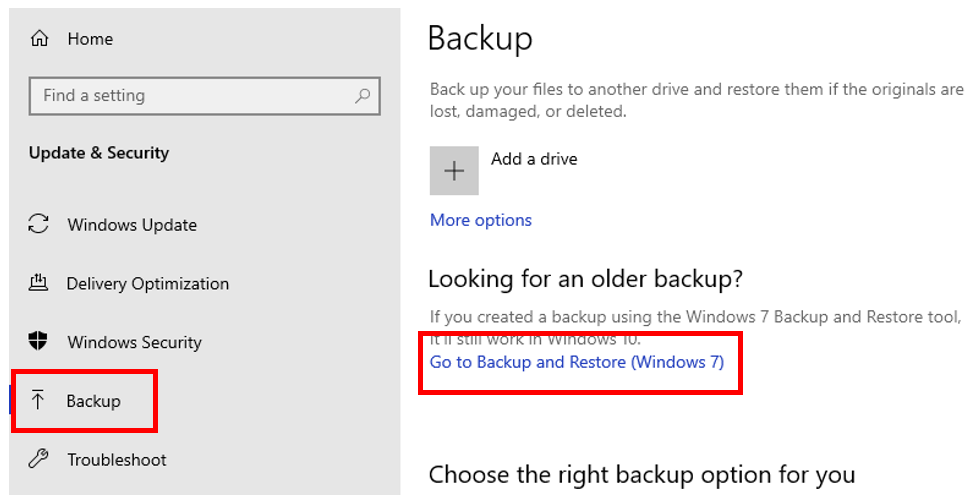
Click “Backup”.
-
Click the “Go to Backup and Restore (Windows 7)” in the "Looking for an older backup?" section.
-
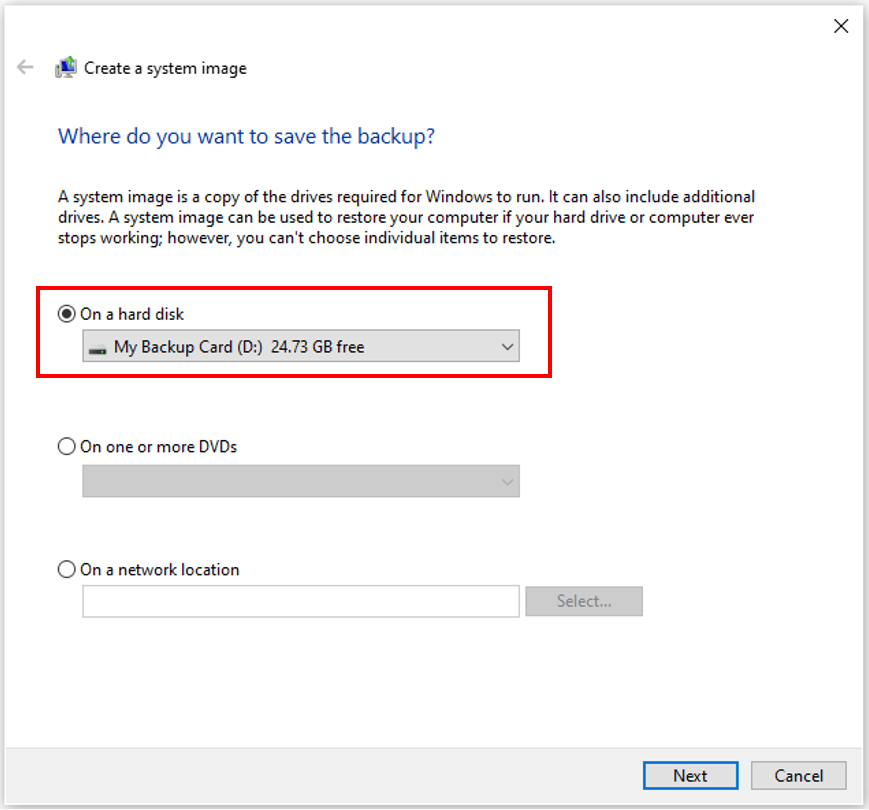
Click “Create system image”.

-
Click “On a hard disk”.
-
Choose the location to export the Windows 10 full backup.
-
Click “Next”.
Note: Select any additional hard drives to include them in the backup.
-
Click “Start backup”.
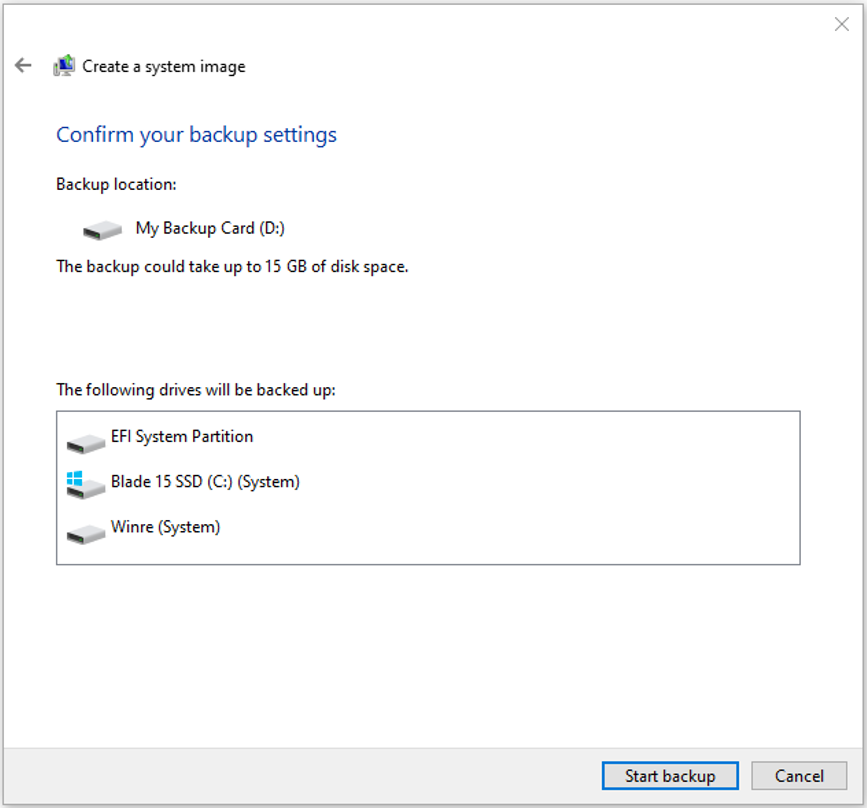
Note: Skip the prompt to create a system repair disc. To restore the machine, use a USB installation media to access the recovery environment.
Once the process is complete, the image tool will create a backup image of the entire Razer Blade system.
Restore a backup with system image tool on Windows 10
-
Connect the drive with the full backup to the device.
-
Connect the Windows 10 USB bootable drive to the Razer Blade.
-
Power the Razer Blade on.
-
On the USB bootable drive startup prompt, press any key to continue.;
-
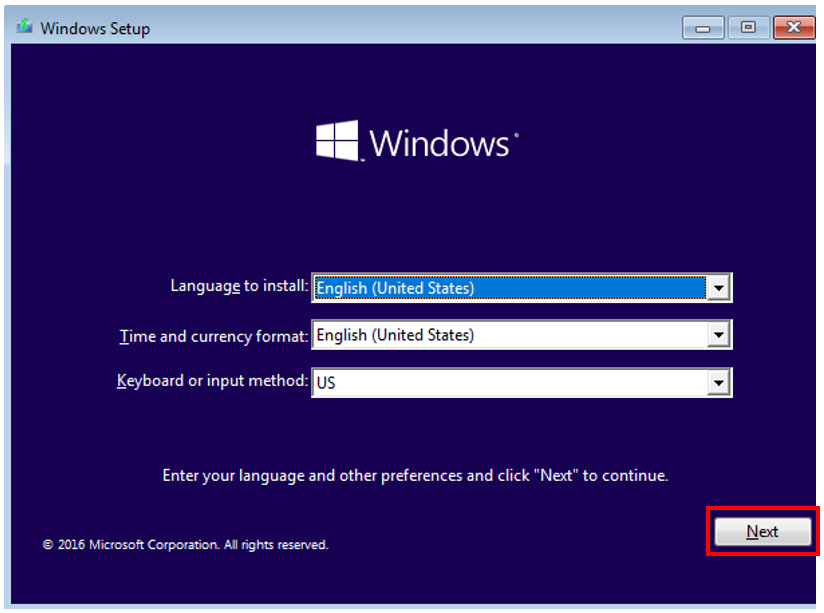
Click “Next” on the Windows Setup page.
-
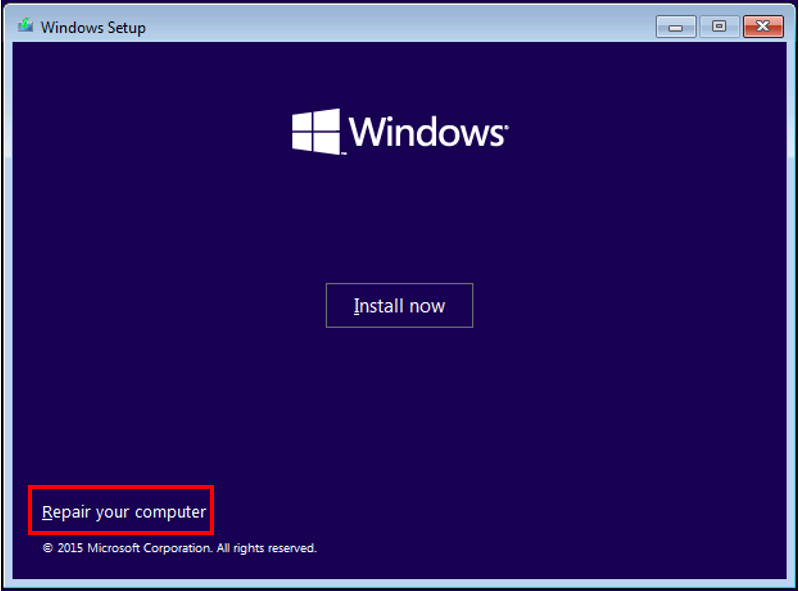
Click “Repair your computer”.
-
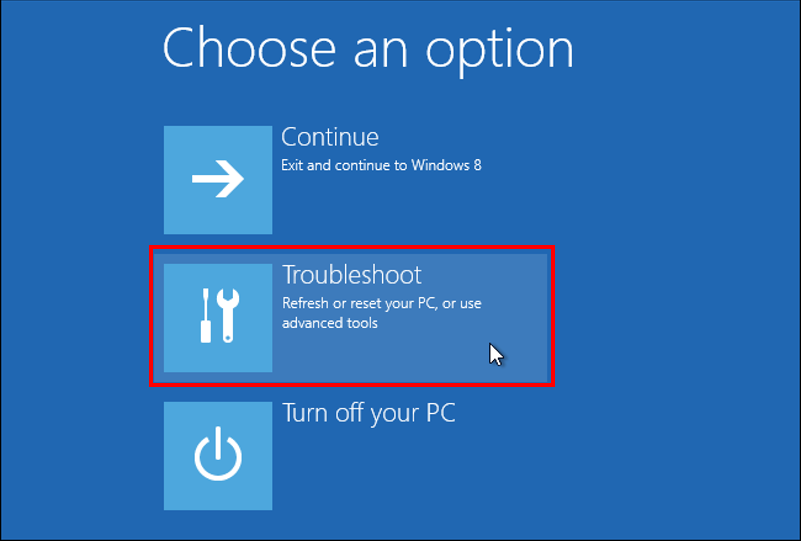
Click “Troubleshoot”.
-
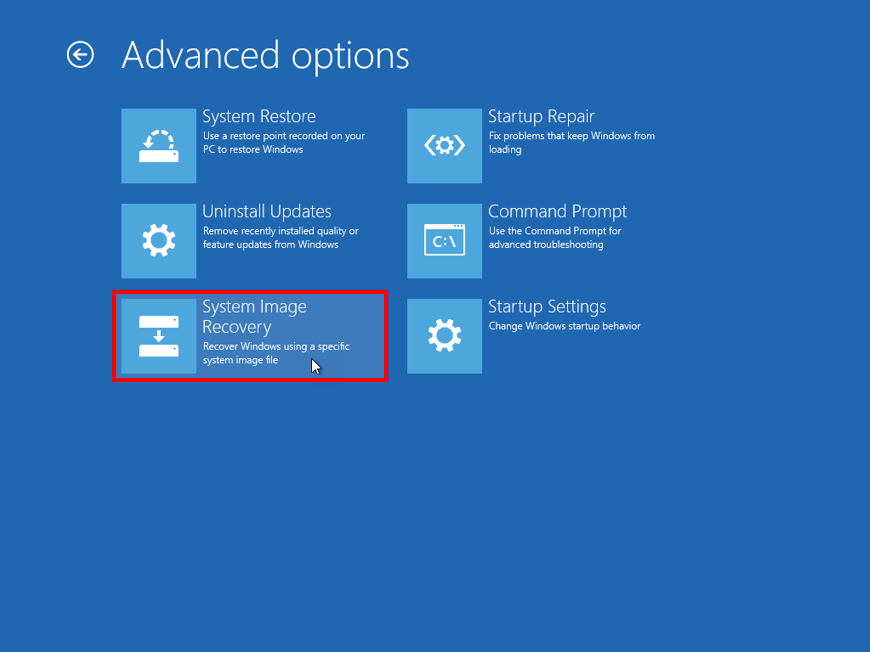
Click “System Image Recovery”.
-
Select “Windows 10” as the target OS.
-
Follow the on-screen instructions to complete the system restore process.

