
Supported devices:
- Razer Blade 16” (2026) | RZ09-0581x
- Razer Blade 18” (2025) | RZ09-0529x
- Razer Blade 16” (2025) | RZ09-0528x
- Razer Blade 14” (2025) | RZ09-0530x
- Razer Blade 18” (2024) | RZ09-0509x
- Razer Blade 16” (2024) | RZ09-0510x
- Razer Blade 14” (2024) | RZ09-0508x
- Razer Blade 18" (2023) | RZ09-0484x
- Razer Blade 16" (2023) | RZ09-0483x
- Razer Blade 15" (2023) | RZ09-0485x
- Razer Blade 14" (2023) | RZ09-0482x
- Razer Blade 17" (2022) | RZ09-0423x
- Razer Blade 15" (2022) | RZ09-0421x
- Razer Blade 14" (2022) | RZ09-0427x
BitLocker protects your data from any attempts of unauthorized access. This feature has two types: device encryption and drive encryption.
Follow the steps below to enable device encryption on your Razer Blade. For instructions on enabling drive encryption, see the answer below.
Note: Device encryption is available and enabled by default on Windows Home and Pro devices that support Modern Standby.
Select preferred action
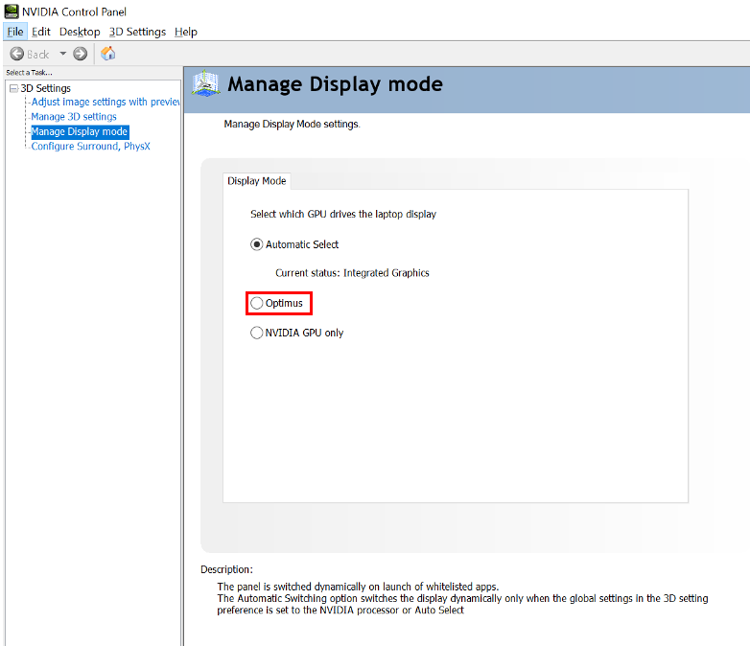
Ensure your system is in NVIDIA Optimus mode
-
Open the NVIDIA Control Panel.
-
Go to "Manage Display mode" under "3D Settings".
-
Select "Optimus" under "Display Mode".
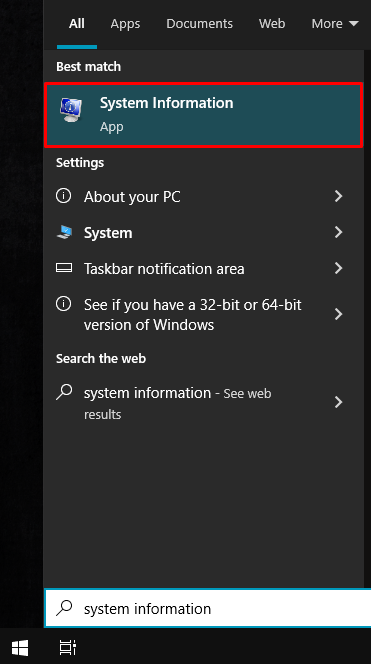
Check for device encryption support
-
Press the Windows key or click Start.

-
Search for "System Information".
-
Right-click then select “Run as administrator”.

-
Check "Device Encription Support" under "System Summary". Device encryption is available on your device if the value shows "Meets prerequisites".

See the answer below for more details.
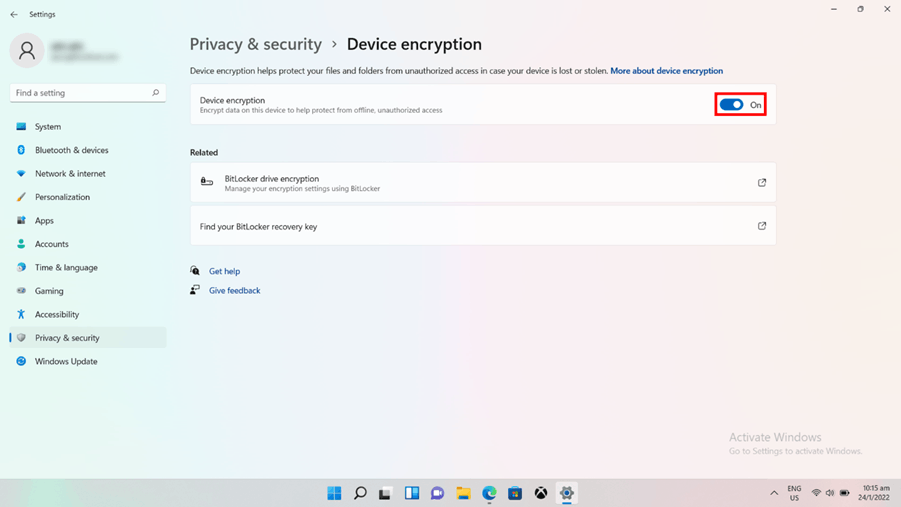
Enable device encryption
-
Go to Settings > Privacy & security > Device encryption.
-
Toggle “Device encryption” on.
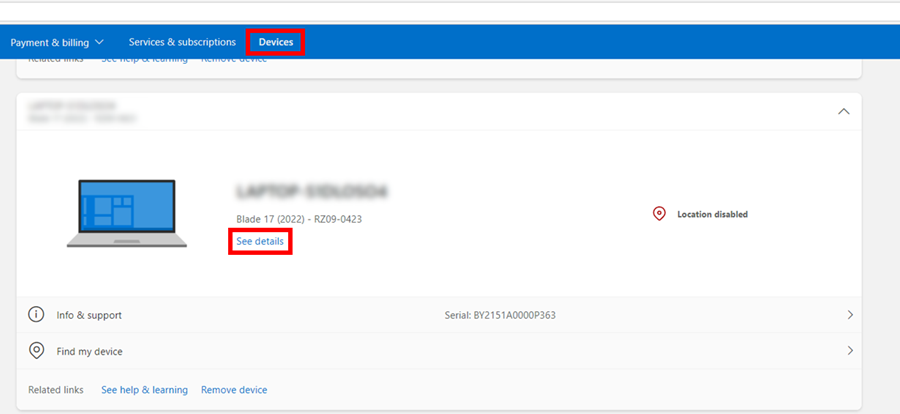
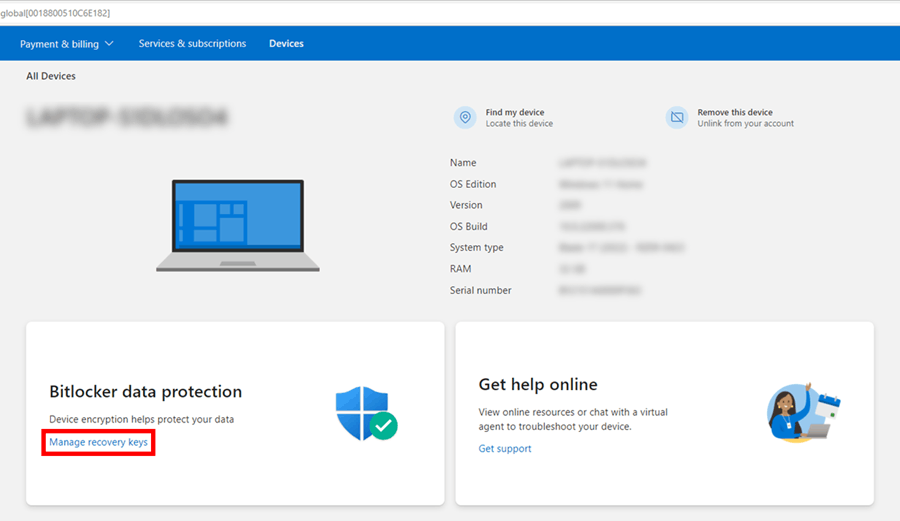
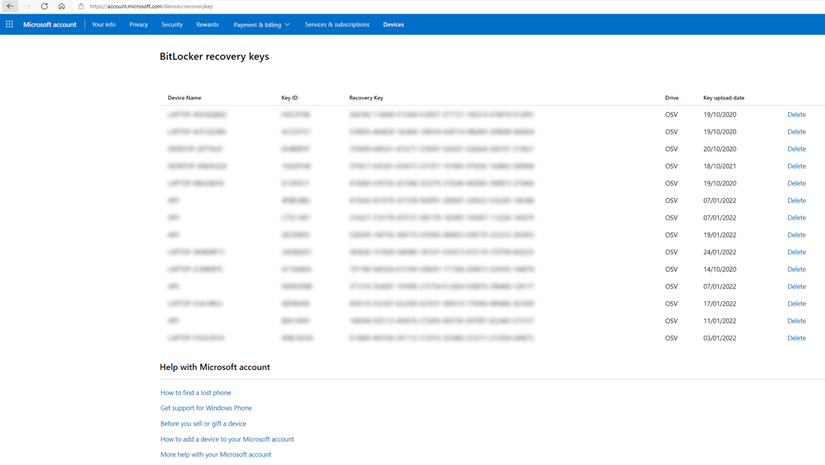
Find the recovery keys
-
Sign in to your Microsoft account.
-
Go to “Devices”.
-
Click on “See details”.
-
Click on “Manage recovery keys”.
-
Find the recovery key from the list.
Access the encrypted drive
-
Open an encrypted drive.
-
Input the 48-digit recovery key in the dialog box.
-
Click on “Unlock”.
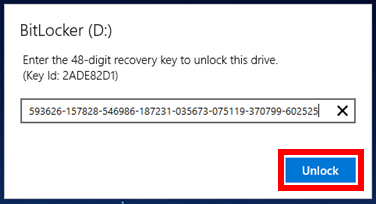
You can now access the stored data in your drive.
For more information on device encryption in Windows, see the following Windows support pages:

