
Applicable models:
Razer Blade models
- Razer Blade 18" (2026) | RZ09-0582x
- Razer Blade 16" (2026) | RZ09-0581x
- Razer Blade 18" (2025) | RZ09-0529x
- Razer Blade 16" (2025) | RZ09-0528x
- Razer Blade 14" (2025) | RZ09-0530x
- Razer Blade 18" (2024) | RZ09-0509x
- Razer Blade 16" (2024) | RZ09-0510x
- Razer Blade 14" (2024) | RZ09-0508x
- Razer Blade 18" (2023) | RZ09-0484x
- Razer Blade 16" (2023) | RZ09-0483x
- Razer Blade 15" (2023) | RZ09-0485x
- Razer Blade 14" (2023) | RZ09-0482x
- Razer Blade 17" (2022) | RZ09-0423x
- Razer Blade 15" (2022) | RZ09-0421x
- Razer Blade 14" (2022) | RZ09-0427x
BitLocker protects your data from any attempts of unauthorized access. This feature has two types:
- Device encryption: available and enabled by default on Windows Home and Pro devices that support Modern Standby.
- Drive encryption: available on Windows 10 and Windows 11 Pro, Enterprise, and Education devices.
Follow the detailed instructions below to check if your Razer Blade supports device encryption, and to enable device encryption or drive encryption.
Step-by-step Process
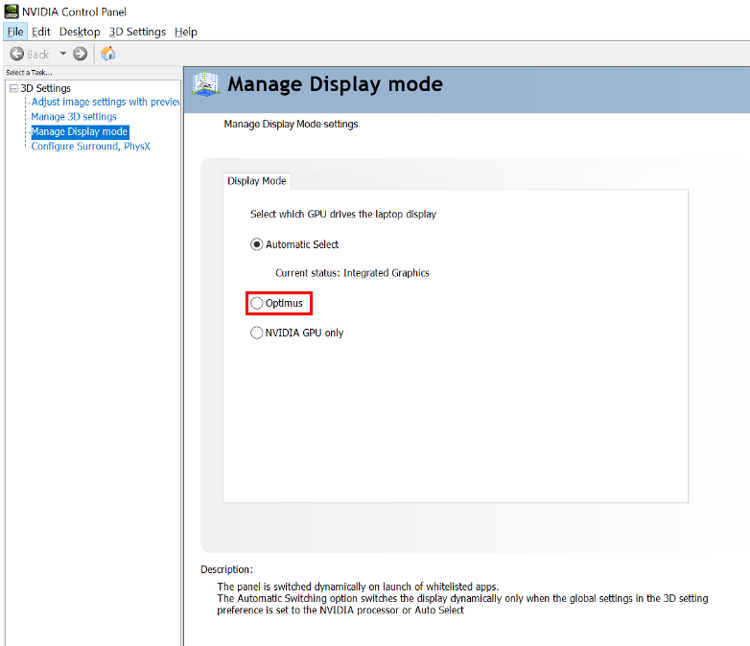
Ensure your system is in NVIDIA Optimus mode
Open the NVIDIA Control Panel.
Go to "Manage Display mode" under "3D Settings".
Select "Optimus" under "Display Mode".
Check for device encryption support
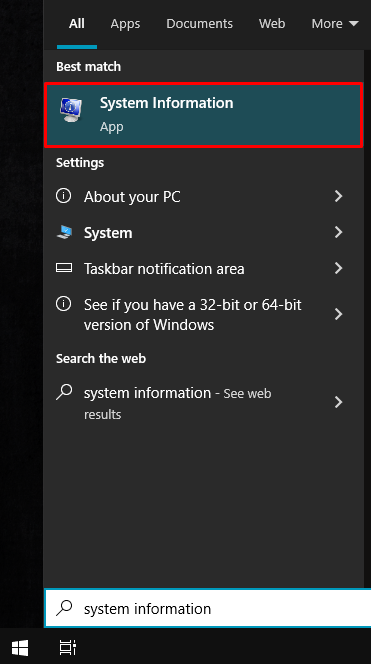
Press the Windows key or click Start.

Search for "System Information".
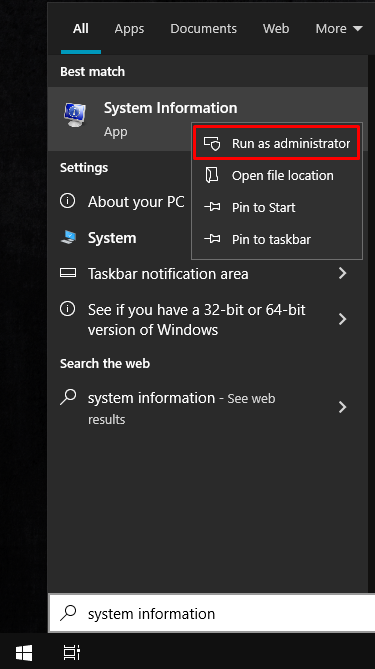
Right-click then select “Run as administrator”.
Check "Device Encryption Support" under "System Summary". Device encryption is available on your device if the value shows "Meets prerequisites".

System Information item values
When "Dedicated GPU only" is selected in BIOS:
"Reasons for failed automatic device encryption: PCR7 binding is not supported, Un-allowed DMA capable bus/device(s) detected, Disabled by policy"

When NVIDIA Optimus or Dynamic Switching is selected:
"Meets prerequisites"

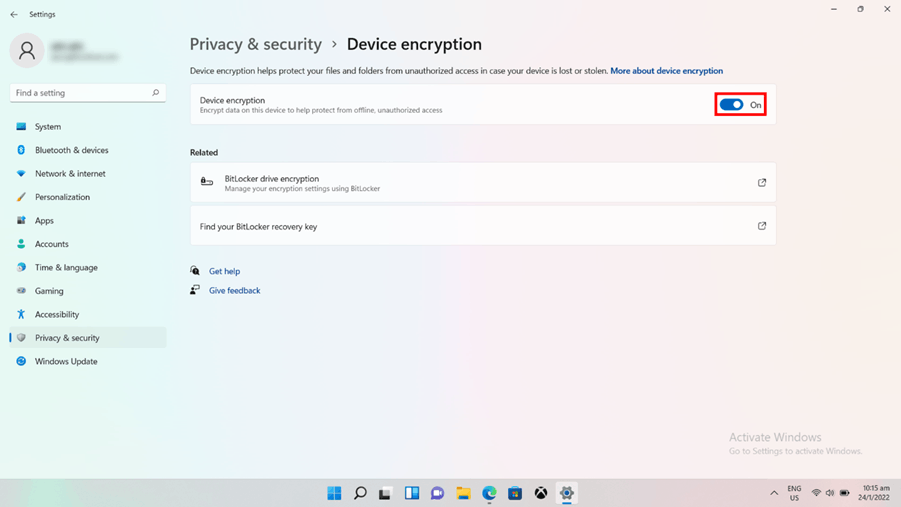
Enable device encryption
Go to Settings > Privacy & security > Device encryption.
Toggle “Device encryption” on.
Enable drive encryption
Note: Drive encryption is available on Windows 10 and Windows 11 Pro, Enterprise, and Education devices.
Press the "Windows" key or click "Start".
Search for "BitLocker".
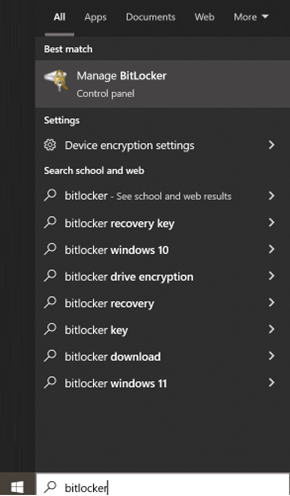
Select “Manage BitLocker”.
Select “Turn on BitLocker” and follow the onscreen instructions.
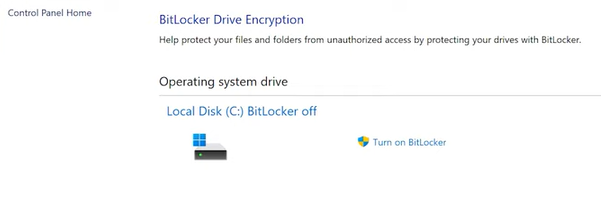
Once enabled, a prompt asking for your recovery key will appear if Windows detects an unauthorized user accessing your drive.
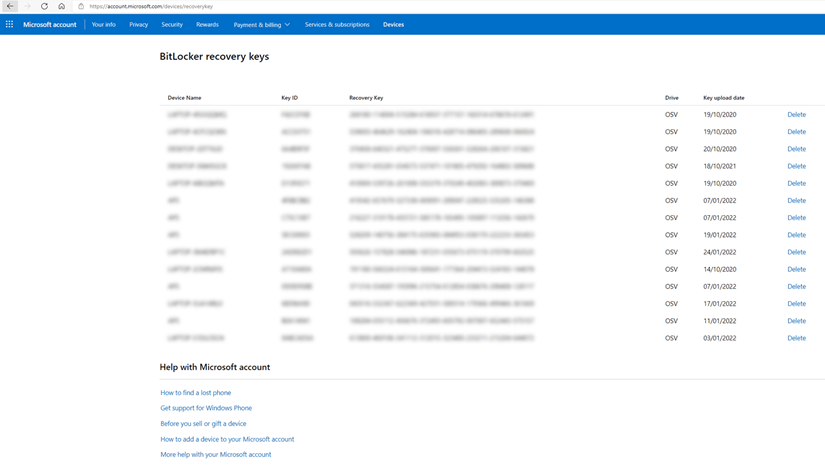
Find the recovery keys
Sign in to your Microsoft account.
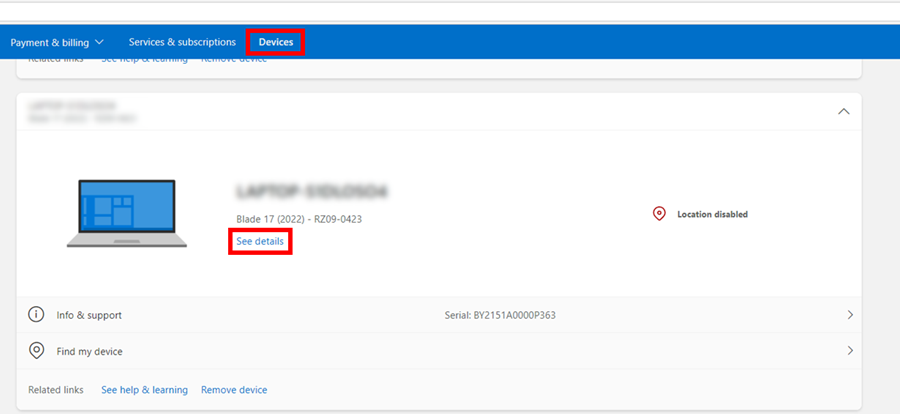
Go to “Devices”.
Click on “See details”.
Click on “Manage recovery keys”.
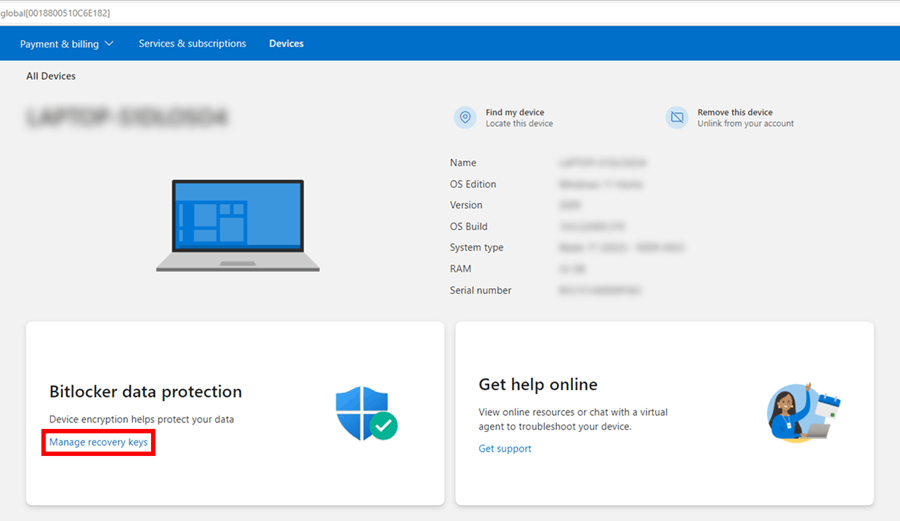
Find the recovery key from the list.
Access the encrypted drive
Open an encrypted drive.
Input the 48-digit recovery key in the dialog box.
Click on “Unlock”.
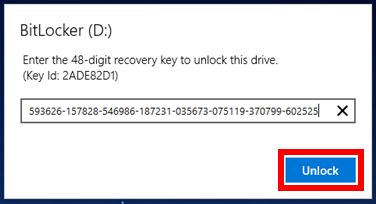
You can now access the stored data in your drive.
For more information on device encryption and BitLocker recovery keys in Windows, see the following Windows support pages:

