
The Razer Audio Mixer requires OBS or XSplit to be installed on the system before audio input and output sources can be configured for streaming or recording.
You can view the video below for instructions or review a copy of the video transcript.
Follow the detailed instructions below to set up the Razer Audio Mixer with OBS or XSplit.
Select your streaming software
OBS
-
Run OBS.
-
Click on the plus “+” icon under “Sources”.

-
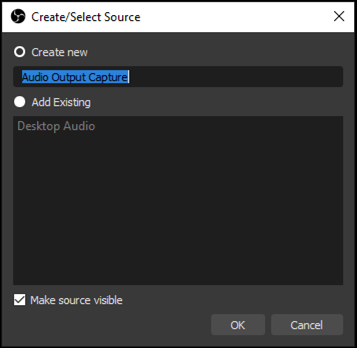
Select “Audio Input Capture”. You can either create a new or use an existing audio input capture.


-
Double click on the “Audio Input Capture” that you created.
-
Depending on what you plugged in or the mapping on the mixer, select one of the following:
-
Line (Razer Audio Mixer)
-
SPDIF Interface (Razer Audio Mixer)
-
Microphone (Razer Audio Mixer)
-
-
Click “OK”.

-
Repeat the steps for “Audio Output Capture”.

-
For the output, select either “Headphones (Razer Audio Mixer)” or “Line (Razer Audio Mixer)”.
-
Click “OK” and you are done with the setup.

XSplit
-
Run XSplit.
-
Click on “Tools” then select “Settings”.

-
Go to the “Audio” tab.

-
Click on “System Sound”.
-
Select either “Headphones (Razer Mixer)” or “Line (Razer Mixer)”.

-
As for the microphone, select one of the following:
-
Line (Razer Mixer)
-
SPDIF Interface (Razer Audio Mixer)
-
Microphone (Razer Mixer)
Depending on what you plugged in or the mapping on the mixer.
-
-
Click “OK” and you are done with the setup.


