
Applicable Model:
Important:- Internet connection is required for installation, updates, and cloud-based features.
- Registering for a Razer ID account is recommended but optional.
- All listed features are subject to change based on the current software version, connected devices, and supported apps and software.
Here is a step-by-step process on how to configure the Razer Stream Controller on Razer Synapse.
- Launch Razer Synapse.
- Select the Razer Stream Controller from the “DASHBOARD”.

- Navigate to the “HOME” tab.
- Click on “LAUNCH LOUPEDECK” to launch or download the Loupedeck Software and change the controller’s application profile using Razer Synapse.
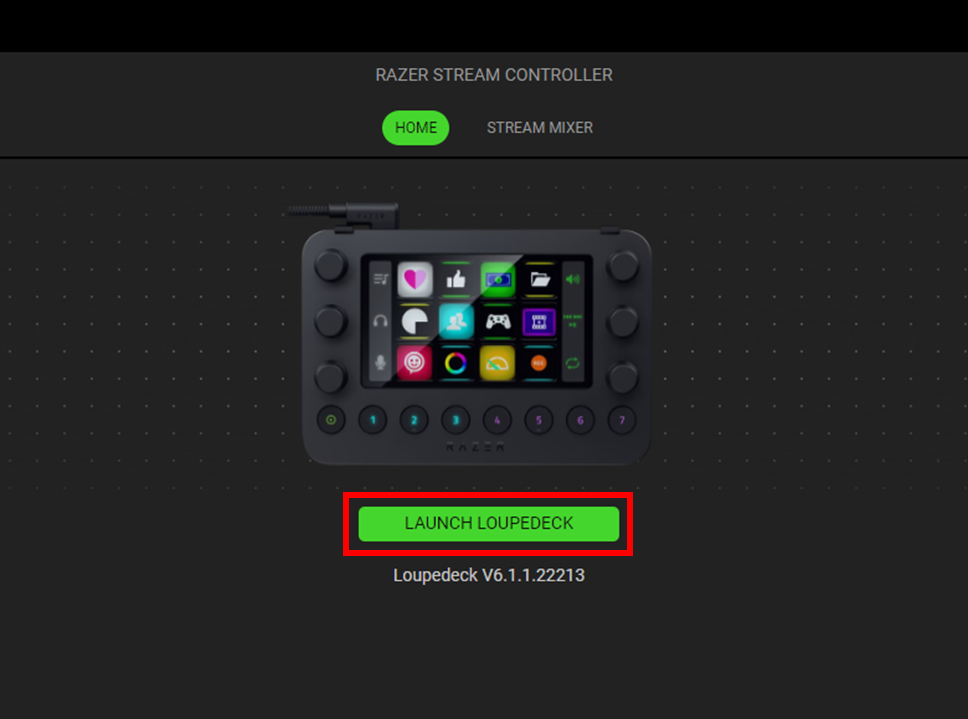
Note: A profile is a pre-configured workspace designed to make the controller immediately usable and compatible with the supported application that you are using.
- Install the Loupedeck Software to take control of the Razer Stream Controller’s profiles through Razer Synapse.
- Turn the Dynamic Mode OFF on the Loupedeck Software for the Razer Synapse app to have control over the controller’s profiles.
- Install the plugin works for application-specific profiles.
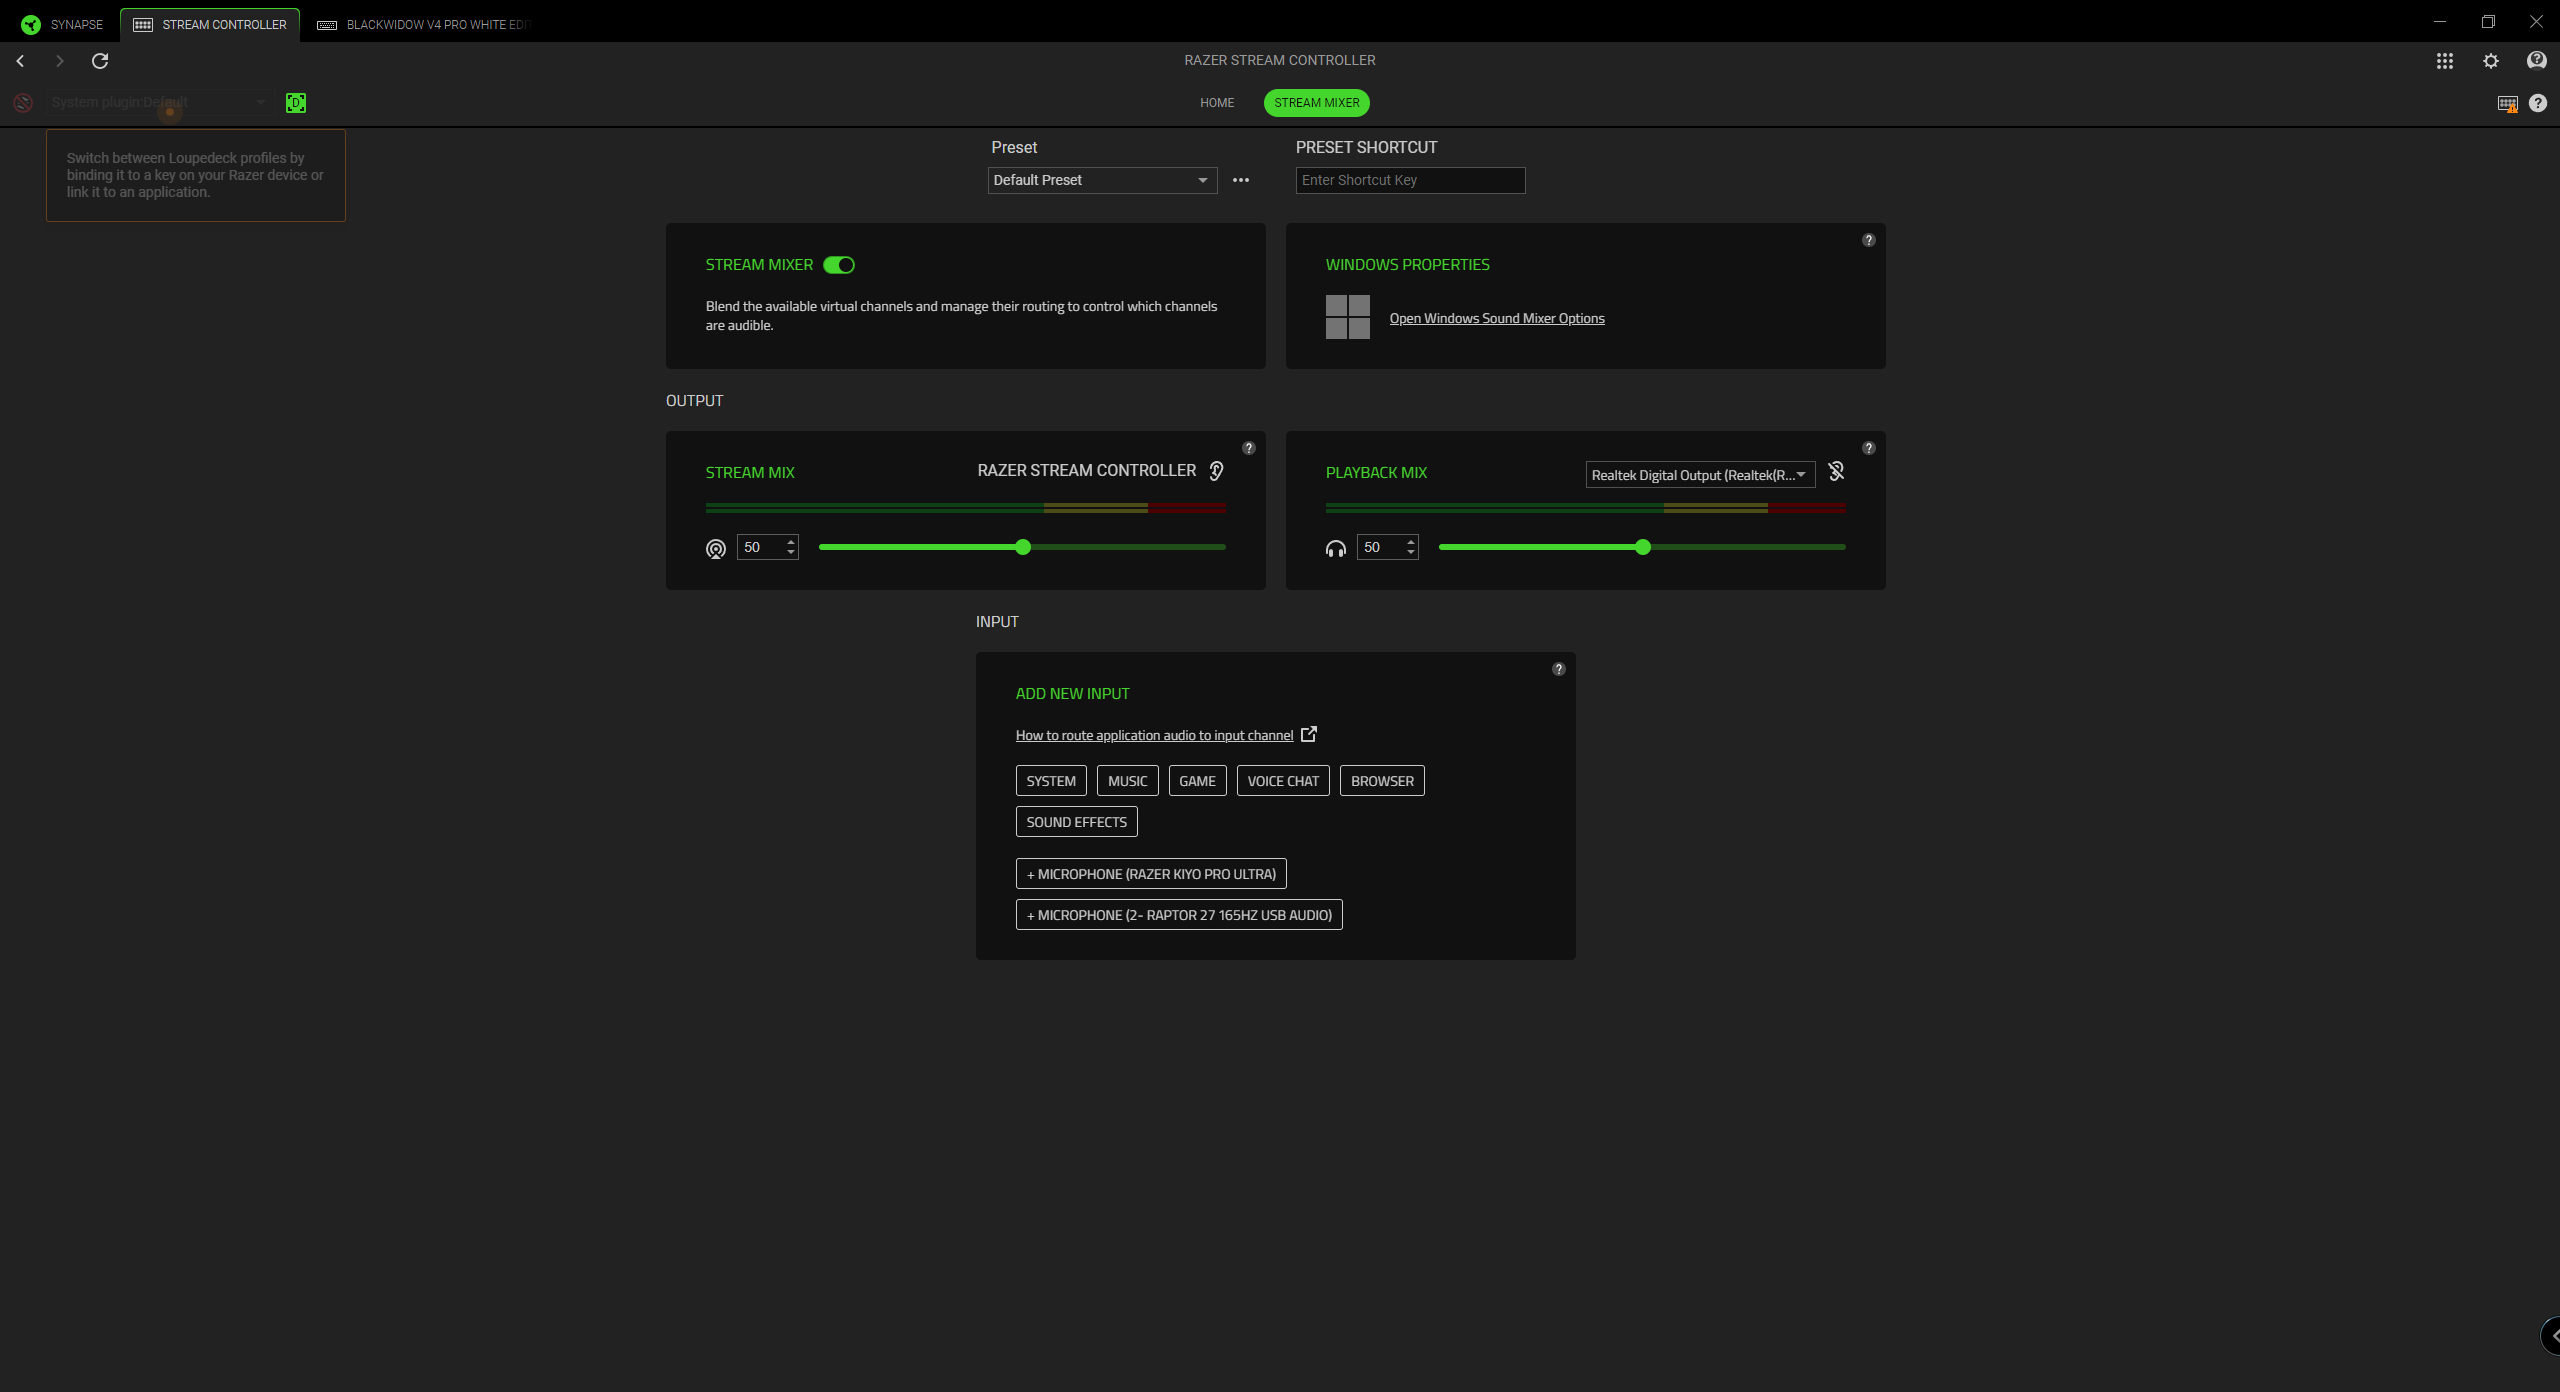
- Navigate to the “STREAM MIXER” tab to configure the Stream Mix and Playback Mix.
- Click “PROFILES” to manage all your profiles and link them to your games and applications.
- Click the “DEVICES” tab to view which games are linked to each device’s profiles or which Chroma Effect is linked to specific games.
- Click “LINKED GAMES” to do the following:
- Add games, view devices linked to games, or search for added games. See How to link to connected Razer devices or Chroma Effects on Razer Synapse for more details.
- Sort games based on alphabetical order, last played, or most played
Note: Added games will still be listed even if they are not linked to a Razer device.

