

Tips to help you get started
- Get the most out of your keyboard with Razer Synapse
- Create macros in Razer Synapse to use on a keyboard
- Configure lighting on your Razer keyboard with Razer Synapse
- Install or upgrade the Razer Chroma App
You can view the video below for instructions or review a copy of the video transcript.
From enthusiast-level customization to ultra-low-latency performance, the complete package has never come this compact. Meet the Razer BlackWidow V4 Mini HyperSpeed—a wireless, hot-swappable 65% keyboard powered by Razer Chroma RGB, complete with stealth pudding keycaps for maximum illumination.

Device Layout

- Function keys
- Sleep mode key
- On-the-fly macro record key
- Gaming mode key
- Backlight control keys
- Macro keys
- Volume control keys
- Media keys
- Charging/data port (USB Type C)
- Power indicator
- Mode switch (2.4/OFF/BT)
- Wireless USB dongle compartment
- Kickstand
Full Technical Specifications
| Category | Specification |
|---|---|
| Variation | Razer BlackWidow V4 Mini HyperSpeed |
| Keyboard Type | Wireless Hot-swappable 65% Gaming Keyboard |
| Design | 5052 Aluminum Alloy Top Case |
| Available switch type(s) | Razer™ Mechanical Switches Gen-3 (Tactile) |
| Switch Lifespan | 100-million keystroke lifespan |
| Keycaps | Razer Phantom Keycaps |
| Connectivity | Razer™ HyperSpeed Wireless (2.4 GHz), Bluetooth 5.0, or Type C |
| Wireless Response Rate | 1ms |
| Battery Life | 200 hours (0% brightness) |
| Backlighting | Razer Chroma™ RGB lighting with true 16.8 million customizable color options |
| Key Roll-over | N-key Rollover and Anti-ghosting |
| Fully Programmable Keys | Yes |
| Synapse | Razer Synapse 4 |
| Onboard memory | Hybrid on-board storage for up to 5 profiles |
| 1000Hz Ultrapolling | Yes |
| Additional Game Keys | No |
| Audio Pass-Through | No |
| Dedicated Media Controls | No |
| USB Pass-Through | No |
| Wrist Rest | None |
| Cable Type | Detachable USB-C to USB-A cable |
| Approx. Dimension LxWxH (mm) | 131 mm x 319 mm x 41 mm |
| Approx. Weight (grams) | 717 g |
How To
How do I connect the Razer BlackWidow keyboard?
See the answer below for detailed instructions.
How do I switch the connectivity mode of the Razer keyboard?
- Toggle between 2.4 and BT to switch the connectivity mode of the Razer BlackWidow V4 Mini HyperSpeed between 2.4 GHz and Bluetooth.
- Remove the wireless USB dongle from the dongle compartment.
- Connect it to your computer.

How do I remap keys or buttons on a Razer keyboard?
- Open Razer Synapse.
- Select the device that you want to customize.
- Click on the key or button you want to remap.
- Select the type of function you want to assign to the key or button.
- Specify the key or function to assign.
- Click “Save”.
See the answer below for detailed instructions.
How do I turn the LEDs on or off on the Razer keyboard when the computer is on standby?
Configure the lighting of your keyboard's LEDs through Razer Synapse.
See the answer below for detailed instructions.
How do I replace keycaps on a Razer keyboard?
- Pull the keycap out using a keycap puller.
- Install a replacement keycap by firmly pushing the keycap in place.
You can view the video below for instructions or review a copy of the video transcript.
See the answer below for detailed instructions.
How do I check the battery life of the Razer keyboard?
Check the Power Indicators of the Razer BlackWidow V4 Mini HyperSpeed battery as shown in the image below.

*Critical status indicates that the keyboard’s battery is less than 3%. The lighting sequence will repeat until the battery has been drained or the keyboard is being charged.
How do I switch between Bluetooth profiles on my Razer keyboard?
To switch between any of the Bluetooth profiles available on your keyboard, press the corresponding shortcut of the profile your device is registered to.

How do I remove and install mechanical switches on my Razer keyboard?
Note: Wear an anti-static wrist strap for safety purposes.
- Unplug the USB cable from the keyboard.
- Remove the keycap from the keyboard.
- Gently pull out the switch using a switch puller that came with the keyboard.
- Insert your preferred 3-pin or 5-pin mechanical switch replacement. Ensure the pins are aligned properly before doing so.
- Reattach the keycap.
- Plug the USB cable into the keyboard and test the keys.
You can view the video below for instructions or review a copy of the video transcript.
See the answer below for detailed instructions.
How do I fit Razer Mechanical Switches into my keyboard?
Ensure your keyboard circuit board supports either 3-pin or 5-pin switches. Also, make sure the switch copper pins are not bent.
How do I maintain optimal key performance and responsiveness on my Razer keyboard?
- Use a clean, microfiber cloth and compressed air to clean your Razer keyboard or touchpad from dirt or residues.
- Update the drivers of your Razer device.
- Update your Razer Synapse software and Windows OS.
- Plug the Razer device directly into the computer and not into a USB hub. If it is already plugged into the computer, try a different USB port.
Note:
- For Razer Keyboards with two USB connections, make sure that both are plugged directly into the computer.
- For desktops, use the USB ports at the back panel.
You can view the video below for instructions or review a copy of the video transcript.
See the answer below for detailed instructions.
How do I ensure a stable USB connection for my Razer keyboard?
Plug the Razer device directly into the computer and not into a USB hub. If it is already plugged into the computer, try a different USB port.
Note:
- For Razer Keyboards with two USB connections, make sure both are plugged directly into the computer.
- For desktops, use the USB ports at the back panel.
See the answer below for more details.
How do I customize and synchronize lighting colors across my Razer devices?
- Update your Razer Synapse to the latest version.
- Perform a repair or clean re-installation of Razer Synapse.
- Disable the Dynamic Lighting feature on your Windows 11 23H2 and above system.
See the answers below for more details.
General Information
What is On-the-Fly Macro Recording on Razer keyboards?
On-the-Fly Macro Recording allows users to record lengthy macros in the game, without having to access driver menus or other software. See the answer below for more details.
Can I use On-the-Fly Macro Recording without Razer Synapse?
No. On-the-Fly Macro Recording only works when Razer Synapse is installed and running in the background. See the answer below for more details.
Where can I find the 2.4 GHz USB dongle?
The 2.4 GHz USB dongle is stored in the dongle compartment behind the keyboard.

How long will the Razer BlackWidow V4 Mini HyperSpeed battery last?
The battery lasts up to 200 hrs. with backlighting turned off. With backlighting on, the battery life depends on the lighting effects and brightness. Below are examples of average battery life with backlighting:
-
White backlight at 50% brightness is up to about 14hrs
-
Spectrum cycling backlight at 50% brightness is up to about 25hrs
-
White backlight at 100% brightness is up to about 6hrs
-
Spectrum cycling backlight at 100% brightness is up to about 13hrs
Why is the lighting effect on the Razer BlackWidow V4 Mini HyperSpeed incomplete while on Bluetooth?
Due to inherent bandwidth limitation over Bluetooth, Razer Studio lighting effects, Audio Visualizer, and On-board memory will only be available over 2.4GHz and wired connection.
Only the following quick lighting effects are available while on Bluetooth connection:
-
Breathing
-
Static
-
Wave
-
Spectrum Cycling
-
Reactive
-
Starlight
Can I use a 5-pin switch on the Razer Blackwidow V4 Mini HyperSpeed?
Yes. Most 3-pin and 5-pin mechanical switches are compatible with the Razer Blackwidow V4 Mini HyperSpeed.
Applicable Model:
Firmware Updater v1.02.01_r2
- https://rzr.to/gbfsy3 | November 8, 2024
- Improved battery reading accuracy
- Fixed unable to wake some laptop models in keyboard Dongle mode
STEP-BY-STEP PROCESS
Before you start
-
If using a laptop, ensure it is plugged into a wall outlet. Do not let it run on battery alone.
-
Save any open documents on your computer.
-
Close all other programs.
-
Download the latest firmware.
Update Process
-
Run the updater.
-
Click "Yes" if the User Account Control window pops up.
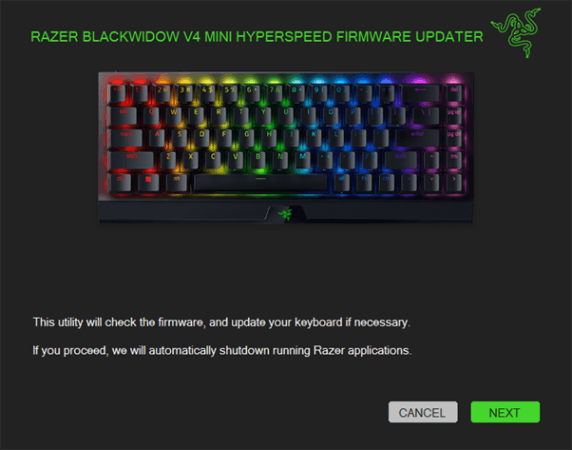
-
Click "NEXT". The updater will close all running Razer applications.
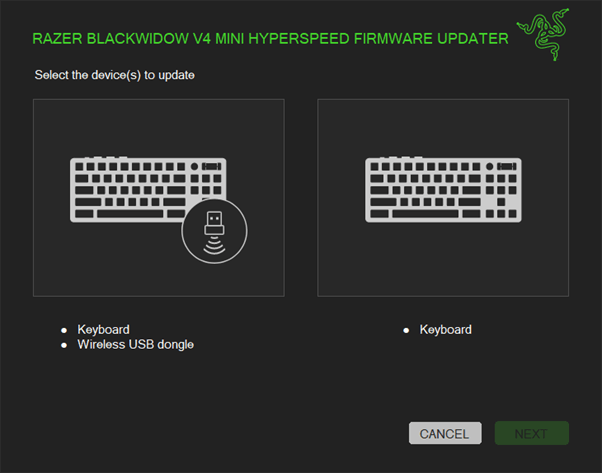
-
Select the device to update, then click "NEXT".
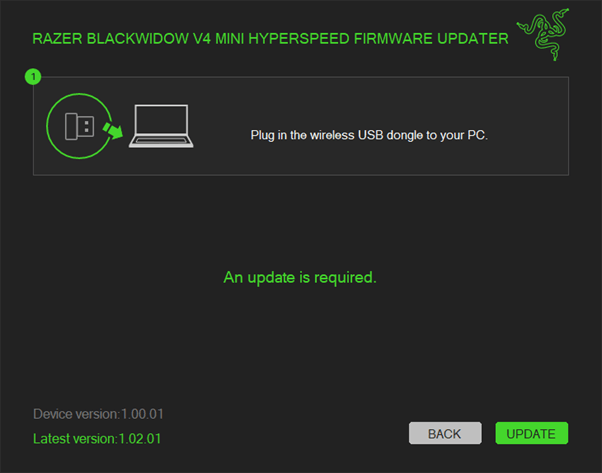
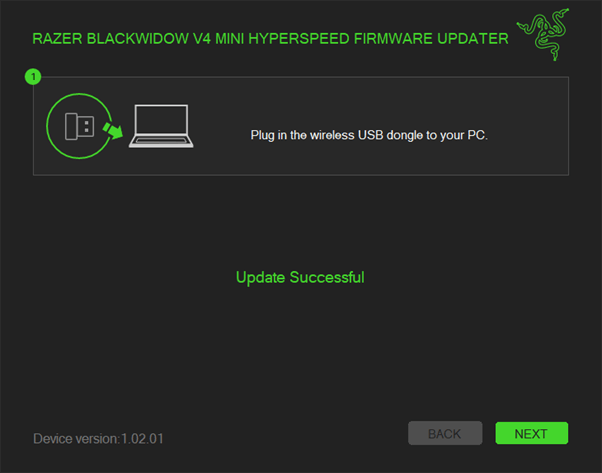
-
Plug the wireless USB dongle into your computer.
-
Click "UPDATE".
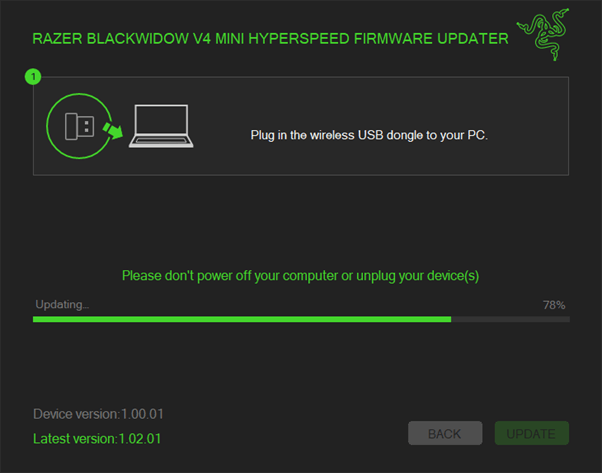
-
Wait until the update process is complete. Do not interrupt.
-
Click "NEXT" once the update is complete.
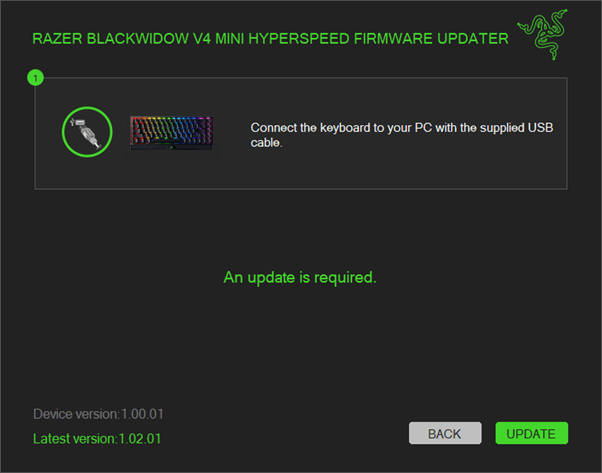
-
Connect the keyboard to your computer directly using the supplied USB cable.
-
Click "UPDATE".
-
Wait until the update process is complete. Do not interrupt.
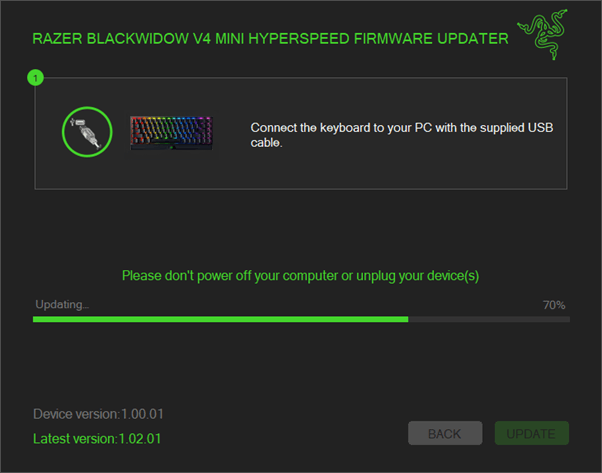
-
Click "NEXT".

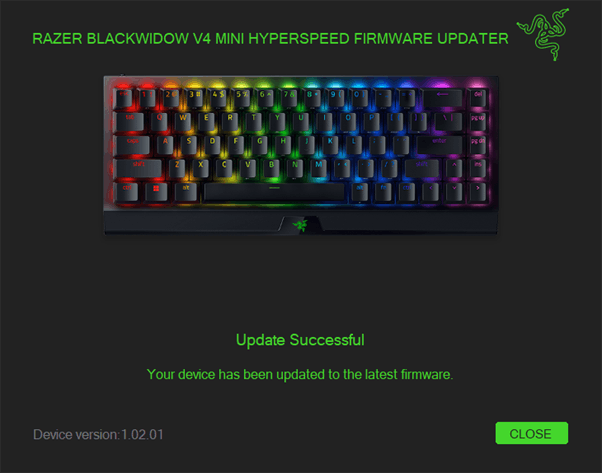
-
Click "CLOSE" once the update is complete.
| Documentation | Language |
|---|---|
| User Guide (English) | English |
| User Guide (Simplified Chinese) | 简体中文 |
| Razer USB HyperSpeed Dongle | |
| User Guide (English) | English |
| User Guide (Simplified Chinese) | 简体中文 |
Please see our warranty policy for a complete review of our warranty policy.
You are eligible for Limited Warranty support for the following periods of time commencing upon the date of retail purchase of your Product (Warranty Period).
| Product | Warranty Period |
|---|---|
| 2021 and Older Model Laptops | 1 yeara |
| 2022 and Newer Model Laptops | 1 yeara 2-year limited battery warrantya |
| Razer Viper Mini Signature Edition | 3 year |
| Razer Phone and Phone Accessories | 1 year |
| Razer Edge Gaming Handhelds | 1 year |
| Razer Mice | 2 years |
| Razer Keyboards and Keypads | 2 yearsb |
| Razer Huntsman Signature Edition | 5 years |
| Razer Headsets, Earphones and Earbuds | 2 yearsb |
| Razer Wireless Mouse and Mat Bundles | 2 yearsb |
| Razer Mouse Mats | 1 yearc |
| Razer Speaker Systems and Broadcaster Devices | 1 year |
| Razer Controllers and Chargers | 1 year |
| Razer Routers (except Singtel) | 1 year |
| Razer Routers (Singtel) | 2 years |
| Razer Monitors | 1 year |
| Smart Watches and Eyewear | 2 years |
| Razer Case Fans | 2 years |
| Razer Liquid Cooling | 2 years |
| Razer Power Supplies | 5 years |
| Razer Fan and RGB Controllers | 2 years |
| Razer Cases | 1 year |
| Razer System Accessories | 1 year |
| Razer Docks | 1 year |
| Wearable Air Purifiers | 1 year |
| Razer Gaming Accessories | 1 yearc |
| Razer Rechargeable Batteries for Wireless Devices | 1 yeard |
| Razer Gaming Chairs | 3 yearse |
| Chair Frame, mechanisms and armrests | Up to 5 years |
| Mesh backing and seat pan | Up to 1 year |
All new Products will have the Warranty Periods listed above, subject to applicable local law. Certain "end of life", sell out or discontinued Products may have a shorter Warranty Period; this will be clearly marked at the time of purchase and the given Warranty Period will be stated at that time. Refurbished Products purchased from Razer.com will have the lesser of a 1 year warranty period or the warranty period as stated above. Refurbished products not purchased from Razer.com will have a 90 day warranty period. If you are uncertain whether your Product is eligible for Limited Warranty support, please contact our support team for clarification.
Please note that third-party products may be covered by the product manufacturer's warranty and these warranty terms are exclusively provided by the product manufacturer. Razer does not offer a warranty for third-party products. If you need product or warranty support with your third-party product, please contact the product manufacturer. Please consult the product documentation provided by the product manufacturer for details.
If you are uncertain whether your Product is eligible for Limited Warranty support, please contact our support team for clarification.
[a] If you are a customer outside of the U.S. and have validly purchased a Razer Extended Warranty for your product, the Warranty Period shall be extended for another one (1) year period, to be a total of two (2) years commencing upon the date of retail purchase of your Razer Product. The Razer Extended Warranty does not apply to batteries. Aside from the change to Warranty Period, the Razer Extended Warranty does not alter any other terms and conditions of the Limited Warranty.
[b] Products purchased prior to October 1st, 2018 maintain the original 1 year warranty (keyboards with mechanical switches maintain original 2 year warranty).
[c] Warranty period for Razer Firefly HyperFlux is 2 years.
[d] Products purchased prior to October 1st, 2018 maintain the original 6 month warranty.
[e] Limited Warranty: The Razer Iskur is free from defects in workmanship, materials and construction for three years from the date of purchase. In the event that a defect is found, the manufacturer will either repair or replace the defective item, at its discretion. Exclusions and Limitations: This Limited Warranty does not cover cosmetic damage, minor cosmetic abnormalities and normal wear and tear, including without limitation scratches, dents, discoloration and tears in the head pillow, seat cushion, PU leather, Armrest and stitches of the upholstery.

