
Effective February 3, 2026, Razer Synapse 3 will no longer receive updates or support cloud services. After this date, cloud syncing of configurations across PCs using the same Razer ID will be disabled.
Note: Your installed devices will continue to be configurable in Razer Synapse 3. However, if you uninstall these devices completely, you will need to upgrade to Razer Synapse 4 to continue customization.
Download Razer Synapse 4 and migrate your existing Razer Synapse 3 profiles using the Profile Migration Tool to retain access to your configurations. See How to migrate your Razer Synapse 3 Profile to Razer Synapse 4 for instructions.
Use Razer Synapse to program your Razer mouse buttons to switch between preprogrammed profiles.
See the step-by-step instructions below on how to assign a Razer mouse button to switch profiles in Razer Synapse.
Choose an option
Razer Synapse 4
Important: Before you begin, make sure mouse profiles are already created. See How to create mouse profiles on Razer Synapse 4 for more details.
-
Launch Razer Synapse 4.
-
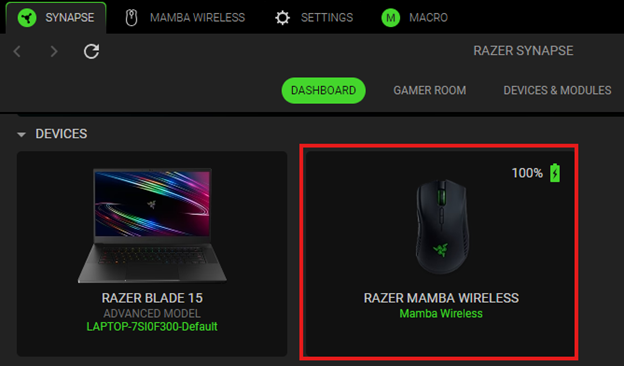
Select your mouse from the DASHBOARD.
-
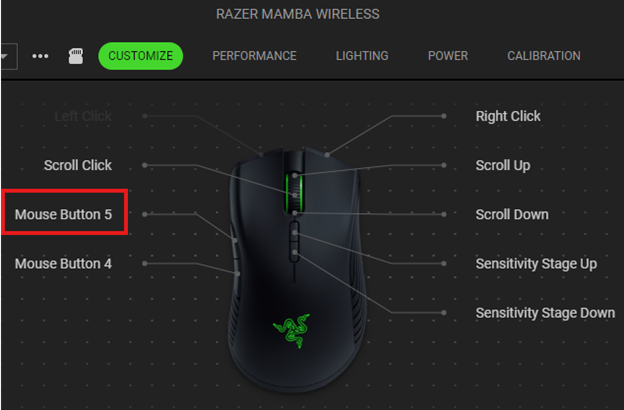
Select a button you want to customize.
-
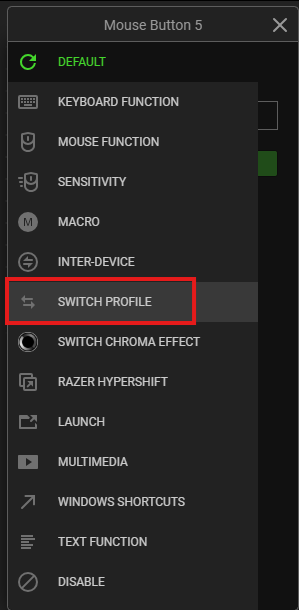
Click “SWITCH PROFILE”.
-
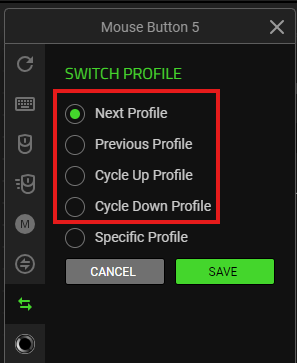
Select the type of switching you prefer to use.
-
“Next” or “Previous” lets you go to the next or previous profile used. You can program “Next” and “Previous” on separate buttons.
-
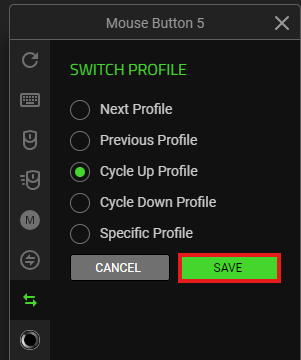
“Cycle Up” or “Cycle Down” lets you cycle up or down between profiles. If you have reached the last profile, the next click will send you back to the first profile.
-
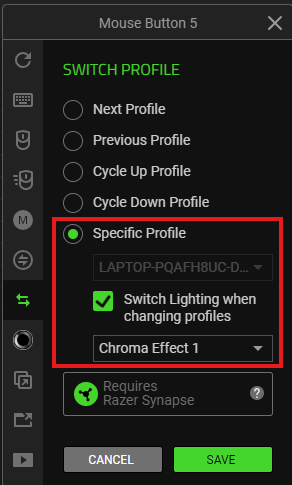
"Specific Profile” lets you choose which of your Chroma Effects will be applied for that profile. Click this button to switch to the chosen profile and its assigned lighting effect.
-
-
Click “SAVE” to complete the process.
Note: Keep Razer Synapse running in the background to use this function.
The assigned button is displayed after the shortcut on your device layout.
Razer Synapse 3
-
Create mouse profiles. See How to create mouse profiles in Razer Synapse 3 for more details.
-
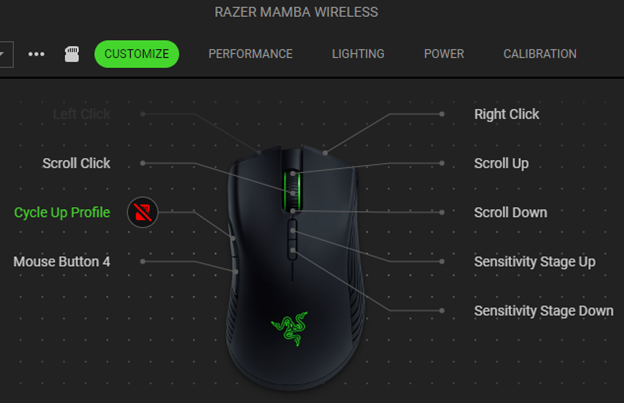
Click “CUSTOMIZE” in Synapse 3. In Razer Synapse 4, choose a profile and click “CUSTOMIZE”.
-
Click on the name of the button you want to program a profile to.

-
Click on “SWITCH PROFILE”.

-
Select the type of switching you prefer to use.
-
“Next” or “Previous” lets you go to the next or previous profile used. You can program “Next” and “Previous” to separate buttons.

-
“Cycle Up” or “Cycle Down” lets you cycle up or down between profiles. If you have reached the last profile, the next click will send you back to the first profile.

-
"Specific Profile” lets you choose which of your Chroma Effects will be applied for that profile. Click this button to switch to the chosen profile and its assigned lighting effect.

-
-
Click “SAVE” to complete the process.


The button assigned will now appear with the type of switching method you have chosen. If you chose a specific profile, it will reflect as the name of the button.

