
Effective February 3, 2026, Razer Synapse 3 will no longer receive updates or support cloud services. After this date, cloud syncing of configurations across PCs using the same Razer ID will be disabled.
Note: Your installed devices will continue to be configurable in Razer Synapse 3. However, if you uninstall these devices completely, you will need to upgrade to Razer Synapse 4 to continue customization.
Download Razer Synapse 4 and migrate your existing Razer Synapse 3 profiles using the Profile Migration Tool to retain access to your configurations. See How to migrate your Razer Synapse 3 Profile to Razer Synapse 4 for instructions.
You can assign Razer Chroma settings to a Razer mouse's buttons, allowing you to switch between Razer Chroma lighting effects without opening Razer Synapse.
See the step-by-step instructions below on how to create multiple Chroma effects on a Razer mouse.
Choose an option
Razer Synapse 4
-
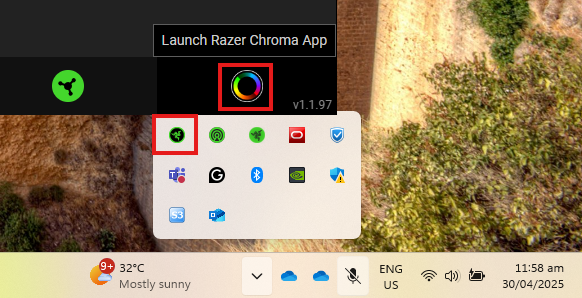
Launch Razer Chroma.
-
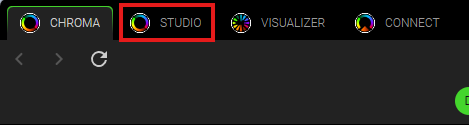
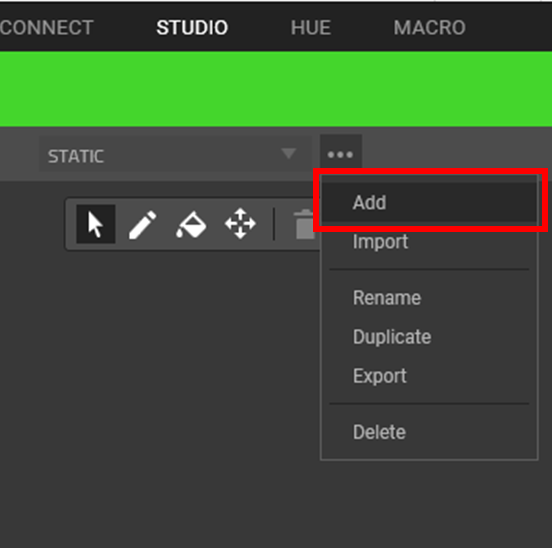
Click the “STUDIO” tab.
-
Click the ellipsis icon, then click “Add”.
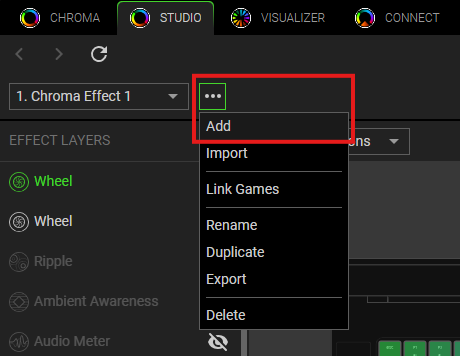
Note: The new effect is defaulted to the name “Chroma Effect 1” and progresses to 2, 3, 4, and so forth as you keep adding new effects.
-
Click the Chroma effect you prefer under “ADD EFFECT”.

-
The effect will then be added to the "EFFECT LAYERS" section as shown below and will be prioritized from top to bottom.
-
Select the effect and apply the effect to your Razer product using the following application tools:
-
Selector - Select the LED where you want to apply the effect. (Shortcut: Ctrl + S)
-
Pen - Lets you draw on the LEDs with the current effect. (Shortcut: Ctrl + P)
-
Paint Bucket - Fill an area continuously with the current effect. (Shortcut: Ctrl + B)
-
You can also edit the effect using the “Effect Settings” column on the right side.
-
-
Click on your mouse to apply the effect.
-
Click “SAVE” to complete the process.
Your mouse will immediately apply the lighting effect.
To configure Chroma lighting on your Razer mouse, see How to configure the Chroma lighting on a Razer mouse for more details.
Razer Synapse 3
-
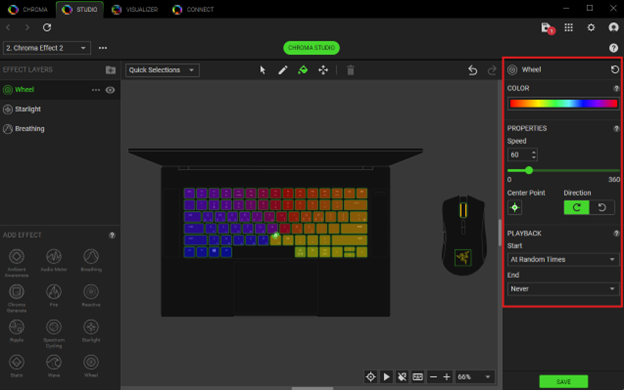
Open Razer Synapse and go to “CHROMA STUDIO”.
-
Open the menu next to Chroma Effect dropdown box.

-
Once the options have appeared, select “Add”.
-
The new effect is defaulted to the name “Chroma Effect 1” and progresses to 2, 3, 4, and so forth as you keep adding new effects. The default effect is Spectrum Cycling.

-
Select your desired effect at the bottom-left corner of the Synapse window. Every selected effect will appear at the upper left side of the Synapse window.

-
Select your desired color from the right side of the Synapse window. Each effect has a different color selection method.
-
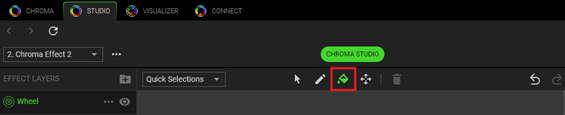
Click on the “Fill” icon on the chroma toolbar.
-
Click on your mouse to apply the effect.
-
Click “SAVE” to complete the process. You will notice the changes on your mouse’s lighting effect.


