
Effective February 3, 2026, Razer Synapse 3 will no longer receive updates or support cloud services. After this date, cloud syncing of configurations across PCs using the same Razer ID will be disabled.
Note: Your installed devices will continue to be configurable in Razer Synapse 3. However, if you uninstall these devices completely, you will need to upgrade to Razer Synapse 4 to continue customization.
Download Razer Synapse 4 and migrate your existing Razer Synapse 3 profiles using the Profile Migration Tool to retain access to your configurations. See How to migrate your Razer Synapse 3 Profile to Razer Synapse 4 for instructions.
Choose which Razer BlackShark V2 device to activate THX Spatial Audio on.
Note: The following Blackshark V2 variants do not support THX Spatial Audio:
- Razer BlackShark V2 Pro for PlayStation | RZ04-04530x
- Razer BlackShark V2 Pro (Xbox Licensed) | RZ04-04530x
Select your device
Razer BlackShark V2
Note: Prepare the USB sound card before you get started.
- Plug the USB Sound Card that came with your headset.

- Install or upgrade Razer Synapse.
- Restart your PC.
- Launch Razer Synapse after the restart.
- Click on RAZER USB SOUND CARD, then navigate to the “SOUND” Tab.
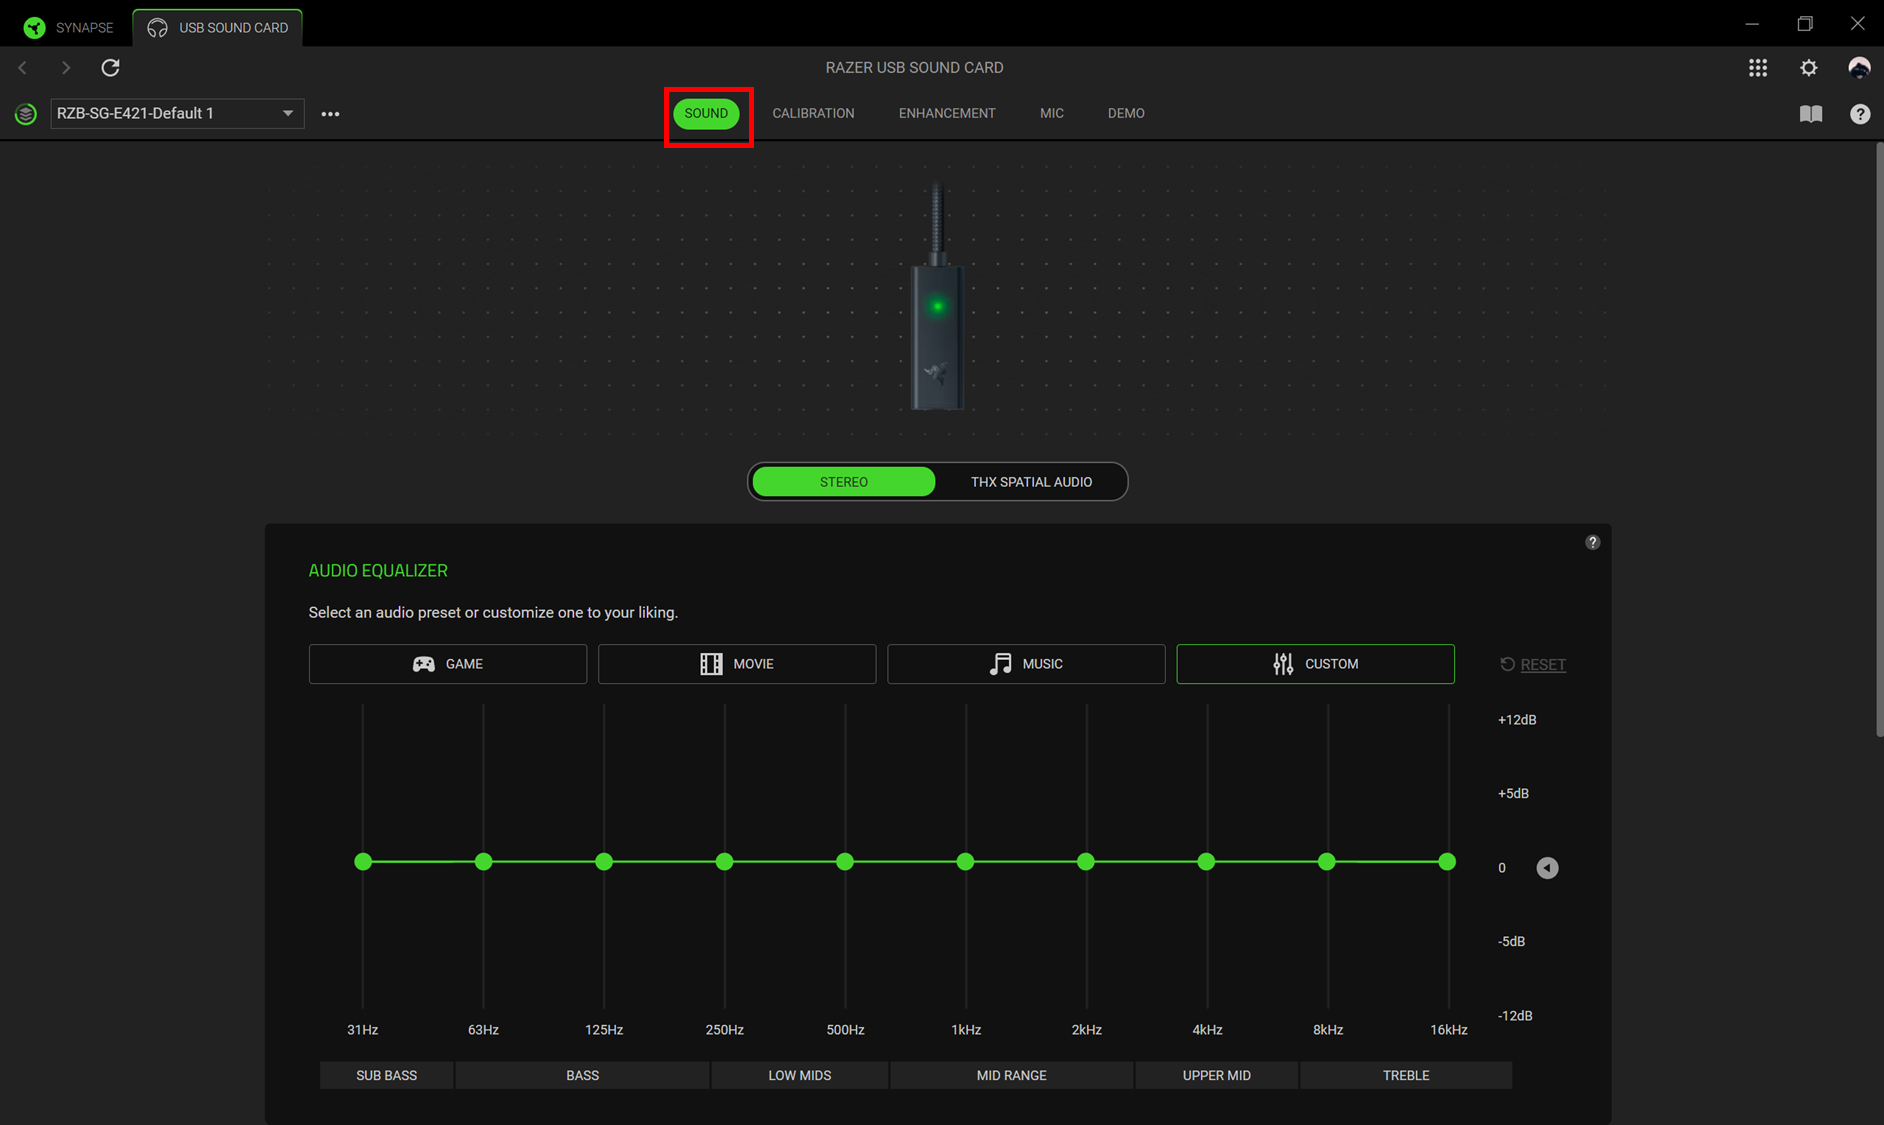
- Toggle to “THX SPATIAL AUDIO” to activate it.

The THX Spatial Audio is now activated.
Note: THX Spatial Audio within Razer Synapse is only available with the USB sound card. For more details, see How to use the THX Spatial as a playback device.
Razer BlackShark V2 Pro
Note: Prepare your USB wireless dongle before you get started.
- Plug the USB wireless dongle that came with your headset.

- Install or upgrade Razer Synapse.
- Restart your PC.
- Launch Razer Synapse after the restart.
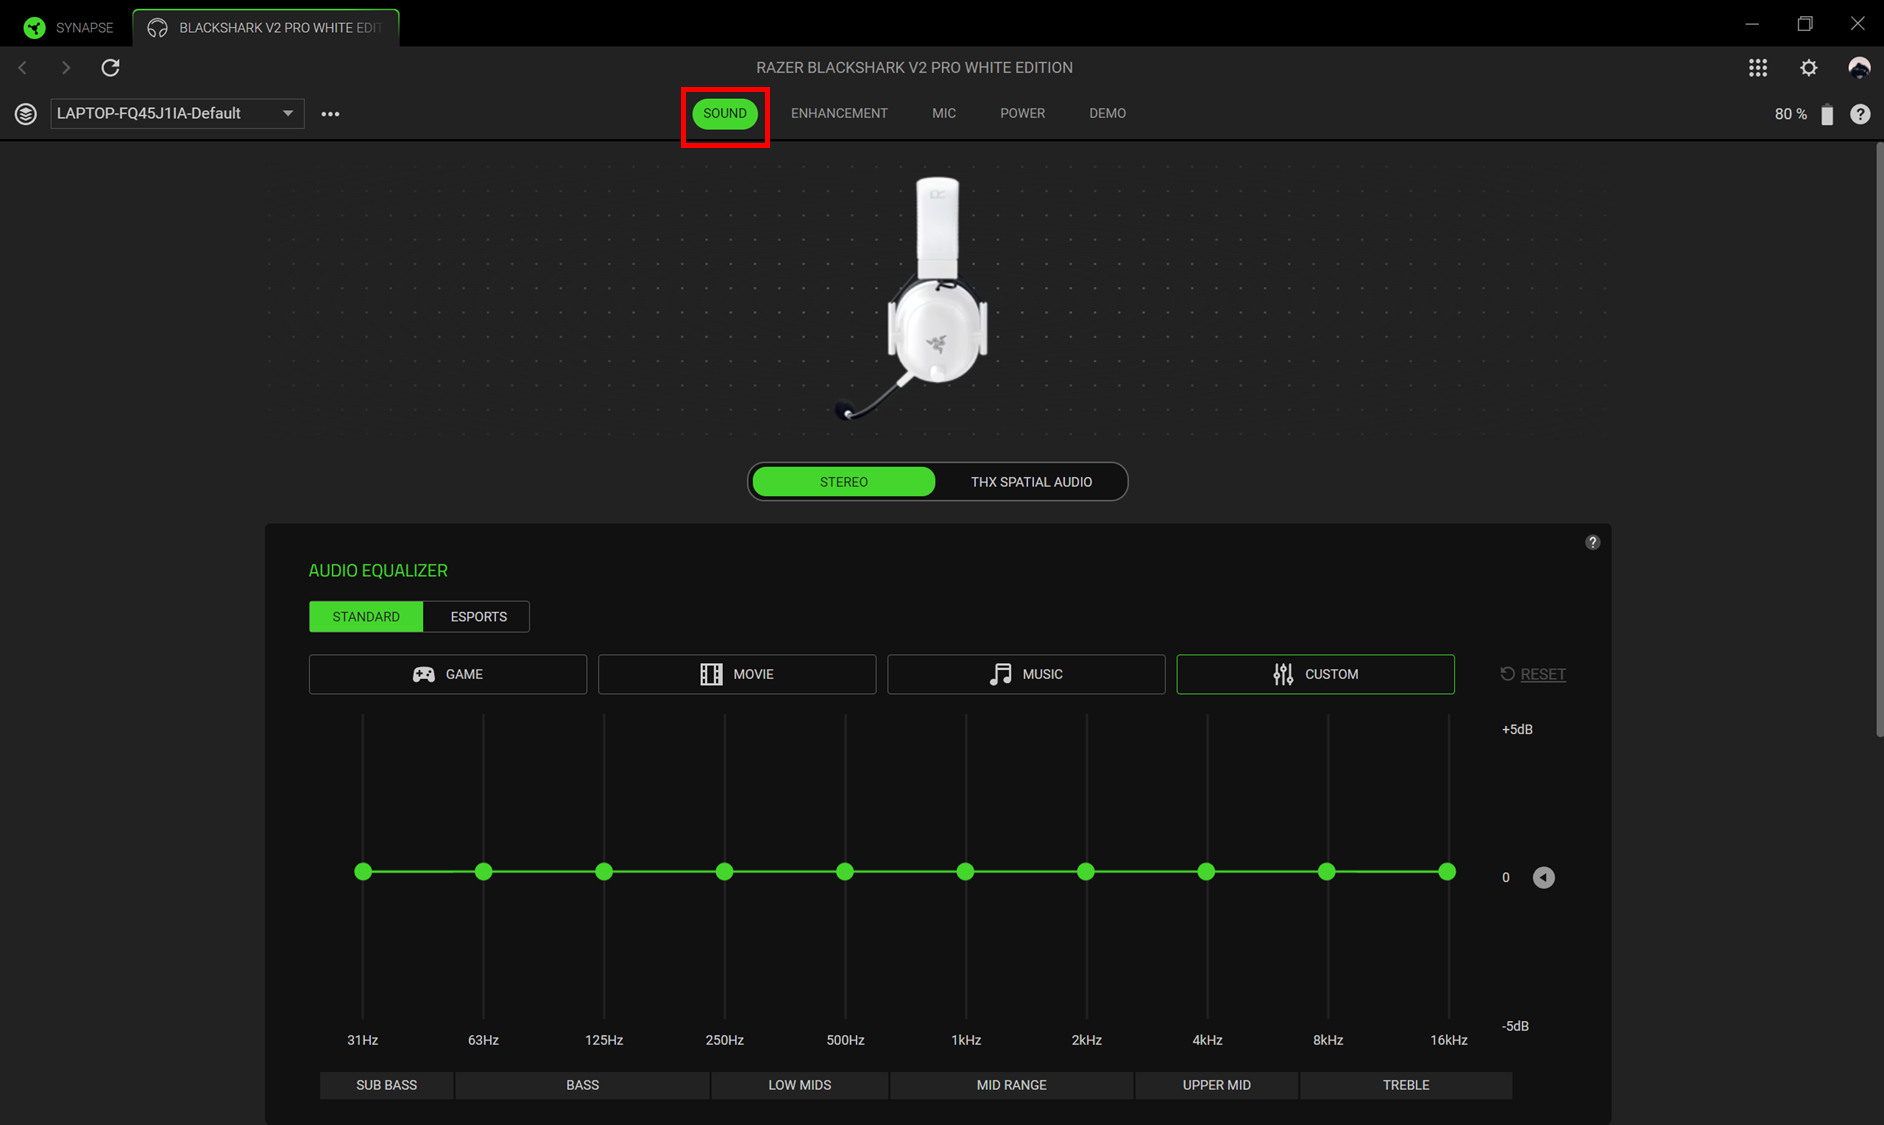
- Click on Razer USB wireless dongle, then navigate to the “SOUND” Tab.
- Toggle to “THX SPATIAL AUDIO” to activate it.
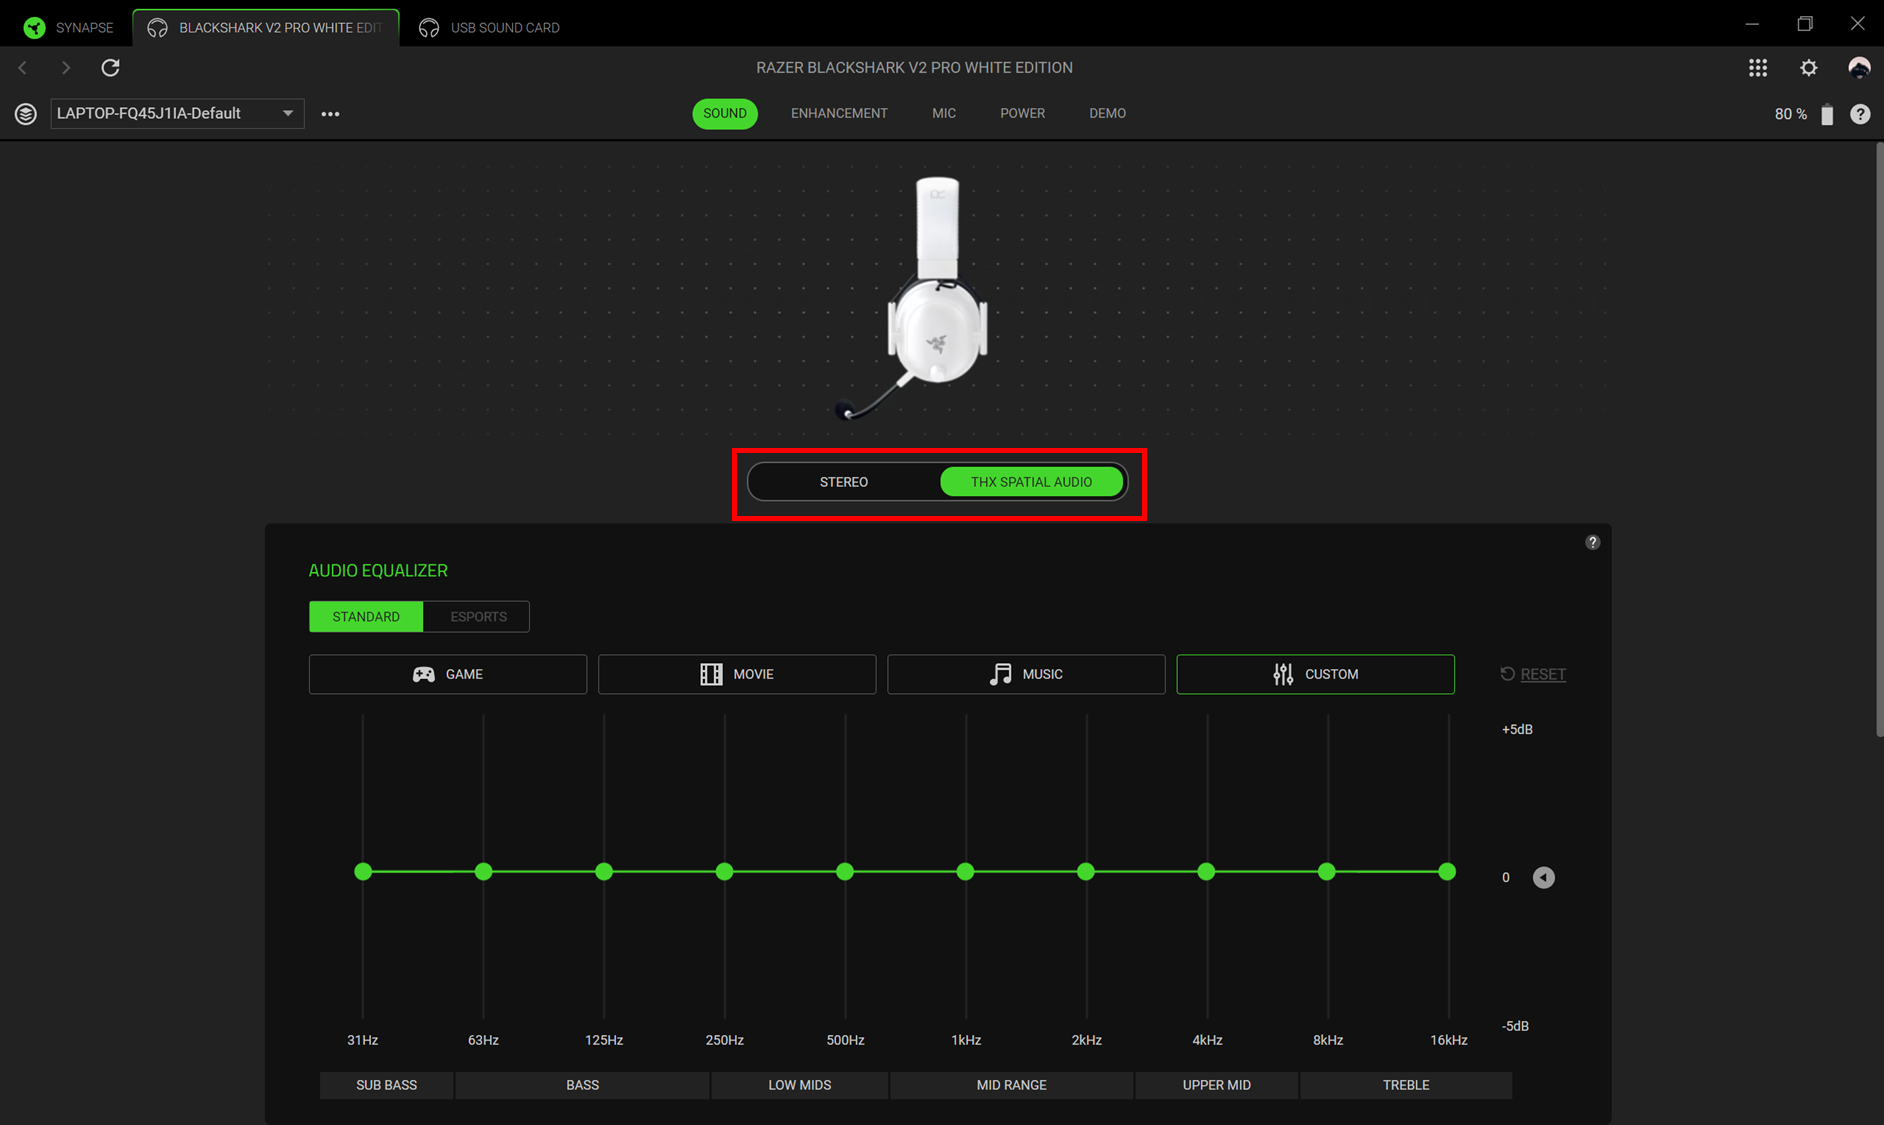
The THX Spatial Audio is now activated.
Note: THX Spatial Audio within Razer Synapse is only available with the USB wireless dongle. For more details, see How to use the THX Spatial as a playback device.

