
Applicable models:
Razer Core X | RC21-01310
The issue of a GPU not being detected in a Razer eGPU setup is possibly caused by the following scenarios:
Improper GPU installation
Razer Core has no power
The Razer eGPU was disconnected and reconnected while the system was powered on
The connected port does not support high-bandwidth traffic (for example, USB 3.1 Gen 1 compared to USB4, Thunderbolt 4, or Thunderbolt 5)
You can view the video below for instructions or review a copy of the video transcript.
See the step-by-step instructions below on how to fix a Razer eGPU that is not detecting the GPU.
Select an option
Check the system’s USB settings
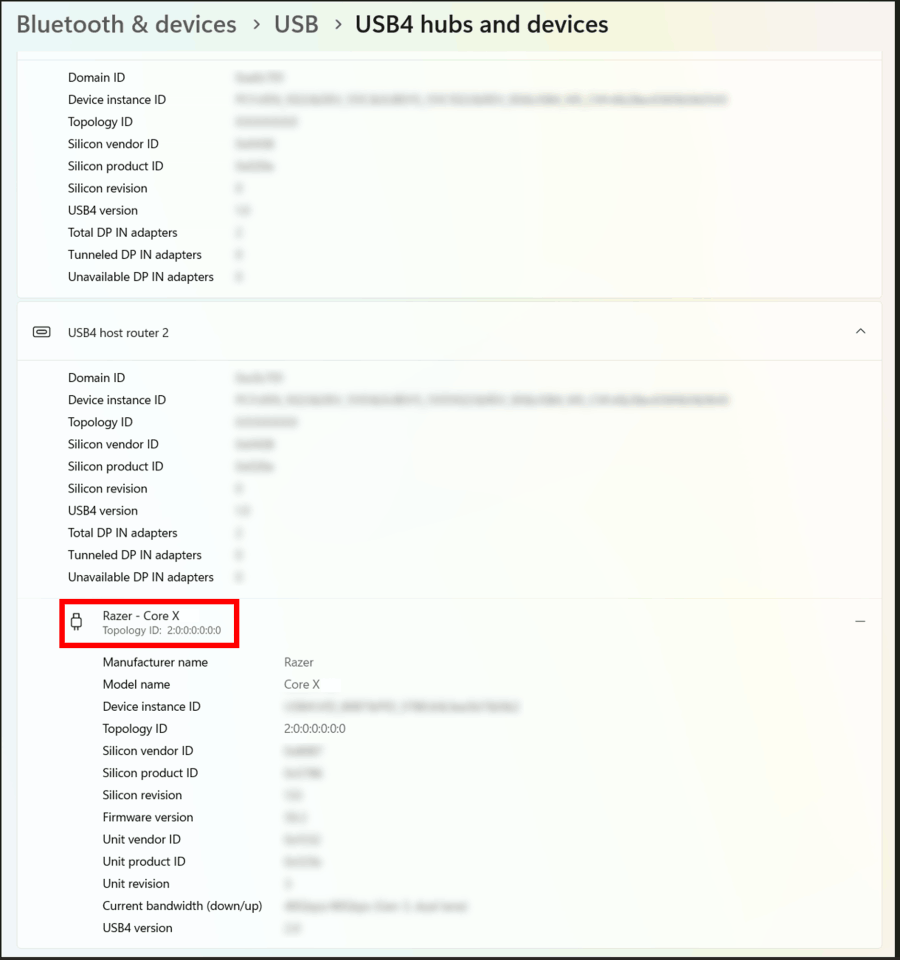
Go to Settings > Bluetooth & devices > USB > USB4 hubs and devices.
Make sure the Razer eGPU model name and topology ID are displayed.
Ensure the GPU driver is installed and updated
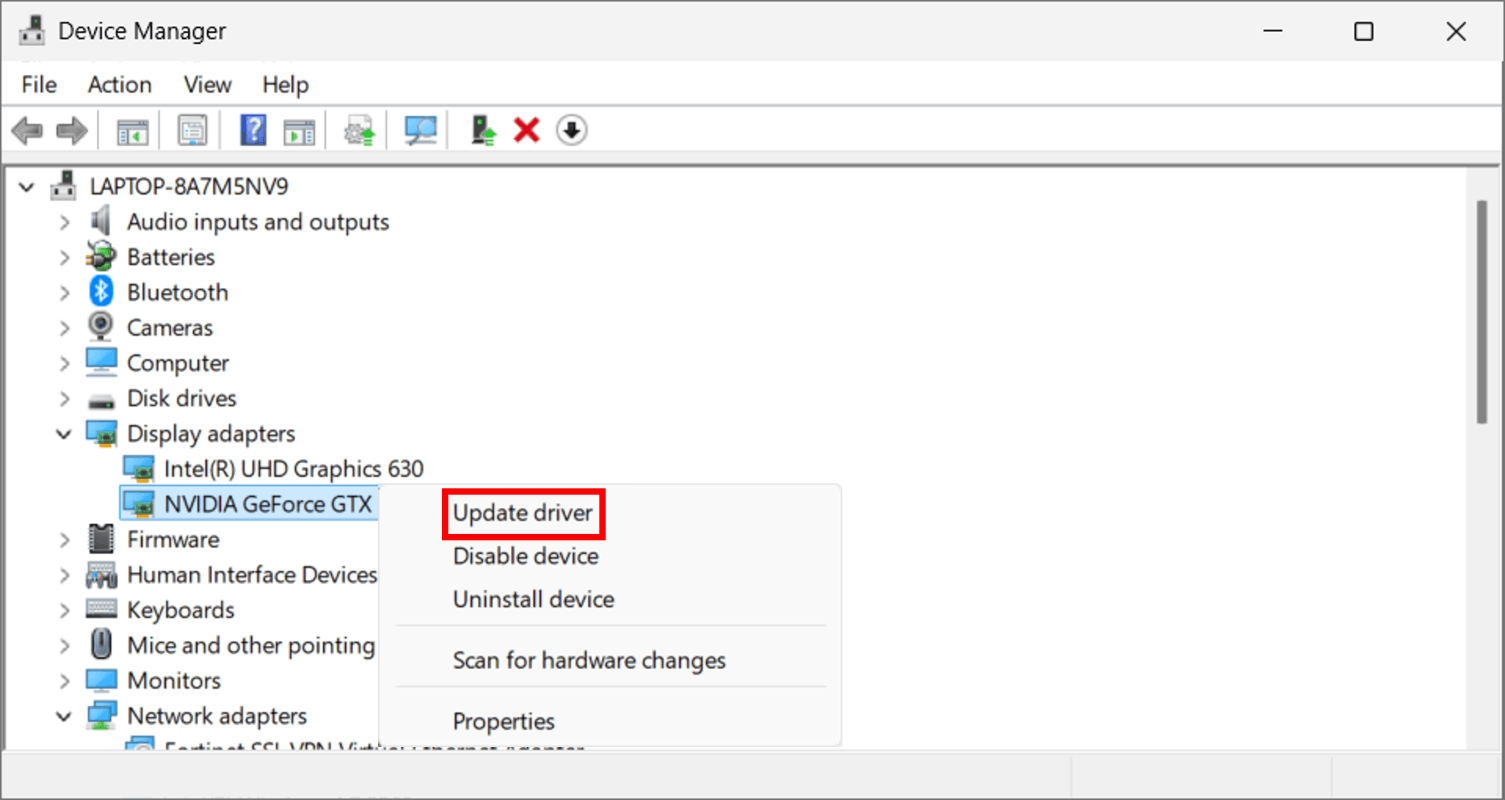
Open “Device Manager”.
Expand “Display adapters”.
Right-click on the device and select “Update driver”.
Click “Search automatically for drivers”.
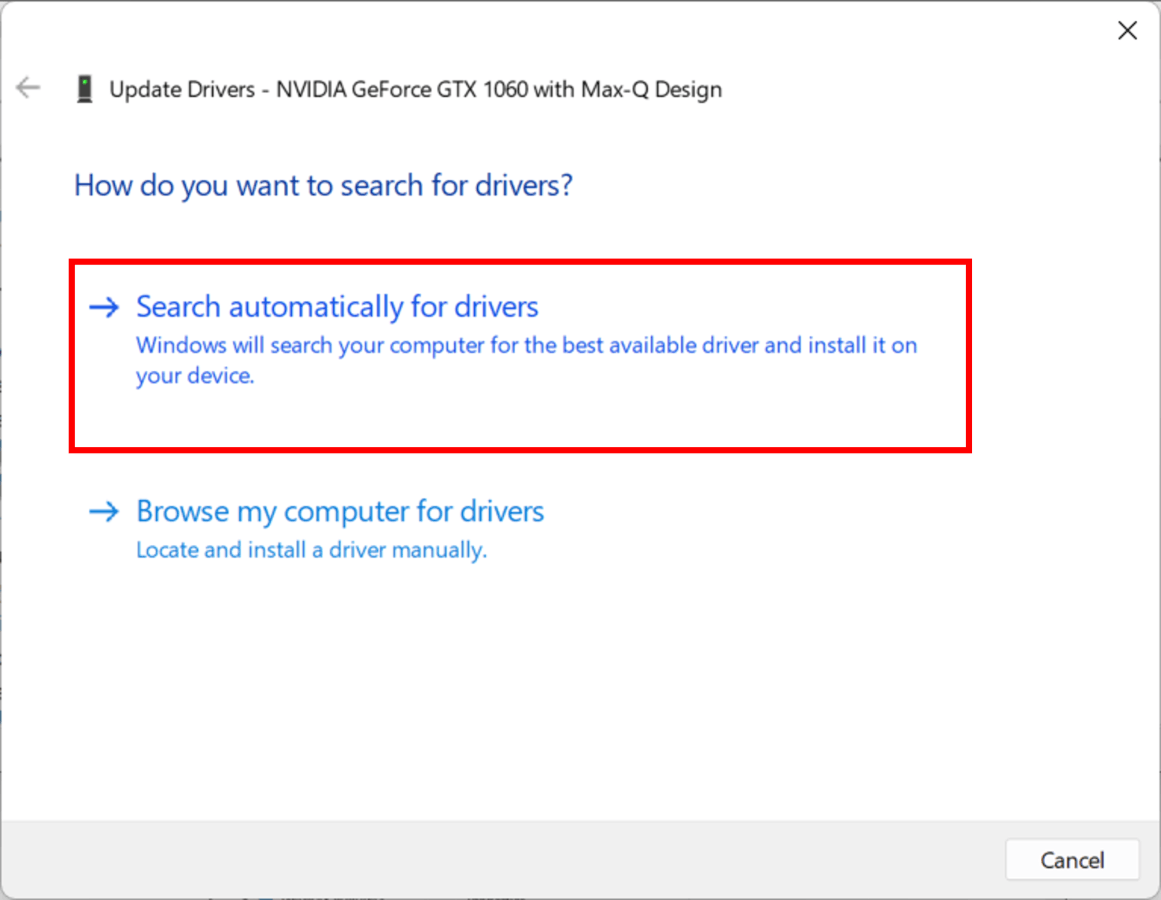
Follow the on-screen instructions.
Ensure the GPU is properly installed (Razer Core V2, Core X, Core X Chroma)
Pull the lever to unlock the compartment.
Detach the compartment from the enclosure.
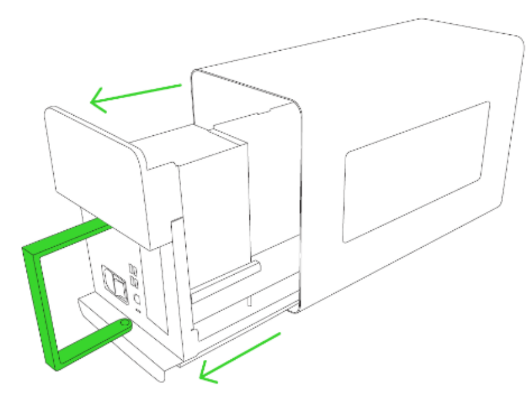
Verify that the graphics card is securely seated in the PCI-E port.
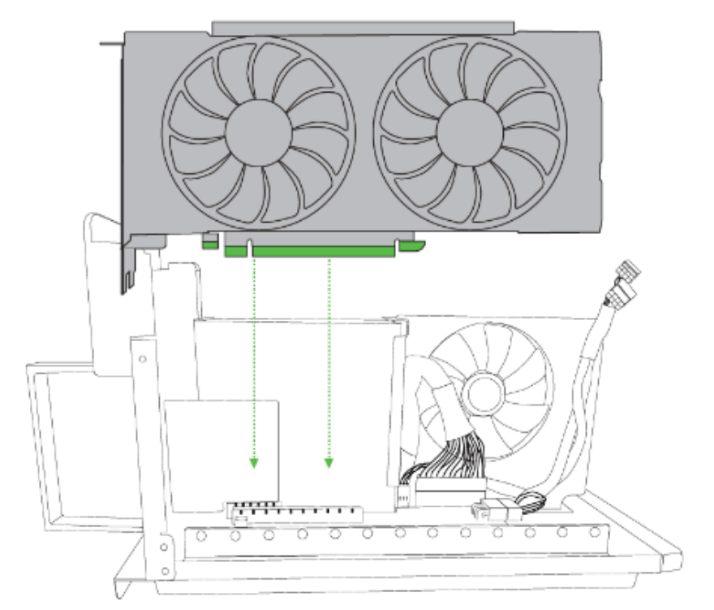
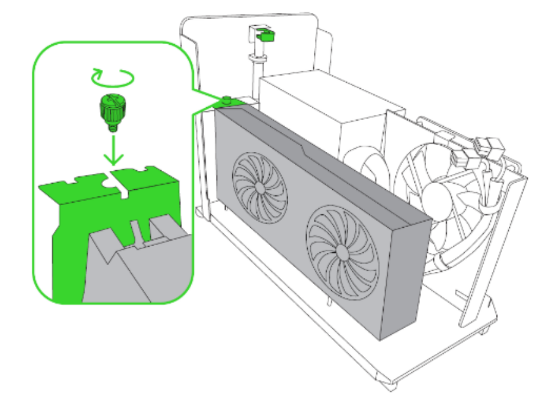
Tighten or reinsert the slot thumbscrew.
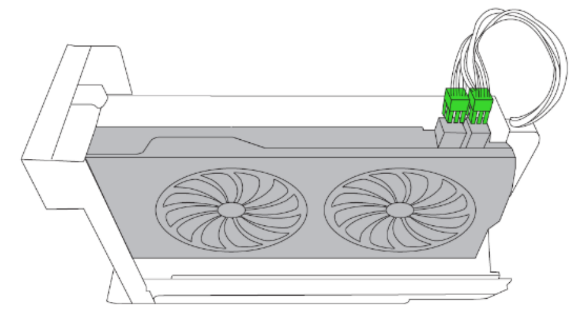
Make sure the GPU power connectors are securely plugged in.
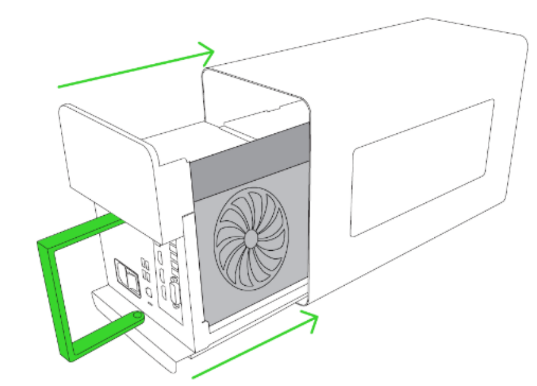
Reattach the compartment to the enclosure.
Tuck the lever to secure the compartment.
Ensure the GPU is properly installed (Razer Core X V2)
Unfasten the thumbscrews and remove the chassis cover.
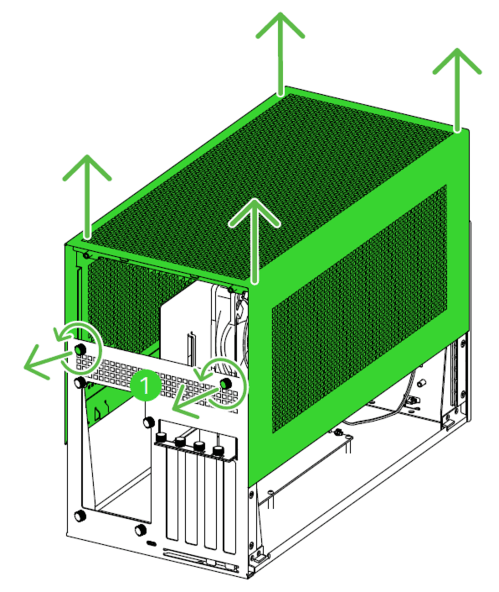
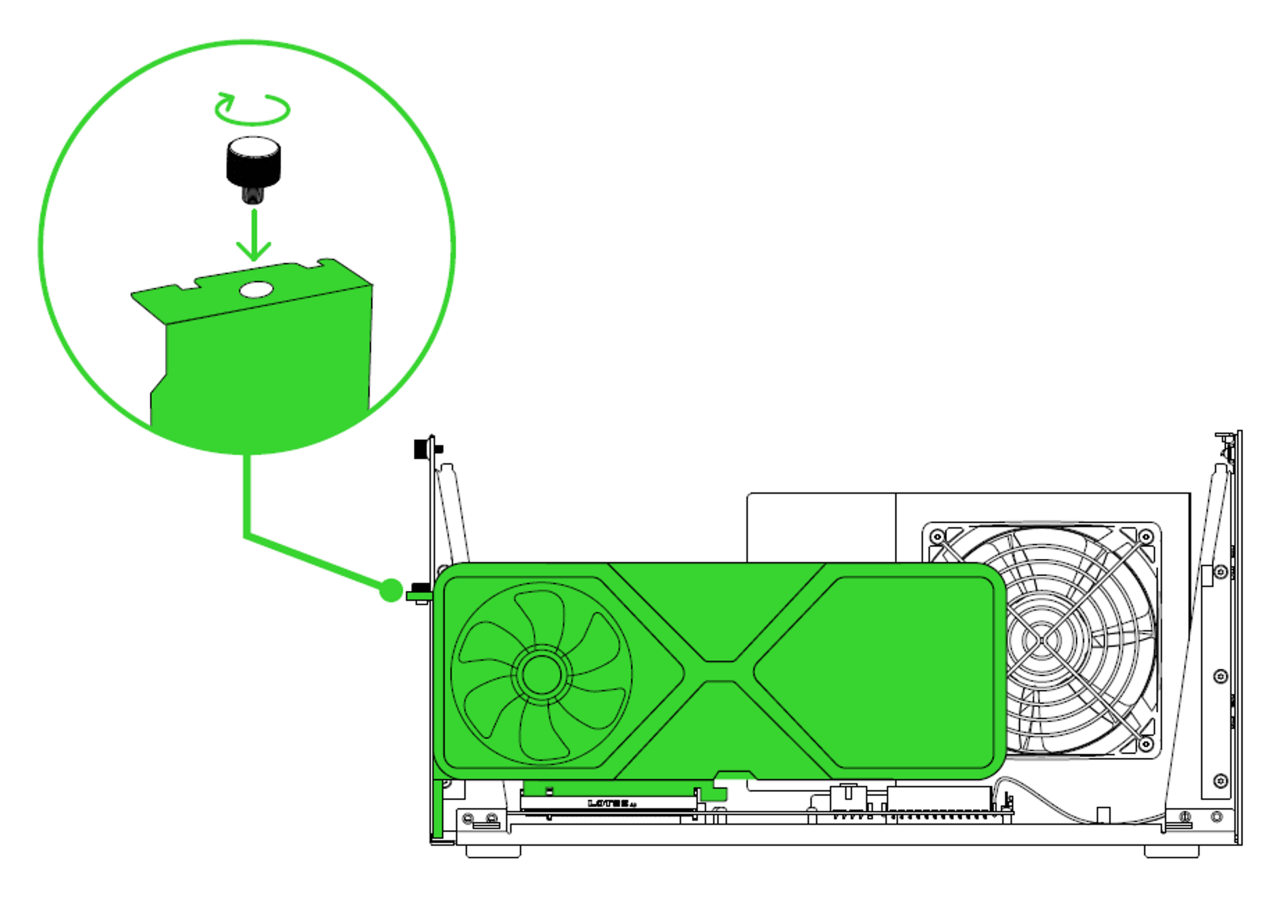
Verify that the graphics card is securely seated in the PCI-E port.
Tighten or reinsert the slot thumbscrew.
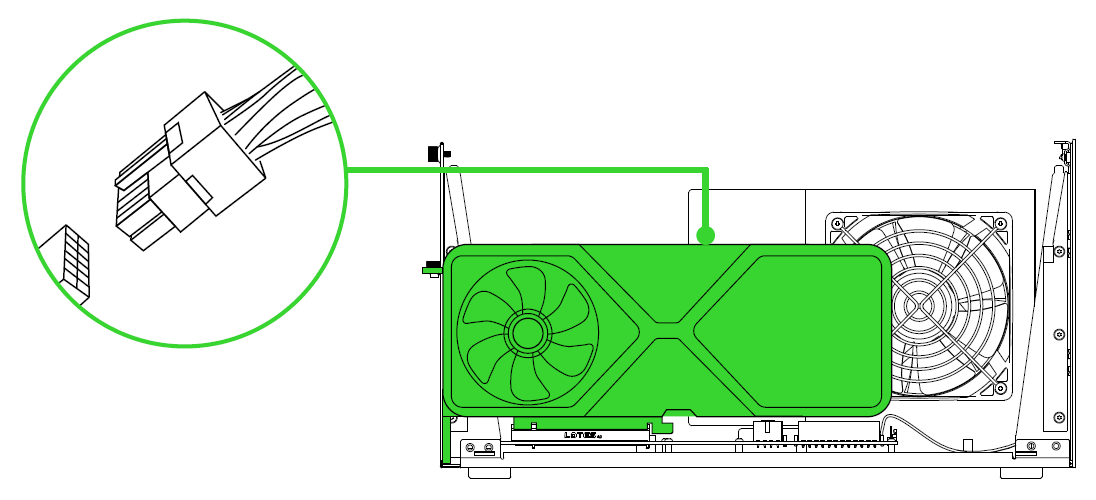
Make sure the GPU power connectors are securely plugged in.
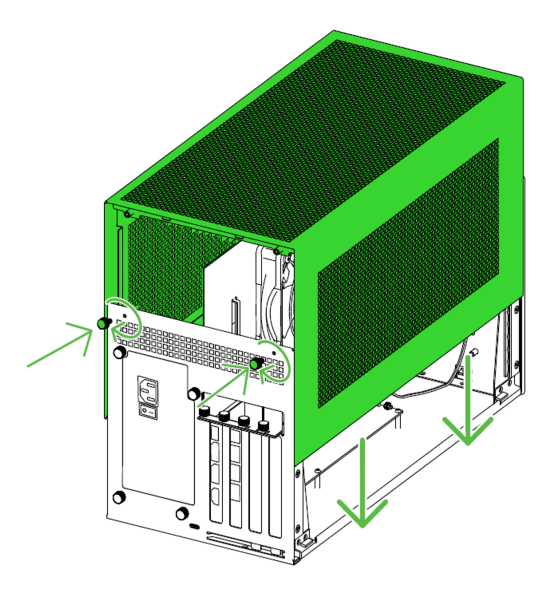
Reattach the chassis cover and secure it with thumbscrews.
Ensure the Razer eGPU is receiving power
Razer Core X V2: Ensure the installed PSU meets the GPU’s power requirements plus an additional 230 W to power the Razer Core X V2.
Inspect the power cord, adapter, and outlet. Make sure all connections are secure.
Test the power source using another device.
Ensure the Razer eGPU power switch is turned on and that the fans are spinning.
Avoid disconnecting and reconnecting the Razer eGPU while the system is powered on
Disconnect the Razer eGPU and shut down the system.
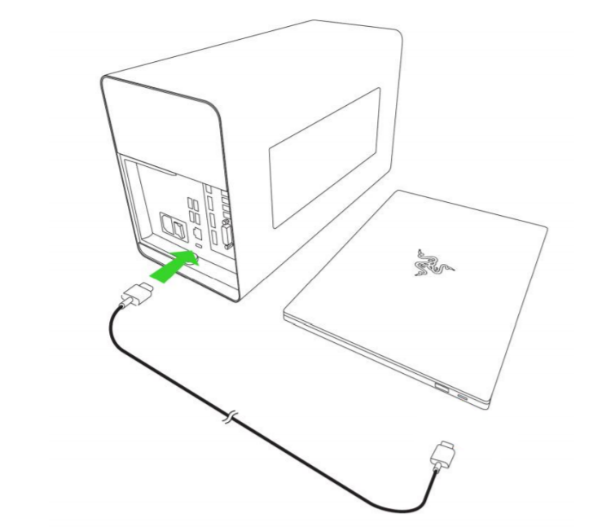
Reconnect the Razer eGPU while the system is powered off.
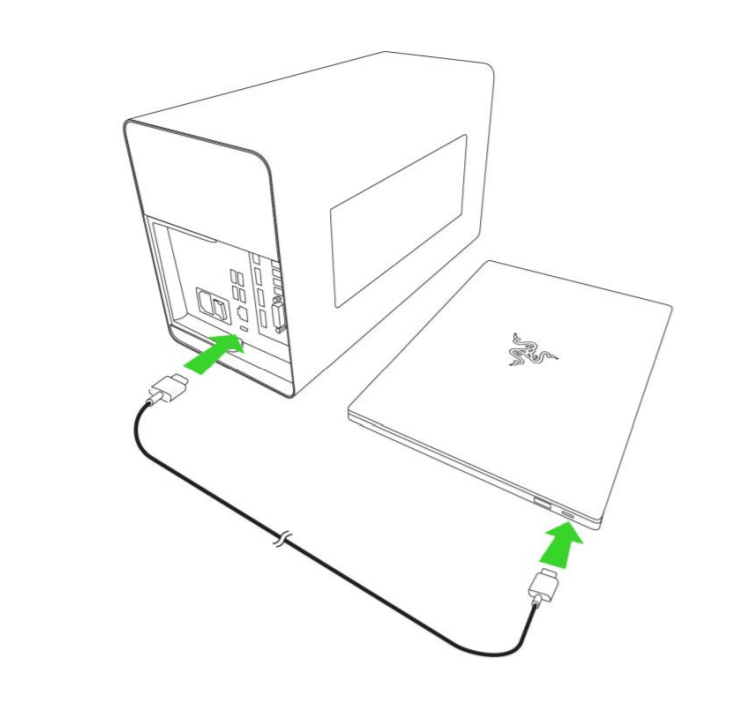
Power on the system. The GPU should now be detected.

Important: If disconnection is necessary while the system is running, wait for the confirmation prompt that the GPU has been safely removed before reconnecting.
Install the Nvidia graphics driver for the Razer Core X V2 eGPU enclosure
When the external Nvidia GPU is not detected, the Device Manager may display it as "Microsoft Basic Display Adapter" or list it as "Nvidia" with an error.
See the answer below for more details.

