
The Basic Input Output System (BIOS) Setup Utility is where you can see the system's health and hardware status. Access the BIOS settings on the Razer Tomahawk Gaming Desktop to configure hardware components including hard disk, keyboard, USB, and CPU.
Caution: Any damages that resulted from altering the BIOS is not covered by our Warranty Policy.
Select preferred method
Access BIOS using BIOS Key
-
Restart your Gaming Desktop.
-
Tap the "F2" key repeatedly once the “Razer Logo” appears upon startup.
Note: The BIOS screen should appear as below. Otherwise, try again and ensure that you press the "F2" key fast enough to trigger the setting.

Access BIOS using Advanced Startup
Advanced Startup on Windows 10
-
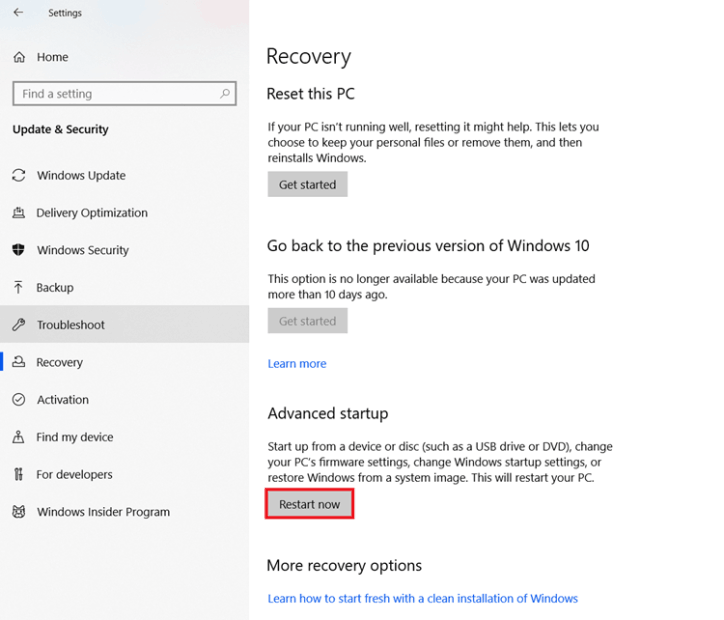
Go to “Settings” > “Update and Security”.

-
Select “Recovery”.
-
Click “Restart Now”.
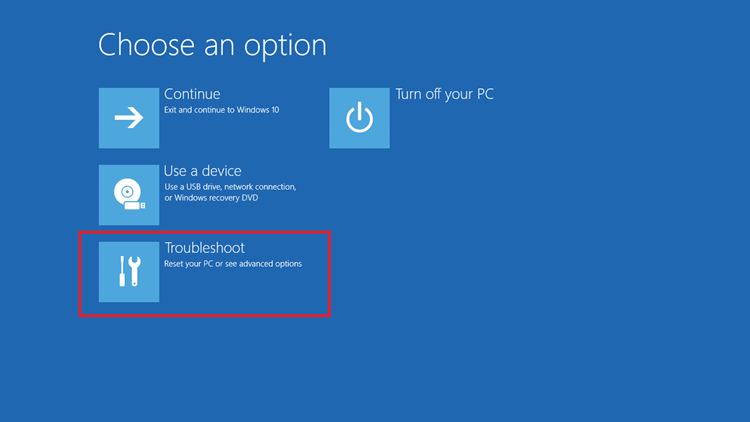
The Gaming Desktop will restart and boot to “Advanced Startup”.
-
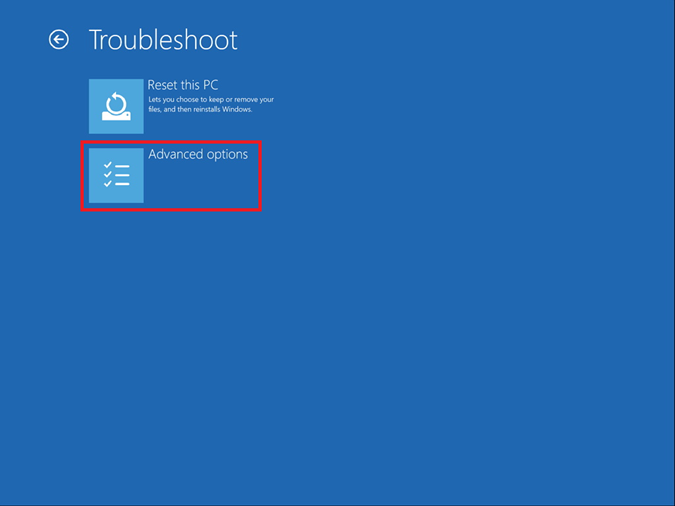
Select “Troubleshoot”.
-
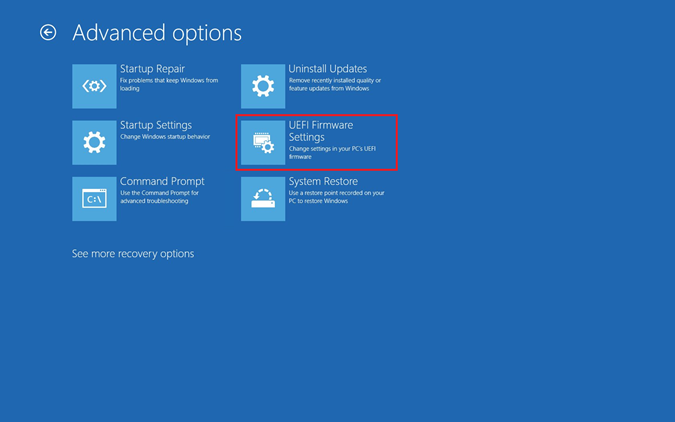
Click “Advanced options”.
-
Select “UEFI Settings”.
-
Click “Restart”.
The Gaming Desktop will then restart to BIOS settings.
Advanced Startup on Windows 11
-
Go to “Settings” > “System”.

-
Select “Recovery”.

-
Next to “Advanced startup”, click “Restart now”.

-
Click “Restart now” in the next window.

-
Wait for the device to restart.
-
Select “Troubleshoot” in the menu.

-
Go to “Advanced options” > “UEFI Firmware Settings”.

-
Click “Restart”. The Razer Tomahawk Gaming Desktop will then restart to BIOS settings.

