Effective February 3, 2026, Razer Synapse 3 will no longer receive updates or support cloud services. After this date, cloud syncing of configurations across PCs using the same Razer ID will be disabled.
Note: Your installed devices will continue to be configurable in Razer Synapse 3. However, if you uninstall these devices completely, you will need to upgrade to Razer Synapse 4 to continue customization.
Download Razer Synapse 4 and migrate your existing Razer Synapse 3 profiles using the Profile Migration Tool to retain access to your configurations. See How to migrate your Razer Synapse 3 Profile to Razer Synapse 4 for instructions.
Applicable models:
New Razer Blade models feature a dual-mode display, which is known to offer a more effective and efficient way of LCD screen backlighting. This feature fits more and smaller LED diodes behind LCD pixels that makes images appear brighter.
Switch between the available dual-mode displays:
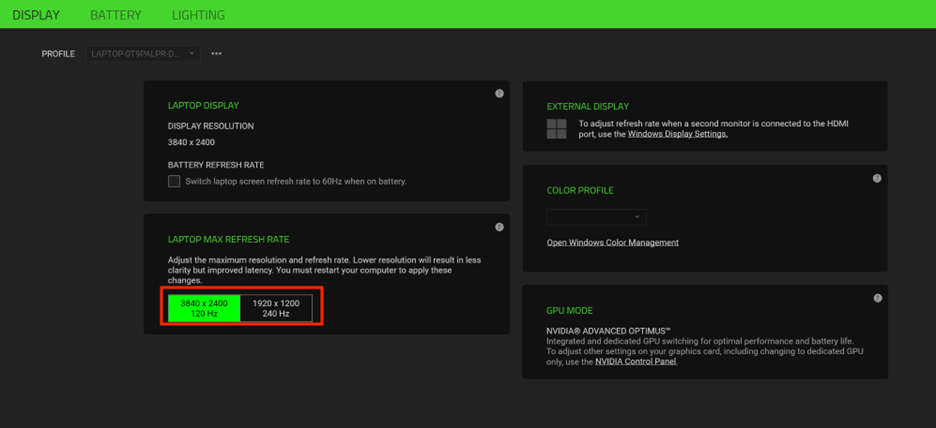
Through Razer Synapse 4
- Open Razer Synapse 4.
- Select your Razer Blade and go to “DISPLAY”.

- Choose your preferred refresh rate under “LAPTOP DISPLAY”.

Through Razer Synapse 3
- Open Razer Synapse 3.
- Go to “SYSTEM” > “DISPLAY”.

- Choose your preferred refresh rate under the LAPTOP MAX REFRESH RATE section.
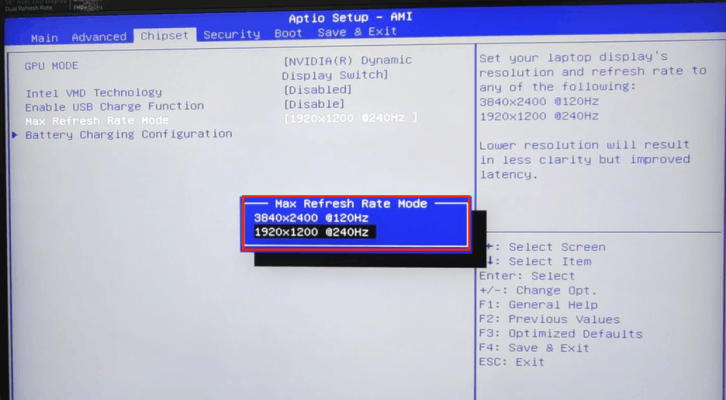
Through BIOS
- Access the BIOS on your Razer Blade. See How to access the BIOS settings on the Razer Blade for more details.
- Go to “Chipset” > “Max Refresh Rate Mode”.

- Choose your preferred max refresh rate mode.