Overclocking involves carefully increasing your CPU’s frequency and balancing it with voltage regulation to run beyond default specifications. When done correctly, it delivers improved overall system performance. Likewise, fine-tuning your GPU clock settings maximizes its capabilities. Properly tuned overclocking can lead to noticeable gains in gaming and rendering performance, typically at the cost of higher heat and power consumption.
Important:
-
This guide applies to Razer Blade models that support overclocking via Razer Synapse. If your device does not support this feature, do not overclock your CPU, GPU, or RAM. There is an associated risk of damage to crucial components if unauthorized changes are made, which will result in voiding the manufacturer’s warranty.
-
Only CPU and GPU overclocking is allowed in Razer Synapse. This differs across different models as listed below:
| Applicable models | CPU overclocking Supported in Synapse | GPU overclocking Supported in Synapse |
|---|---|---|
| Razer Blade 18” (2026) | Yes | Yes |
| Razer Blade 16” (2026) | No | Yes |
| Razer Blade 18” (2025) | Yes | No |
| Razer Blade 18” (2024) | Yes | No |
| Razer Blade 16” (2024) | Yes | No |
| Razer Blade 18” (2023) | Yes | No |
| Razer Blade 16” (2023) | Yes | No |
Follow the detailed instructions below to overclock or undervolt your Razer Blade with Intel processor via Razer Synapse.
Step-by-step Process
Overclocking preconditions
Note: These preconditions are applicable only to CPU overclocking and not to GPU overclocking.
-
Ensure your Razer Blade has the latest BIOS. For specific downloads, search by model number on the Support Site (for example, “RZ09-03009 software”).
-
Ensure Windows is up-to-date. See How to get the latest software and driver updates from Windows.
-
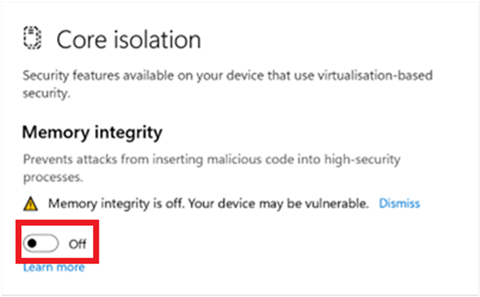
Disable Windows Core Isolation.
-
Go to “Windows Security” > “Device security” and click “Core isolation details”.
-
Toggle off the “Memory integrity” switch.
-
Restart your Razer Blade.
-
-
If your system is running Windows 11 Pro edition, do the following to disable the Hyper-V feature:
-
Go to Control Panel > Programs > Turn Windows features on or off.
-
Uncheck “Hyper-V” and "Windows Hypervisor Platform".

Notes:
-
Uncheck "Virtual Machine Platform" if your system is running Windows 11.
-
Windows 11 Home edition does not support the Hyper-V feature.
-
Make sure to disable Undervoltage Protection in BIOS.
See Device protection in Windows Security for more details.
-
- Go to BIOS > Advanced, and disable "Undervoltage Protection".
-
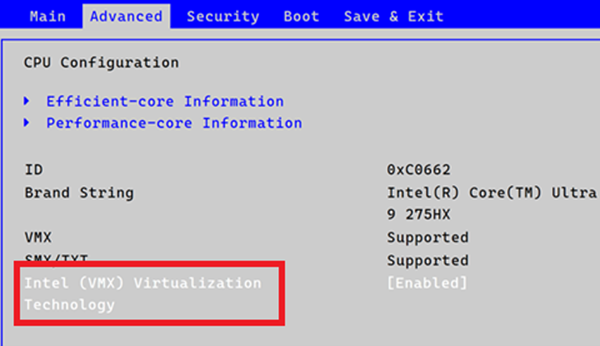
Go to BIOS > Advanced > CPU Configuration, and disable Intel (VMX) Virtualization Technology.
-
If you have Razer Blade 18" (2025) | RZ09-0529x, go to BIOS > Advanced > Power & Performance, and disable "Overclocking Lock".

Overclocking tips
-
There is a chance that the expected gain performance will not be attained during the first attempt. This is considered normal.
-
Make small adjustments.
-
Only change one parameter at a time.
-
Restart your system when any of the following issues occur:
-
Stuttering
-
Sudden shutdown
-
Blue screen error message
-
Freezing
Use the power button if the system becomes unresponsive. If the system is still able to load Razer Synapse, go to “SYSTEM” > “PERFORMANCE” and hit “RESET”.
-
Related links:
CPU overclocking in Razer Synapse
-
Open Razer Synapse 4.
-
Go to “PERFORMANCE” > “Custom”.
-
Toggle the switch to enable “CPU OVERCLOCKING”.

-
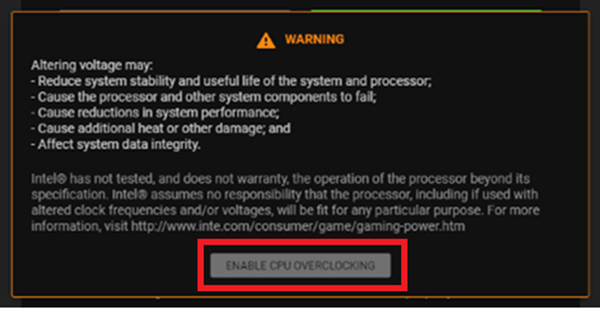
Click “ENABLE CPU OVERCLOCKING” when a WARNING message appears.
-
Adjust the parameters using the slider or input fields.
-
Core Voltage Offset – increases or decreases the processor’s main input voltage
Note: Disable Undervolt protection in BIOS to enable Core Voltage Offset.
-
Turbo Boost Short Power Max – limits the processor’s short Duration Maximum Power when Turbo Boost is enabled (PL2 Limit)
-
Turbo Boost Power Max – limits the processor’s extended duration Maximum Power when Turbo Boost is engaged (PL1 Limit)
-
Turbo Boost Power Time Window – the time window over which the average CPU Core Power must be below the Turbo Boost Power Max (PL1 time)
-
-
Double-check the settings, then click “APPLY”.
GPU overclocking in Razer Synapse
-
Open Razer Synapse 4.
-
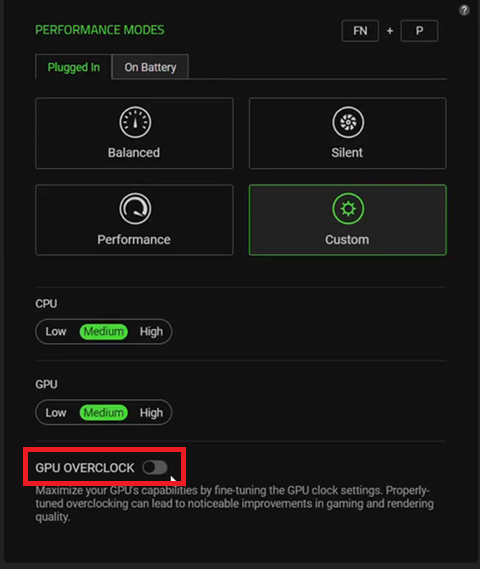
Go to “PERFORMANCE” > “Custom”.
-
Toggle the switch to enable “GPU OVERCLOCKING”.
-
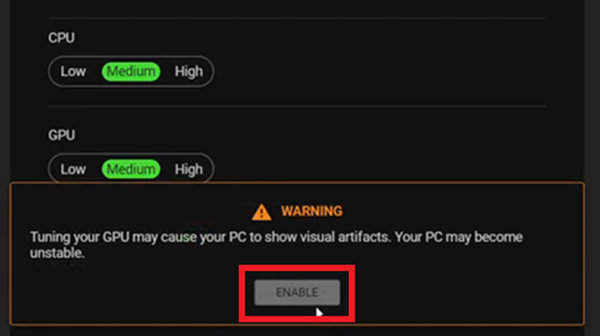
Click “ENABLE” when a WARNING message appears.
-
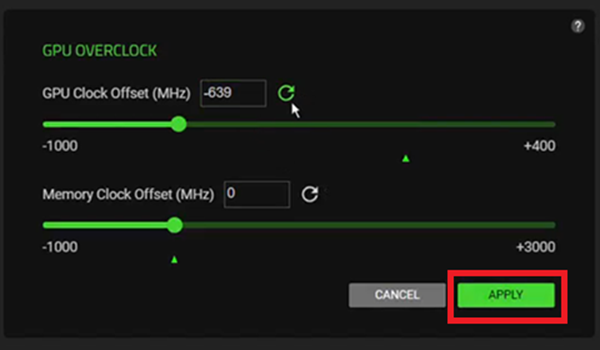
Adjust the parameters using the slider or input fields in the GPU OVERCLOCK section.
-
Double-check the settings, then click “APPLY”.