
Secure Boot is a Windows operating system security feature that blocks malicious programs from running. This feature runs once the Razer Blade starts.
Follow the detailed instructions below to confirm or enable Secure Boot, or to fix a Secure Boot Violation message at startup.
Select an option
Confirm Secure Boot is enabled
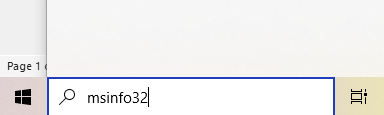
Enter “msinfo32” in the Windows search box.
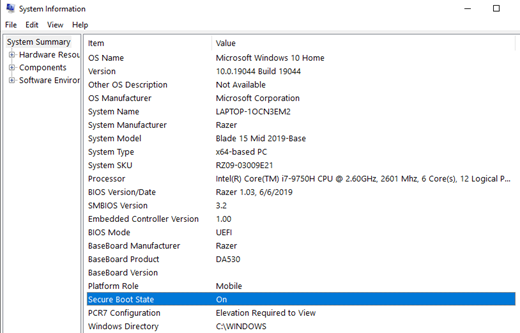
Look for Secure Boot State.
Enable Secure Boot
If Secure Boot is disabled:
Open the Recovery settings.
Windows 11: Go to “Settings” > “System” > “Recovery”.
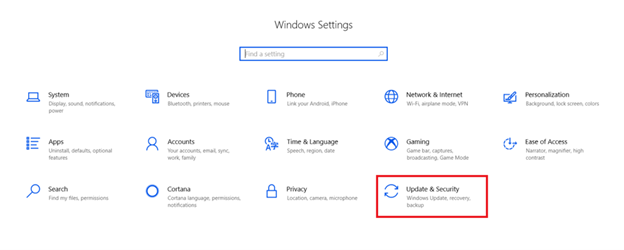
Windows 10: Go to “Settings” > “Update and Security”, then select “Recovery”.
Click “Restart now” next to Advanced startup.
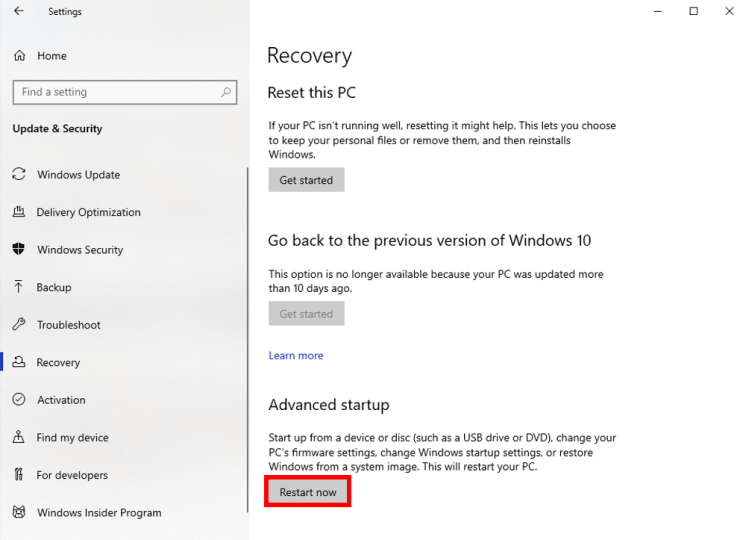
The Blade will restart and boot up to “Advanced Startup”.
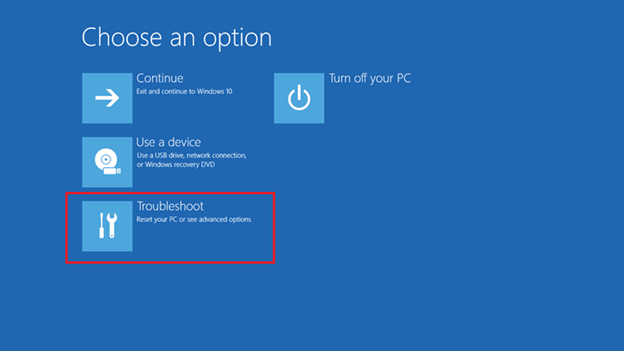
Select “Troubleshoot”.
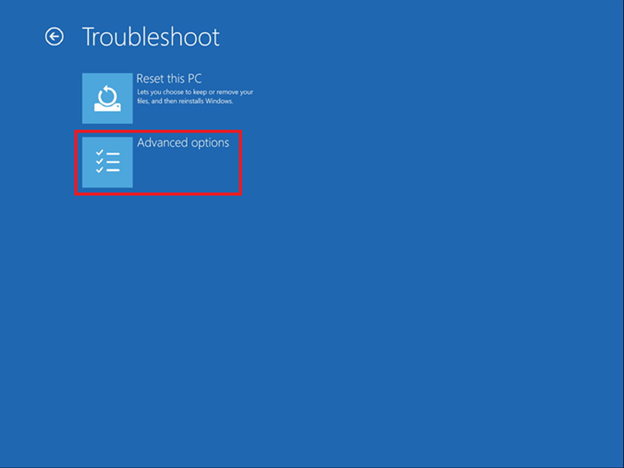
Click “Advanced options”.
Click “UEFI Firmware Settings”.

Click “Restart”.
Once the Blade restarts to BIOS settings, click “Security”.
Click “Enabled” next to Secure Boot.

Click “Save & Exit” > “Save Changes”.

Fix the Secure Boot Violation message
A Secure Boot Violation message appears during the startup due to a missing or invalid Secure Boot file.
- Prepare an empty USB thumb drive.
- Restart the laptop. When the Razer logo appears, repeatedly press F1 or Del to access the BIOS before the Secure Boot warning appears.
- Go to “Security” and disable Secure Boot.
- Click “Save & Exit” > “Save Changes.”
- Boot into Windows and plug in the USB drive.
- Run Command Prompt as Administrator.
- Copy the recovery application to the USB drive using the commands below. This example assumes the USB drive is D:.
Type each command separately, then press Enter:
md D:\EFI\BOOT
copy C:\windows\boot\efi\securebootrecovery.efi D:\efi\boot\bootx64.efi
- Restart the laptop and access the BIOS again.
- Go to “Security” and enable Secure Boot.
- Click “Save & Exit” > “Save Changes.”
- Restart the laptop. When the Razer logo appears, repeatedly press F12.
- Select the USB drive as the boot device.
- Follow the on-screen instructions.
Note: If the issue returns after unplugging the power adapter for more than 20 seconds, the CMOS battery is no longer working and needs to be replaced. See How to replace the CMOS battery on the Razer Blade for more details.

