
Upgrading the RAM can improve multitasking performance on your Razer system. Ensure you use a compatible memory module before you begin.
Follow the detailed instructions below to upgrade the RAM on your Razer system.
Select your system
Razer Blade laptop
Note: The RAM in the Razer Blade Pro 17" (2019) comes with 16GB dual-channel DDR4 2667MHz that is expandable up to 64GB. It also has a 512GB SSD (PCIe 3.0 x4 NVMe, 2280) that is upgradeable to up to 2TB and an open M.2 slot that supports both SATA and PCIe SSDs.
Important - Review prior to upgrading:
- Review our warranty policy.
- Check the specifications on your Razer Blade for compatibility and supported upgrades.
- Place the laptop on a smooth surface for proper grounding.
Note: Any damages or issues during installation or as a result of incompatible parts being used are not covered under the warranty. Razer will not be liable for any warranty coverage on any third-party part you may install, and we cannot guarantee compatibility or performance of any third-party parts.
You can view the video below for instructions or review a copy of the video transcript.
Needed tools and parts:
- T5 Screwdriver
- Compatible memory module
Step-by-step process
Power off the system then unplug all connections including the power adapter.
Flip the device over a flat surface.
Unscrew the T5 screws holding the bottom plate. Do not apply excessive force.
Note: Do not use an electric screwdriver.
Pry the bottom plate with your fingers until it clicks off.
Disconnect the battery. Use the flat end of a spudger to push the square tab on the battery connector and slide the connector out of its socket.
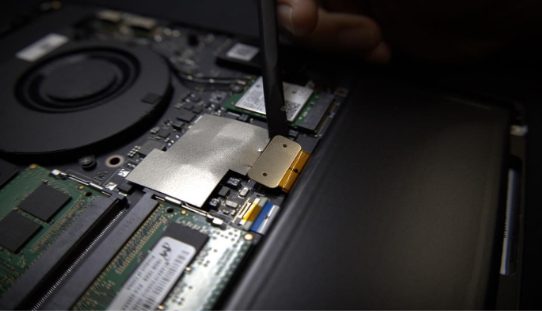
Locate the RAM slots under a ribbon tape.
Carefully tug at the two pieces of tape holding the ribbon tape down to reveal their socket and metal brackets.
Unlock the two metal brackets on the side of the RAM until it pops out.
Note: The RAM does not pop out for some Razer Blade models due to the thermal pad stuck underneath. In this case, you can use a spudger tool to gently push the RAM up while the metal brackets unlock.
Align the notch and insert the RAM module at an angle. Press it down until the retaining clips lock into place.
Reconnect the ribbon tape.
Put the bottom plate back on and the screws back in place.
Once done, boot up the Razer Blade.
Note: By changing or upgrading the RAM, your Razer Blade will show up a blank screen for a few minutes while it is doing retraining.
Go to "Settings" > "Update & Security", then download and install all available updates.
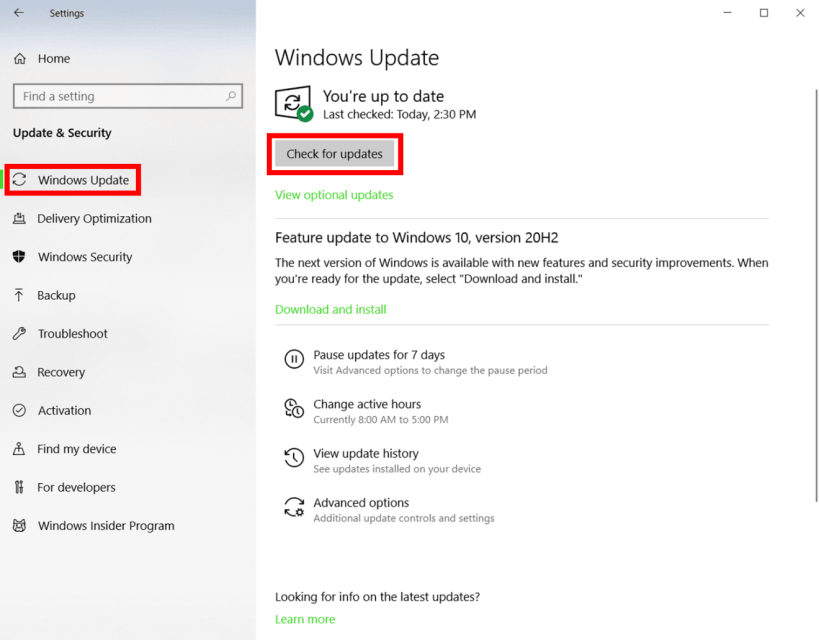
Go to Settings > System > About to check if the correct amount of RAM is showing.

Razer Tomahawk Gaming Desktop
Important - Review prior to upgrading:
- Review our warranty policy.
- Check the Tomahawk Gaming Desktop specifications for compatibility.
- Place the unit on a smooth surface for proper grounding.
Step-by-step process
Unplug all connections including the AC power cord from the unit.

Pull the lever and remove the compartment from the enclosure.
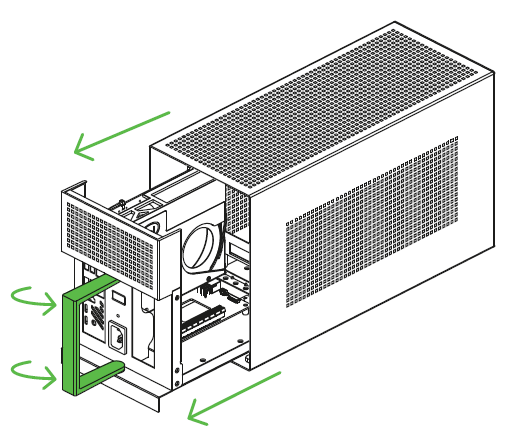
- Remove the graphics card to gain access to the RAM modules located inside the Compute Element.
Remove the power connectors.
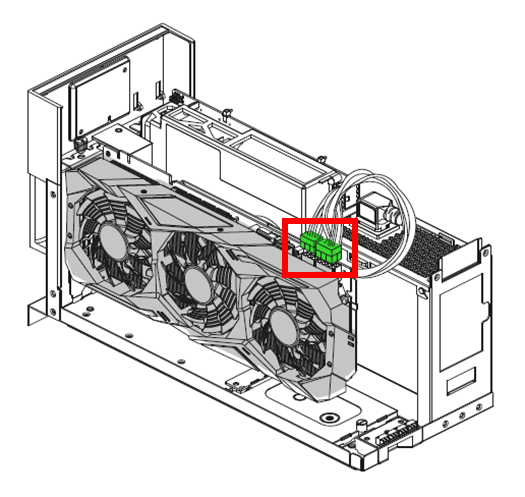
Remove the PCIe thumbscrew.
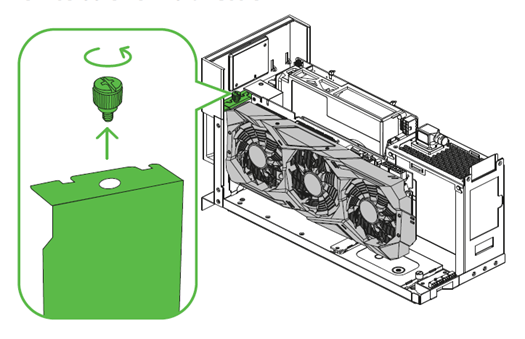
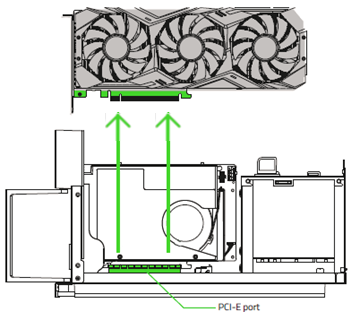
Pull out the graphics card from the PCIe slot.
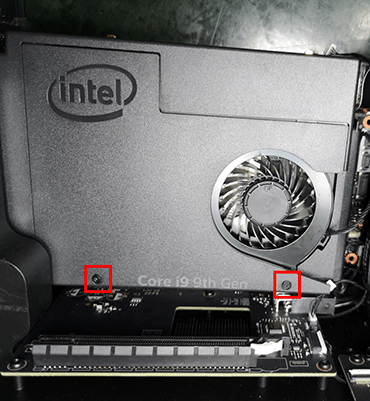
Unfasten the screws on the Compute Element’s front panel using a Phillips screwdriver to expose the RAM modules inside the Compute Element.
Note: Be careful with the amount of force you use. Do not use an electric screwdriver.
Unclick the two metal brackets on the side until the RAM pops up then pull it straight out.

Align the notches and insert the RAM at an angle, then push it down until it clicks.
Reinstall the Compute Element’s front panel.
Reattach the graphics card.
Slide the compartment back into the enclosure then push the lever to lock.
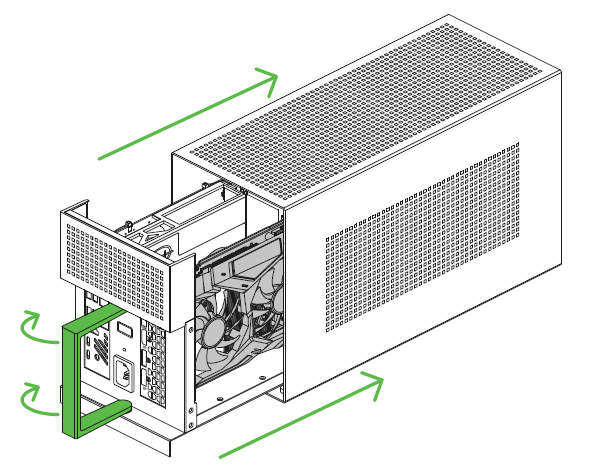
Once done, boot up the Gaming Desktop.
Go to "Settings" > "System" > "About" to check if the correct amount of RAM is showing.

Related articles:

