
Tips to help you get started
- How to set up the Razer Stream Controller
- How to use the Razer Stream Controller
- How to configure the Razer Stream Controller on Razer Synapse
- How to set up the Razer Stream Controller with Streamlabs
- How to set up the Razer Stream Controller with OBS Studio
- How to set up the Razer Stream Controller with Twitch
Whether you are a streamer, content creator, or both, fully realizing your creative vision has never been this easy. Introducing the Razer Stream Controller, an all-in-one solution that streamlines your production process and places all the control you will ever need right at your fingertips.

Device Layout

- Type C port
- 6 Tactile analog dials
- Dial information panels
- 12 Haptic Switchblade keys
- Home button
- Workspace 1 to 7 buttons

- Type C to Type A cable
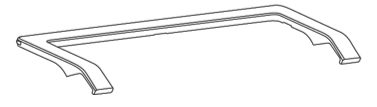
- Detachable stand
Full Technical Specifications
| Category | Specification |
|---|---|
| Product name | Razer Stream Controller |
| System Requirements |
|
| Interface |
|
| Connectivity | 2-meter USB-A to USB-C cable |
| Razer Synapse Support | Razer Synapse 3 |
|
Approx. Dimensions
(L x W x H)
|
151 mm x 101.5 mm x 30 mm
|
| Approx. Weight |
|
| Package Contents |
|
How To
How do I set up the Razer Stream Controller?
- Connect the Razer Stream Controller to your computer.
- Install Razer Synapse.
- Use the Razer Synapse app to access the Loupedeck software.
See the answer below for more details.
How do I set up the Razer Stream Controller with Streamlabs?
- Open the Loupedeck software.
- Start “Streamlabs”.
- Identify the press action or rotation adjustment you want to add.
- Drag the desired action to a button or dial.
- Click on an action to customize the icon.
- Click “Save”.
See the answer below for more details.
How do I set up the Razer Stream Controller with OBS Studio?
- Open the Loupedeck software.
- Start OBS Studio.
- Drag the action or action type on to a dial or button from the action panel to set up OBS Studios actions.
See the answer below for more details.
How do I set up the Razer Stream Controller with Twitch?
- Open the Loupedeck software.
- Select the “Hide and show plugins” tab from the action panel list.
- Confirm that the Twitch plugin is activated.
See the answer below for more details.
How do I configure the Razer Stream Controller on Razer Synapse?
- Launch Razer Synapse.
- Click “STREAMING” to launch or download the Loupedeck Software and change the controller’s application profile using Razer Synapse.
- Click “PROFILES” to manage all your profiles and link them to your games and applications.
See the answer below for more details.
How do I change the color of the round buttons of the Razer Stream Controller?
- Hover your cursor over a round button.
- Click on the color picker icon.
- Choose the color you wish to assign to the button.
- Click “X” at the top right corner of the palette to close it once done.
See the answer below for more details.
How do I use the detachable stand of Razer Stream Controller?
- Insert the controller into the hooks of the stand.
- Firmly press on each hook until the controller locks in place.
See the answer below for more details.
How do I use the Razer Stream Controller?
- Use the Home button to return or go back to your home workspace.
- Use the Workspace buttons 1 to 7 to customize and remain constant even as you switch between apps.
See the answer below for more details.
How do I ensure my Razer Stream Controller responds properly in Windows?
- Go to "Settings" > "Update & Security".
- Click “Windows Security” > “Firewall & network protection”.
- Click “Allow an app through the firewall”.
- Check if the Loupedeck software is allowed through the firewall. To make changes, click “Change settings”.
- Click “OK”.
See the answer below for more details.
How do I restore the display on my Razer Stream Controller?
- Make sure the Loupedeck software is launched.
- Use a different USB hub or USB port.
- Connect the device directly to the computer.
- Use another USB cable.
- If you are using a VPN, switch it off.
- Turn off the firewall or any antivirus software.
See the answer below for more details.
How do I display OBS scenes and sources when creating a new action?
Start your OBS Studio before trying to create new actions for Scenes or sources within the Loupedeck software.
How do I clean the Razer Stream Controller?
Use a soft cloth or cotton swab to clean the device.
Note: Do not use soap or harsh cleaning agents.
General Information
Where are Razer Stream Controller profiles stored on the computer?
The Razer Stream Controller profiles are stored at C:\Users\<YourUsername>\AppData\Local\Loupedeck\Applications.
Loupedeck Software
How To
How do I install the Loupedeck software?
- Download the Loupedeck software.
- Run the installer.
- Follow the onscreen instructions to install the software.
How do I allow the Loupedeck software through the Windows firewall?
- Find “Firewall & network protection” in the Start menu.
- Click “Allow an app through the firewall”.
- Click “Change settings”.
- In the Allowed apps window, locate the Loupedeck software and check the boxes.
- Click “OK”.
- Relaunch Loupedeck software after the changes have been made.
How do I create a custom profile for a specific software?
- Open Razer Synapse.
- Select your keyboard from the DASHBOARD.
- Open the “Profile” dropdown menu.
- Click the three dots icon beside APPLICATION PROFILES.
- Click the three dots (...) next to "Add Profile" and choose "add empty profile" or "add default profile".
Note: If the application is missing from the profile menu, choose “Add Application”, select application from the dropdown menu, and pick a name for the profile that will appear after pressing “ok”. - Click "Ok".
- Select an application from the drop-down menu or search from a folder.
- Create a name for your new profile.
- Add a description, if desired.
- Click ”Ok.”
How do I import and export profiles on the Loupedeck software?
Import:
- Open the Loupedeck software.
- Click “Profile” > “Import profile”.
- Select the downloaded custom profile.
- Click the folder icon.
- Select the application and enter the profile name.
- Click “Ok”.
Export:
- Open the Loupedeck software.
- Click “Profile”.
- Click the three dots next to the application of the profile you will export.
- Click the three dots next to the profile.
- Click “Export profile”.
How do I use the main profile in the Loupedeck software?
A "Main profile” is the default operating system profile in the Loupedeck software. This remains in use until you activate another profile or select a supported application.
Desktop actions
- Open the Loupedeck software.
- Open the Profile menu and click “Main profile”.
- Click the “OS” icon on the action panel.
- Select actions and drag and drop them to the device.
Custom actions
- Open the Loupedeck software.
- Open the Profile menu and click “Main profile”.
- Click the “Custom” icon on the action panel.
- Select actions from the stored custom actions folder or create actions and drag and drop them to the device.
Universal Plugin actions
- Open the Loupedeck software.
- Open the Profile menu and click “Main profile”.
- Click “Hide and show plugins” on the action panel.
- Select the plugin you will add.
- Click on the newly-added plugin.
- Select actions and drag and drop them to the device.
How do I delete, rename, or export a profile on the Loupedeck software?
- Go to the “Application Profiles” dropdown.
- Hover over the application and click the three dots next to it. The list of the available profiles for that specific application will be shown here.
- Click the three dots that appear on the right side of the profile.
- Rename, export, or delete a profile.
How do I create a Custom Action or Adjustment?
In the action tab
Create custom actions through:
- the icon on the right side of the tab
- the icon on a custom action group
If you did not create a custom action into a group, it will be added after the groups as a separate action. Then, you can drag or copy into a group after creating it.
After selecting the type of custom action you want to create, the corresponding action editor will pop up on the lower left corner of the screen to let you customize the action.
Directly from the device
Click the + action on the button and select the type of custom action you want to create.
How do I switch on or off action Overlays on screen?
Note: Overlays are enabled in the Loupedeck software by default.
- Open the Loupedeck software.
- Click “Device Settings” from the dropdown menu.
- Select “General”.
- Toggle the “Overlay Enabled” switch to Off (white) or On (green).
How do I change the language of the Loupedeck software?
- Click on the menu icon on the upper-left corner of the Loupedeck software.
- Click on “Language”.
- Click on your preferred language.
How do I reinstall the Loupedeck software?
- On your Windows PC, click the arrow on the Windows toolbar > right-click on the Loupedeck icon > “Stop Loupedeck”.
- Press the Windows button.
- Type “Add or remove programs”.
- Find and click the Loupedeck software.
- Click “Uninstall”.
- Download the latest Loupedeck Software version.
Note: Make sure all editing apps and other programs are closed. - Run the installer.
- Reboot your computer once the installation is complete.
How do I completely uninstall the Loupedeck software?
- Press the Windows button.
- Type “Add or remove programs”.
- Find and click the Loupedeck software.
- Click “Uninstall”.
-
Once uninstalled, proceed with the following steps:
- Open File Explorer and go to “C:\Users\<YourUsername>\AppData\Local\” and locate the Loupedeck folder then delete it.
- Open File Explorer and go to “C:\Users\<YourUsername>\AppData\Roaming\” and locate the Loupedeck folder then delete it.
Note: If the AppData folder is hidden, click “View” and check “Hidden items”.
How do I find the Loupedeck firmware version?
- Launch the Loupedeck software.
- Click on the Loupedeck account icon at the upper-right corner of the app.
- Select "Device settings" > “DEVICE CONFIGURATION”.
How do I find the Loupedeck software version?
- Right-click on the Loupedeck icon in the System tray > “About”.
- Search for “Add or Remove programs” in Start search window > locate “Loupedeck”. The Loupedeck app is listed with the software version.
How do I keep Loupedeck pages in sync when OBS Studio is not in focus?
Disable the "Dynamic Mode" in your profile settings, or use the Dynamic Mode action in the "Loupedeck Device Actions" tab.
How do I connect the OBS plugin to the Loupedeck software?
Reinstall the Loupedeck software if it was installed before OBS Studio, to ensure proper connection with OBS Studio.
How do I assign and activate actions in the Loupedeck software?
In some cases, the action on the action panel goes missing. The Loupedeck software indicates the action as N/A (Not Available) even if the action was already mapped to the profile.
Here are some reasons why the action is showing as N/A:
- The target application no longer has that functionality
- The functionality has been significantly changed/upgraded
- The functionality has been deleted for some reason.
Note: The N/A action can be removed normally or replaced by dragging another action over it.
How do I manage the Loupedeck Recovery Tool window?
- Enter “Services” in the Windows Search field.
- Locate “Windows Audio Endpoint Builder”.
- Right-click on the “Windows Audio Endpoint Builder” > “Restart”.
Troubleshooting
How do I restart the Loupedeck software to resolve Razer Stream Controller issues?
- Right-click on the Loupedeck icon from the System tray.
- Click “Restart Loupedeck”.
Error 0x80070643 appears after Loupedeck software installation
- Update the Windows 10 Operating system to the latest version:
- Click the Start menu > Settings > Update & Security > Check for updates.
- Restart your computer.
- Reinstall the .NET framework
- Install the latest .NET framework version.
- Choose the first Download .NET Framework Runtime option.
- Download the latest Loupedeck software again.
- Run the Loupedeck installer.
- Install the Loupedeck Software with a newly created Windows Administrator user
- Click Start menu > Settings > Accounts > Other Users > Add someone else to this PC.
- Change the account type of this user to "Administrator".
- Log out of your current account by clicking "Start" > "Sign out".
- Sign in with the newly created account.
- Install the Loupedeck Software (run as administrator).
- Log back to your original account and run the Loupedeck Software.
How do I collect Loupedeck software logs for a bug report?
- Right-click on the Loupedeck icon in the System tray and choose “Troubleshooter“.
- Click “Start logs collection” to restart Loupedeck.
- Perform the steps again where the reported issue was encountered and take note of the details of these steps.
- Click “Stop logs collection” in the Troubleshooter window once the issue comes up. A zip file containing these logs will be created and saved on the Desktop.
- Send the zip file to us together with your notes.
The Loupedeck Recovery Tool window frequently pops up
- Enter “Services” in the Windows Search field.
- Locate “Windows Audio Endpoint Builder”.
- Right-click on the “Windows Audio Endpoint Builder” > “Restart”.
The action assigned shows as N/A
In some cases, the action on the action panel goes missing. The Loupedeck software indicates the action as N/A (Not Available) even if the action was already mapped to the profile.
Here are some reasons why the action is showing as N/A:
- The target application no longer has that functionality
- The functionality has been significantly changed/upgraded
- The functionality has been deleted for some reason.
Note: The N/A action can be removed normally or replaced by dragging another action over it.
OBS Plugin does not connect to Loupedeck software
If the Loupedeck software was installed before any installation of OBS Studio was present on your computer, re-install the Loupedeck software to ensure that it properly connects to OBS Studio.
Loupedeck switches pages when OBS Studio is not in focus during streams
Disable the "Dynamic Mode" in your profile settings, or use the Dynamic Mode action in the "Loupedeck Device Actions" tab to disable the Dynamic Mode.
OBS Scenes and Sources are not showing when trying to create a new action
Start your OBS Studio before trying to create new actions for Scenes or sources within the Loupedeck Software.
General Information
What are the main parts of the Loupedeck system?
- Plugin - a small program located between the Razer Stream Controller and the application in use. Each application has its own dedicated plugin, which does two things:
- Work as translator between the "Loupedeck language" and "Application's language".
- Deliver the translated commands from Razer Stream Controller to the application or vice versa.
- Profile - Each target application (using the plugin) is controlled through a profile. The profile contains all the mapping information of the whole device. This saves which action is mapped to which button.
- Workspace - A workspace is a combination of the dials and touch buttons. The workspace does not include the round buttons. Because of this, the round buttons can be utilized to switch between workspaces.
- Action or Adjustment - An action, a press function, is mapped to a button. Meanwhile, an adjustment, a rotational function, is mapped to a dial. Each action or adjustment causes a reaction on the target application. A "Play" action starts playback, and "Main Volume" would adjust the output volume.
What are plugins?
Plugins are software add-ons that allow the user to have precise control over the software. It is located between the target application and Razer Stream Controller. The target application provides a set of features to the plugin to which the plugin connects to. These features, actions, can be mapped on the Razer Stream Controller.
What is a Control Center?
Control Center is a widget which takes control of your Razer Stream Controller. It can be identified, when mapped on a touch button, from orange color strips. Control Center can be assigned to the device like any other action, but the content of a control center cannot be altered. The actions and adjustments within a control center is pre-determined by the plugin of the target application.
| Documentation | Language |
|---|---|
| User Guide (English) | English |
| User Guide (Spanish) | Español |
| User Guide (French) | Français |
| User Guide (German) | Deutsche |
| User Guide (Portuguese-Brazilian) | Português |
| User Guide (Russian) | русский |
| User Guide (Traditional Chinese) | 繁體中文 |
| User Guide (Simplified Chinese) | 简体中文 |
| User Guide (Korean) | 한국어 |
| User Guide (Japanese) | 日本語 |
Please see our warranty policy for a complete review of our warranty policy.
You are eligible for Limited Warranty support for the following periods of time commencing upon the date of retail purchase of your Product (Warranty Period).
| Product | Warranty Period |
|---|---|
| 2021 and Older Model Laptops | 1 yeara |
| 2022 and Newer Model Laptops | 1 yeara 2-year limited battery warrantya |
| Razer Viper Mini Signature Edition | 3 year |
| Razer Phone and Phone Accessories | 1 year |
| Razer Edge Gaming Handhelds | 1 year |
| Razer Mice | 2 years |
| Razer Keyboards and Keypads | 2 yearsb |
| Razer Huntsman Signature Edition | 5 years |
| Razer Headsets, Earphones and Earbuds | 2 yearsb |
| Razer Wireless Mouse and Mat Bundles | 2 yearsb |
| Razer Mouse Mats | 1 yearc |
| Razer Speaker Systems and Broadcaster Devices | 1 year |
| Razer Controllers and Chargers | 1 year |
| Razer Routers (except Singtel) | 1 year |
| Razer Routers (Singtel) | 2 years |
| Razer Monitors | 1 year |
| Smart Watches and Eyewear | 2 years |
| Razer Case Fans | 2 years |
| Razer Liquid Cooling | 2 years |
| Razer Power Supplies | 5 years |
| Razer Fan and RGB Controllers | 2 years |
| Razer Cases | 1 year |
| Razer System Accessories | 1 year |
| Razer Docks | 1 year |
| Wearable Air Purifiers | 1 year |
| Razer Gaming Accessories | 1 yearc |
| Razer Rechargeable Batteries for Wireless Devices | 1 yeard |
| Razer Gaming Chairs | 3 yearse |
| Chair Frame, mechanisms and armrests | Up to 5 years |
| Mesh backing and seat pan | Up to 1 year |
All new Products will have the Warranty Periods listed above, subject to applicable local law. Certain "end of life", sell out or discontinued Products may have a shorter Warranty Period; this will be clearly marked at the time of purchase and the given Warranty Period will be stated at that time. Refurbished Products purchased from Razer.com will have the lesser of a 1 year warranty period or the warranty period as stated above. Refurbished products not purchased from Razer.com will have a 90 day warranty period. If you are uncertain whether your Product is eligible for Limited Warranty support, please contact our support team for clarification.
Please note that third-party products may be covered by the product manufacturer's warranty and these warranty terms are exclusively provided by the product manufacturer. Razer does not offer a warranty for third-party products. If you need product or warranty support with your third-party product, please contact the product manufacturer. Please consult the product documentation provided by the product manufacturer for details.
If you are uncertain whether your Product is eligible for Limited Warranty support, please contact our support team for clarification.
Warranty Footnotes
- [a] If you are a customer outside of the U.S. and have validly purchased a Razer Extended Warranty for your product, the Warranty Period shall be extended for another one (1) year period, to be a total of two (2) years commencing upon the date of retail purchase of your Razer Product. The Razer Extended Warranty does not apply to batteries. Aside from the change to Warranty Period, the Razer Extended Warranty does not alter any other terms and conditions of the Limited Warranty.
- [b] Products purchased prior to October 1st, 2018 maintain the original 1 year warranty (keyboards with mechanical switches maintain original 2 year warranty).
- [c] Warranty period for Razer Firefly HyperFlux is 2 years.
- [d] Products purchased prior to October 1st, 2018 maintain the original 6 month warranty.
- [e] Limited Warranty: The Razer Iskur is free from defects in workmanship, materials and construction for three years from the date of purchase. In the event that a defect is found, the manufacturer will either repair or replace the defective item, at its discretion. Exclusions and Limitations: This Limited Warranty does not cover cosmetic damage, minor cosmetic abnormalities and normal wear and tear, including without limitation scratches, dents, discoloration and tears in the head pillow, seat cushion, PU leather, Armrest and stitches of the upholstery.

